When, in yesterday’s Making of Tethering MacBook Pro to iPhone AirDrop Tutorial we left off with …
… is that the “Making of the Making of …”?!
… Gmail_Slideshow_copy.pdf … it was a “lead in” to another “discovery” putting together “presentations”, the “discovery category” of which we find ourselves more than somewhat “stumbling upon”. There’s nothing wrong with “stumbling upon” anything in our books … but how could you think it would apply to our pamphlettes?! … and you can expect that “stumbling upon” feeling more if you are mixing the software and hardware of the “big players” such as, for us …
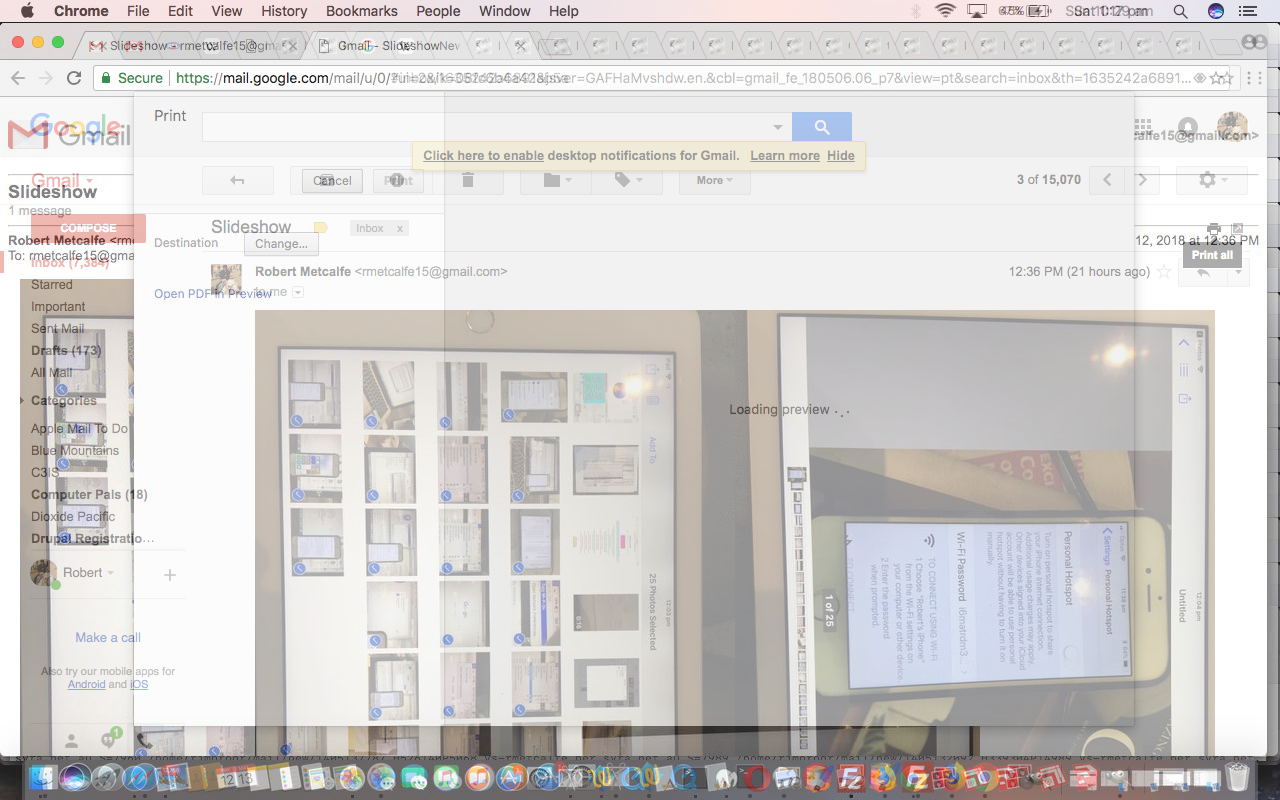
… and that “discovery”, for us, was that Gmail email attachments can be assembled then and there , into PDF slideshows or books, at least on our Mac OS X MacBook Pro via …
- the Apple MacBook Pro’s …
- “webmail” Google Gmail‘s “Print all” (little printer spooling icon) functionality
… because, as we hope you’ve gotten the gist of, that PDF is synonymous with “hardcopy” and printing, and that you will often find the (perhaps) hidden gems of PDF (exporting) functionality resides in the “Print” based menu items of desktop and web applications, today’s being Gmail and the suboptions of its “Print all” top right menu item …
- Print using system dialogue … and our “suboption of the hour” …
- Open PDF in Preview … which is a Mac OS X application … on Windows you may get Adobe Reader here,
wemethinks
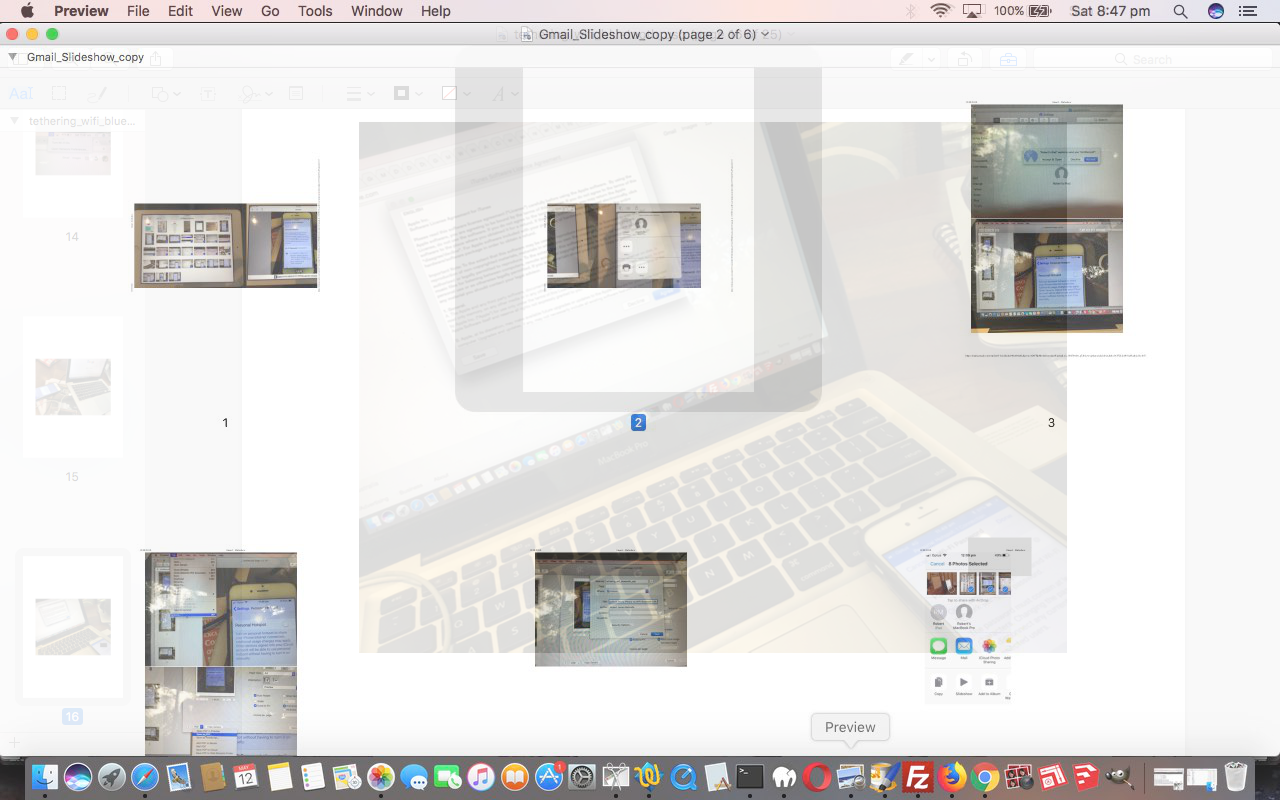
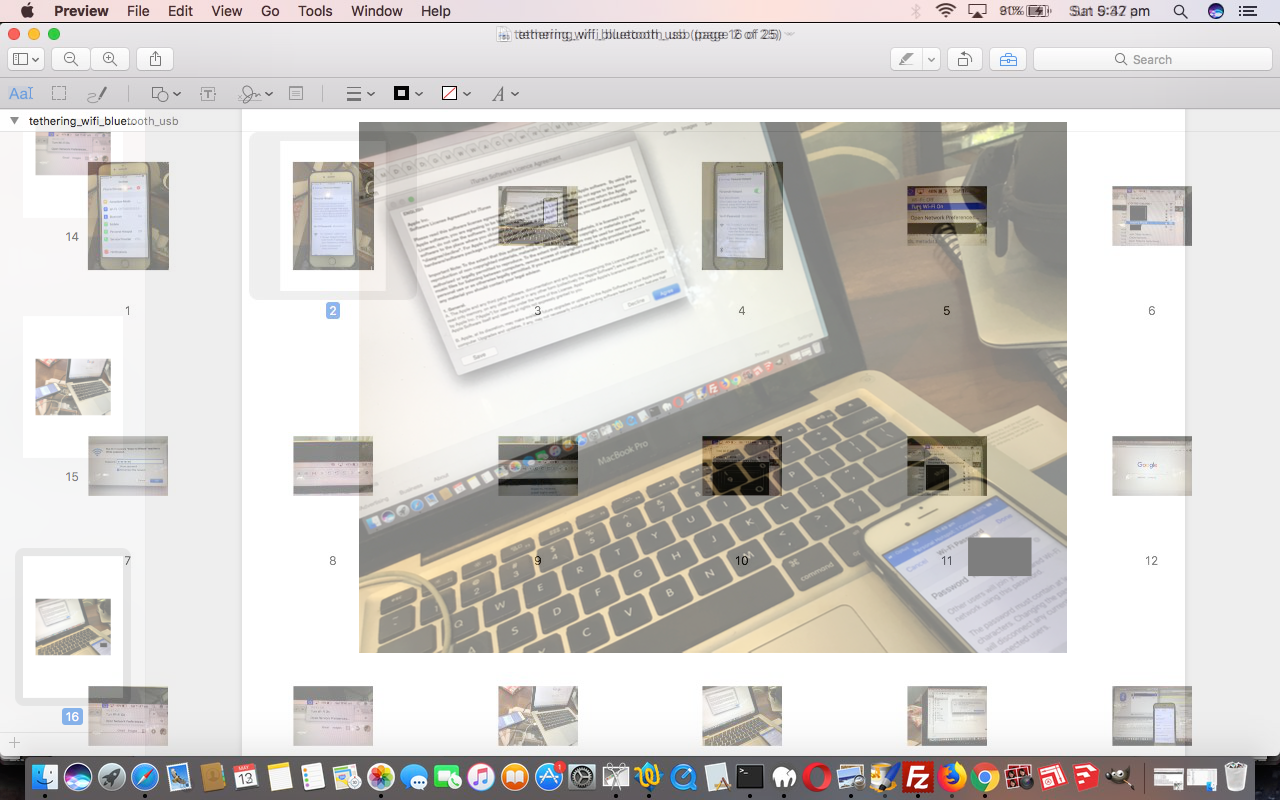
… that latter option very familiar to us around here because the Mac OS X Preview desktop application on our MacBook Pro is excellent at assembling photograph (sets) into image PDF slideshows via its own File -> Print… -> PDF icon’s -> Save As PDF… sub-sub-sub-sub-marineoption.
Why even talk about this? It is of most interest to people perpetually putting together “presentations”, and if you like PDF slideshows, then this functionality could be a massive time saver for you, especially if you have been put off PDF presentations because of the lack of image editing capabilities of applications like Mac OS X’s Preview if we were to remind you that the original assemblage of images into a PDF with the methodology above can be amended by all/some of …
- reorder slides (via a drag and drop technique, in (the default) View -> Thumbnails mode of operation)
- (Tools menu) rotate slide functionalities (and choose to unclick (the default) “Auto Rotate” checkbox in the Print dialogue you are later presented with)
- (a new discovery for us is) Tools -> Annotate -> Rectangle (with very thick line weights) can be a technique to mask out sensitive information (that we’d have used Gimp’s Gaussian Blur for, as a technique, in other circumstances)
… before it (the final PDF slideshow or book) goes off to its destination.
The tutorial picture shows us utilising Gmail’s “Print all” functionality “linkage” to (Mac OS X) Preview’s creation of PDF slideshow (or book) presentation methodology“time saver extraordinaire”.
This presentation technique has been added to our “presentation list” we’re collating with PDF on Mac OS X via Images and Finder and Preview Tutorial.
Previous relevant Making of Tethering MacBook Pro to iPhone AirDrop Tutorial is shown below.
The making of yesterday’s Tethering MacBook Pro to iPhone Primer Tutorial‘s PDF slideshow presentation was of great significance to us, because, although we’d had some experience with Mac OS X and iOS’s AirDrop means of sharing data before, when we presented AirDrop Primer Tutorial almost a year ago now, we remember the AirDrop scenario was not involving a large amount of data as yesterday’s PDF presentation of more than 20 “dense” photos involved, as well as the fact being that when AirDrop “sings” it really is so much faster than other data transfer methods, it feels to us after today’s work.
So what was the “lead in” to …
- needing to transfer … and …
- choosing to use (Apple’s) AirDrop as a means to data transfer
? Well, there was a third player to yesterday’s proceedings …
Mister Ed … sorry …MacBook Pro (named Robert’s MacBook Pro) … “tethered” to …Wilbur Post’s stable … sorry …iPhone (named Robert’s iPhone) … and photographed by …- iPad … Camera app in Photo mode of use
… and so having finished PDF slideshow presentation data capture, we had the task of transferring 25 “dense” iPad photos over to the MacBook Pro (where we use Finder -> Select Slides -> Preview -> Some Slideshow (Tools menu) Rotations and Reordering of Slides (via drag and drop) and (for first time for us today we use Tools -> Annotate -> Rectangle (with thick lines) to mask out some information) -> (File menu) Print -> (PDF dropdown) Save As PDF…) by some means or other … and as many readers will know the Email option is good for a few photos but not 25 … so … eyes shut (we have a chequered history with) … AirDrop becomes the best option. Lo and behold it was brilliant, saving us heaps of bother and time.
What we’d say about using AirDrop is this. Once you get to it, on the two Apple computers and/or devices involved you’ll be prompted in new windows to allow access, so our advice is to stay alert to this, but more or less “follow your nose”. What is very interesting about AirDrop is its integration into Mac OS X and/or iOS “ways”. It can either “turn up” or “be actively accessed by you, the user” via …
- turn up in Mac OS X’s Finder application
- in iOS, swiping from the bottom of the device, up
- in Photos app, in either Mac OS X or iOS, be one of the Sharing (rectangle to top arrow up icon) options
… as you can see a bit of at the start of today’s (new) PDF slideshow presentation, before it goes onto some Mac OS X Preview creation of this very PDF slideshow presentation … is that the “Making of the Making of …”?!
You can also see this play out at WordPress 4.1.1’s Making of Tethering MacBook Pro to iPhone AirDrop Tutorial.
Previous relevant Tethering MacBook Pro to iPhone Primer Tutorial is shown below.
Today we talk about a networking topic, regarding the idea if you are out and about, out of reach of WiFi connections, with your laptop, notebook or MacBook Pro, but you have available to you a device such as an Android or iPhone or iPad or tablet with inbuilt SIM card network connector, that networks via a mobile network (eg. here in Australia a 4G (soon to go to 5G) network) you (and we) can, perhaps …
- “tether” your laptop, notebook or MacBook Pro (Robert’s MacBook Pro) … to that …
- Android or iPhone (Robert’s iPhone) or iPad or tablet with inbuilt SIM card network connector accessing its mobile network (such as, here in Australia, 4G (soon to become 5G))
No, our MacBook Pro is not Mister Ed, but we do form a “stable” connection … chortle, chortle.
The clue to all this is, for us, in the iPhone’s …
Settings -> Personal Hotspot -> switch on
… and there you will see three modes of “hotspotting” …
- WiFi
- Bluetooth … enable on both and “Pair” on both
- USB … we use in Xcode running and testing mobile applications on iPhone (or iPad)
… the first of which is great with that scenario we talked about at the top of the article.
- be on iPhone and touch Settings icon
- touch Personal Hotspot
- touch to be On
- over at MacBook Pro and click Settings icon
- click WiFi
- pick Robert’s iPhone (or equivalent) in the list and it will have that “tethering” icon (two linked ellipses)
- voila! … you can surf the net, read your emails and do any of those other “online” activities … but be aware that this arrangement usually costs more in service charges
You can take a look at our PDF slideshow presentation of some of these concepts.
If this was interesting you may be interested in this too.
If this was interesting you may be interested in this too.
If this was interesting you may be interested in this too.


