

Gmail Webmail Email Attachment on iPad Signature Reply Tutorial
We mused on digital signing with the recent Making of Stylus Email Signatures with Touch Devices Tutorial. Today’s blog posting also tackles the thorny issue of creating “real” digital signatures, in our case on an iPad with Adobe Acrobat installed, but we need to say here that many business players out there now have software permitting them to, with the client’s okay, digitally sign on their behalf, documents of interest.
Okay, that aside, let’s, today …
- start on the iPad with a PDF Gmail Webmail email attachment that contains …
Signed: Date:
… type of arrangement the email recipient is being asked to sign and return
- open the email
- hold finger down on PDF attachment and choose one of “Download File” or “Save to Files“
- open “Files” iOS application on the iPad
- tap on that saved document and up the top choose to “Open in Acrobat” link
- immediately click on the pencil menu icon button near bottom right to choose “Fill & Sign” option
- up the top tap the rightmost (nib) Pen icon
- perhaps you’ll have a suitable signature from last time and if not choose to delete it and get to “Create Signature” option, in which case step below is relevant
- use stylus, ideally, to sign your signature and press (Clear to start again else) Done link, to cause Acrobat to await your positioning of the signature
- tap where you want signature and if not positioned correctly drag to proper spot and/or use the side arrowing to resize into position
- tap to right of “Date:” hardcoding to open up a text placement and you can use the keyboard and/or helpers to place the date
- tap top left “Done” link
- while still with the “Files” application tap the top right “Select” link
- tap the document you just used Adobe Acrobat to edit/sign
- tap the bottom left “Share” link
- in the Share menu that comes up, choose the “Mail” option and fill out the email address and subject of applicability
- tap the Send link to send that email as a signed returning email attachment piece of communication
Voila!
Previous relevant Making of Stylus Email Signatures with Touch Devices Tutorial is shown below.

Making of Stylus Email Signatures with Touch Devices Tutorial
Somewhere along the line with the mixed device goings on in yesterday’s Stylus Email Signatures with Touch Devices Tutorial‘s content consisting of …
- iPad screenshots emailed in two parts (ie. two separate emails)
- iPhone photographing iPad photos separately emailed
… we ended with huge image file sizes, albeit collected into the one directory and made alphabetically relevant to “our story” of the blog topic. How so? Well, macOS Preview app 99% of the time succeeds with you …
- highlighting all the relevant images in Finder app …
- two finger gesture Open With -> Preview …
- Export As PDF…
… and so does the “PDF presentation” trick for us … but not yesterday. It being really more than “99%” we wasted a good deal of time not believing it, especially as Preview appeared not to admit defeat in any way (ie. no error messages), just exporting the first image out of the fifteen we wanted in our PDF export requirement.
The Books app no better, on macOS, this is. So, what to do? Think laterally, think minimally, perhaps. How about (the usually pared down) “command line woooooorrrrrllllllldddd”? Yes, we’ve done it before, and it was easy … good ol’ ImageMagick and its brilliant command line …
convert [optionalSwitches] [imageSpec] [outputPDFname]
… for us in this set aside folder (on macOS Terminal app command line) …
convert -verbose *.* stylus_signature_email.pdf
… creating a 38mB stylus_signature_email.pdf … perhaps a hernia induced Preview reaction … and we’re all pretty shy about hernias … aren’t we?
Lesson two here is, fairly patently, try to reduce your image sizes ahead of exporting to PDF. JPEG images are good in this respect.
Previous relevant Stylus Email Signatures with Touch Devices Tutorial is shown below.

Stylus Email Signatures with Touch Devices Tutorial
Yesterday’s Stylus with Touch Devices Primer Tutorial got us thinking about an annoyance we have with modern life whereby it is still asked that you …
- receive forms online …
- and then are asked to sign these and email them back … the bugbear being …
- that form owner forbids electronic signing and so requires you to rescan the documents with your signature made by a pen
Now I’m not saying that there may not be a legitimate reason for this, amongst them being that we, the world, are definitely not yet anywhere near “au fait” with the various improving electronic signature functionalities out there. But it seems to me a bit juvenile to have a “blanket rule no” to “signatures on mobile devices via stylus annotated form filling”, as there are surely ways to know this is legitimate “real person” usage, or not.
But, did you know, on an iPad or iPhone, this procedure can be as simple as …
- receive forms online on an iPad or iPhone and download form images that need filling out and/or signing to Photos app …
- in Photos app Select these form photos to reply to this same emailer and annotate via Share -> Mail option’s top right Annotating icon
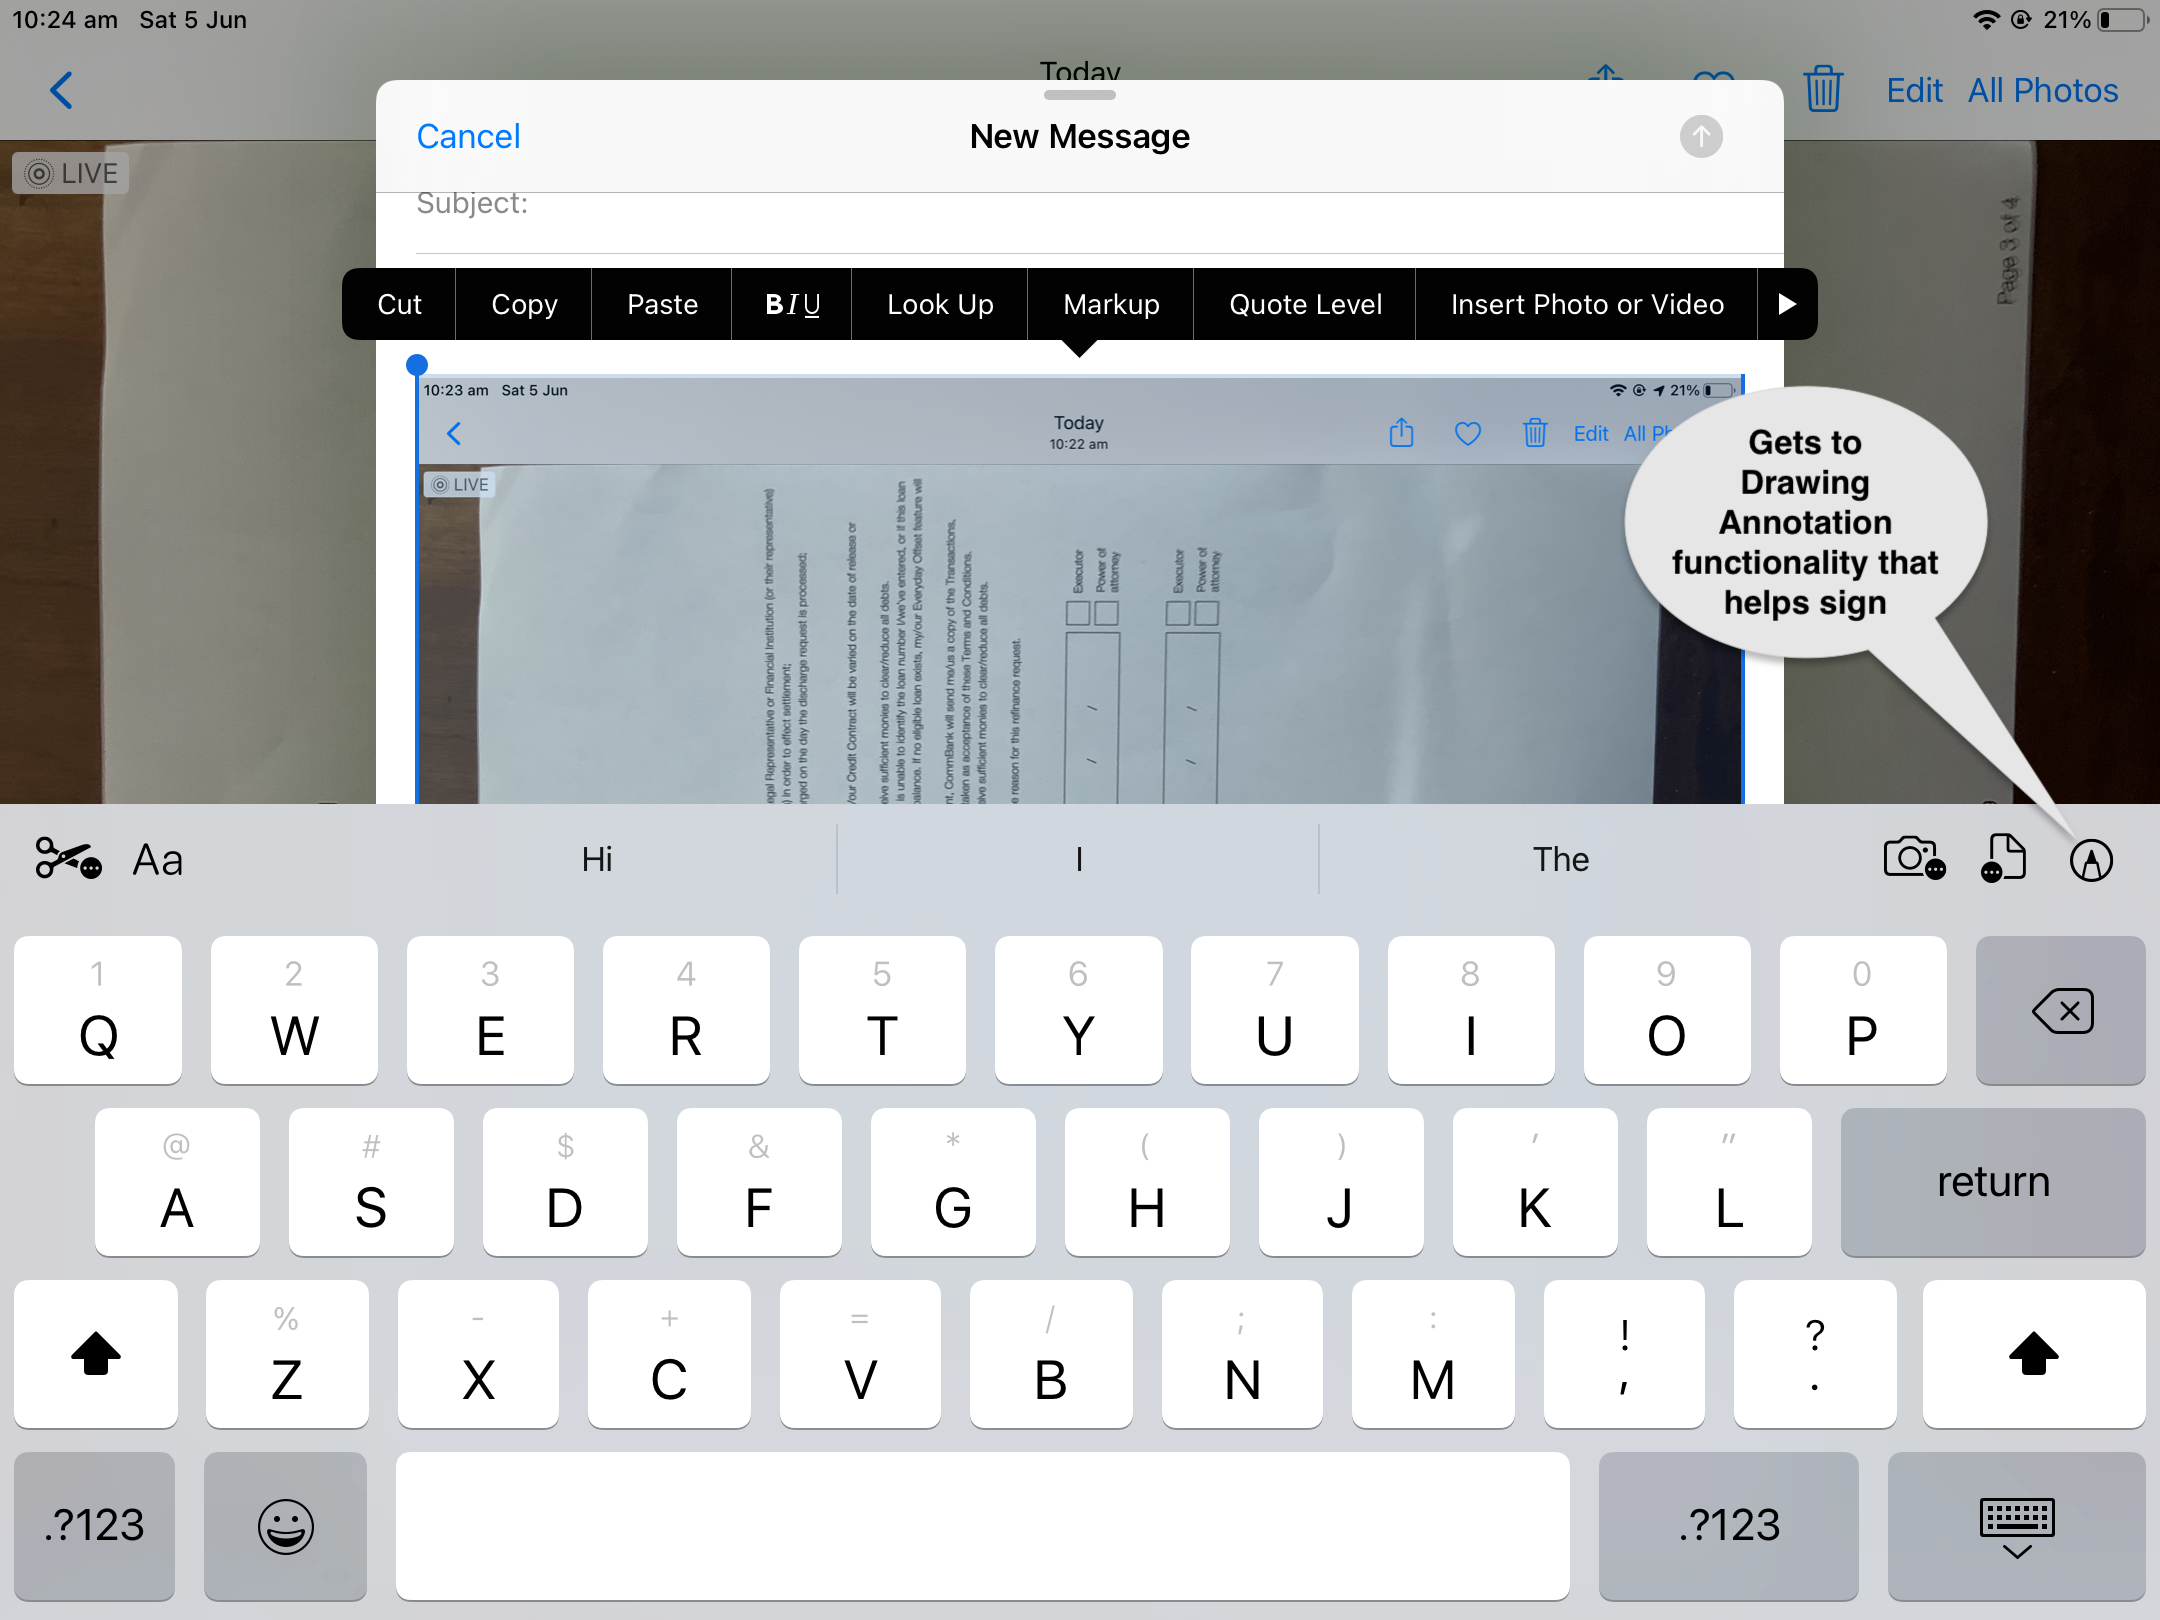
… - fill in and sign away with drawing options and your (perhaps recently discovered) stylus … and as you tap Done …
- email attachment includes your annotations as it wings its way back to the emailee as you tap the Send button/icon
Previous relevant Stylus with Touch Devices Primer Tutorial is shown below.

Stylus with Touch Devices Primer Tutorial
Are you a tablet or mobile phone user whose index finger of your favoured hand is suffering mightily?! Then this tutorial may be of interest.
We’ve avoided the idea for a long while of introducing a “stylus” into the mix of use with our iPad and/or iPhone (ie. works with touch devices). The brand we chose was Targus and their “slim stylus” for $12 (Australian dollars).
As you can see from today’s animated GIF presentation it is not only the tapping of icons that the stylus can help with, but “scribble” type drawing and signature functionality it can excel at.
We’ve found that using the stylus we move around the tablet or mobile phone quicker and more accurately than with our finger tap and touch work.
If this was interesting you may be interested in this too.
If this was interesting you may be interested in this too.
If this was interesting you may be interested in this too.
If this was interesting you may be interested in this too.

