Genius Scan App PDF Email Slide Management Tutorial
Further to Genius Scan App PDF Email Tutorial a revisit recently was of great interest, the resultant PDF being sizeable. Are there Genius Scan app functionalities for “stuff ups”? The answer is yes, and they are very useful because …
we cannot remember from the last time that the scanning could be so “trigger happy” … which can be good or a tad annoying … in that …
the “trigger happy” feel makes the scanning be quicker … with the occasional annoyance that …
double takes (as with the iOS Camera app anyway) are possible … but …
slide management functionality in the Genius Scan app … is both easy to use and contextual (helping enormously with scan double takes)
… so much so that, in the Apple world, we’d put the Genius Scan app (on iOS mobile) right up there in terms of large PDF production and publishing talents with the great out of the box macOS Preview desktop application (where we can’t go past the Finder multiple slide image selection Open With Preview, and there using it’s own slide management, ahead of Print -> PDF creation process talents).
Both are great “online hardcopy” (which is what PDF amounts to) publication ideas!
The raw camera functionality on an iPad is amazing, but short of using stands or rigging up a tripod, its capabilities resolution wise for the scanning of filled out forms can be questionable. We’ve been wanting to do a bit of this recently, and found that the iPad’s Genius Scan (mobile) app we introduced at this blog with Genius Scan App Primer Tutorial (when using it to organize some recipes) could succeed (where raw iPad camera functionality couldn’t (at least for us)) …
get the qualities of photograph resolutions required to see “clearly enough” (the emailee complained about the resolution using native iPad Camera work only) filled out form data
could assemble into the one PDF several scans (meant to be together) in the one document … and then …
share that PDF document by, in our case, emailing it off, to an emailee (ie. recipient)
Cute, huh?!
Today’s PDF slideshow created back on a MacBook Pro’s Preview desktop application illustrates these basic steps (for a two page PDF email attachment) …
If not installed already install the iOS Genius Scan app onto an iPad (in our case, but should work on an iPhone too) via a search of the App Store app for “Genius” … then touch that icon on the iPad desktop to open “Genius Scan” (mobile) app
Touch Camera icon
When form (or other “subject” 1) lined up click the “Shutter” icon
Save to a New Document
Touch Camera icon
When form (or other “subject” 2) lined up click the “Shutter” icon
Save to a Existing Document
Touch that newest Existing Document to open it … so that we can …
Touch the Share icon down at the bottom right
In the Export window that opens up touch the Email icon … which opens a …
Email window with the usual To: CC:/BCC: Subject: Body: filled with the Genius Scan PDF as an email attachment … so we …
Fill out the relevant fields as above and touch the Send “button” up the top left … at which point we can …
Use the iPad’s Home button to bid farewell to the Genius Scan (mobile) app … and in our case open our iPad’s Mail app to view the email ourselves (because we sent it to ourselves)
When you come across a great mobile application it can be a great boon to your relationship with computer equipment. And if it links hardcoded material to the online world all the better. Do you remember when we talked about QR Codes with QR Codes Writer Primer Tutorial? Well, today, with our tutorial about the great iOS mobile application called Genius Scan (and you can just type “Genius” at the App Store application to find it) it feels a bit like the QR Code creation way a mobile device takes a photo of something that is then used to do something else. That “something else” today is that that photo, perhaps of some hardcoded material, can be turned into a PDF by the Genius Scan app and shared, in our case today, by email.
Around our house we used the Genius Scan app to photograph a loose collection of recipes, in poor condition, and centralise (via reprinting) them via …
If not installed already install the iOS Genius Scan app onto an iPad (in our case, but should work on an iPhone too) via a search of the App Store app for “Genius” …
Take photos of the loose collection of recipes and store them as PDFs on the iPad
Another user, meanwhile, has a USB memory stick ready using a MacBook Pro (and in our case we used the Finder application to two finger gesture in the root folder arrived at by clicking the USB Disk and two finger gesturing a New Folder called Recipes)
In batches, email (up to about 11, in our case, of) these off to an email address accessed by a user using a MacBook Pro, and we used a web browser session of Gmail for this
Click Download all Attachments to a zip file in the Downloads folder (of MacBook Pro)
Click the zip file creating a new folder within the Downloads folder
Click that new folder to open its contents
Click (ie. tap) top file
Two finger gesture to Copy all these as you click/tap last file
Click USB folder (and in our case we also click Recipes sub folder)
Two finger gesture Paste files to USB
Repeat from “In batches …” above until all done
Take the USB to Officeworks serve yourself document printing machine, in a similar way, but with photos that last time, that we visited good ol’ Officeworks when we presented Holiday Snaps Printing Primer Tutorial as shown below (and the other thing we’ve learnt since then is that they can recycle some of your old printers if you drop it off at their store)
We found it was too much trouble to do one printout per click for $1.00 Australian per sheet and instead got help from an Officeworks employee to put all the 121 files into a batch job at $0.80 cents per printout … voila …
We had occasion to think about USB Memory Sticks the other day, perhaps a hardware device on the list of ones in danger of slipping away from relevance if we keep moving on in the mobile device and cloud storage direction.
The history of removable media started a long time ago even before the first Windows, back at DOS, and can remember some Wang 8 inch floppies. Back then it was a lot to do with a very finite amount of disk space reflecting when I.T. was more about “real word” processing, rather than, so much, graphical processing. Nowadays, with removable media, and the relatively modern … but for how long? … memory stick holding several gigabytes of media storage, usually, there are media formatting requirements now that have moved on from the default Windows media formatting supporting a File Allocation Table (FAT) file system.
We’ll get to what’s better to use regarding a USB memory stick media formatting arrangement later, but for now, what happens if you …
in Windows or DOS get to a formatting Window and choose to format a USB memory stick of 2gB capacity, for example in “MS-DOS (FAT)” format … or …
in Mac OS X Applications -> Utilities -> Disk Utility -> Selected USB memory stick of 2gB capacity -> Erase tab -> Format -> MS-DOS (FAT)
… well, respectively …
it will have been formatted to have the disk space of a 3 1/4 inch floppy, it looks like, and work on Windows and DOS and Mac OS X
it will have been formatted to have the disk space of a 3 1/4 inch floppy, it looks like, and work on Mac OS X and Windows and DOS
… which is okay but kind of wasteful, in the context of a removable USB 2gB memory stick we wanted to use to store about 320 holiday “snaps” and get printed out. We have these scenarios possible in a house half Mac OS X and half Windows.
So here’s the bit of the tutorial where we can’t help but advertise. Officeworks, with various branches here in Sydney, print 4″ x 6″ photo prints, satin or glossy, at 10 cents per photo. Pretty good, huh? And this can even be done Dragging and Dropping photos online, but up to 20mB, that is. Our 320 holiday “snaps” represented considerably more, and more than for any “MS-DOS (FAT)” file system arrangement, that would get taken for a Same Day do it yourself at a Windows personal computer, with your own USB memory stick arrangement.
So, what is the go to …
use the full capacity of the USB memory stick
be able to fit 320 photos onto the USB memory stick
for normal day to day use, be able to use it on any Mac OS X or Windows computer around the house
have a workable and readable USB memory stick to use at the Officeworks photo printing Do It Yourself Windows personal computers
… having seen unreadable USB memory sticks, at Officeworks Windows personal computers using “in Mac OS X Applications -> Utilities -> Disk Utility -> Selected USB memory stick of 2gB capacity -> Erase tab -> Format -> Mac OS Extended (Journaled)” formatting?
Well, I asked the Fat Controller … of course … what do you take me for? … and they said …
“ExFat” DotDotDot man person
… and, lo and behold … not having registered its existence before … there it was as an option achieving both as per …
in Windows or DOS get to a formatting Window and choose to format a USB memory stick of 2gB capacity, for example in “exFAT” format … or …
in Mac OS X Applications -> Utilities -> Disk Utility -> Selected USB memory stick of 2gB capacity -> Erase tab -> Format -> ExFAT
… resulting in, respectively …
it will have been formatted to have the disk space of its 2gB full capacity, it looks like, and work on Windows and DOS and Mac OS X
it will have been formatted to have the disk space of its 2gB full capacity, it looks like, and work on Mac OS X and Windows and DOS
So, a happy solution for some holiday “snap” printing, and the ongoing less wasteful use of a USB 2gB memory stick on Windows or Mac OS X, on computers around the house. We show some of these ideas with our tutorial picture today.
To read more about getting the photos to the MacBook Pro laptop from the Android phone, please read, below, the techniques from Android Disk to MacBook Pro Disk Tutorial.
We love it here when we can tell you of something that works across the “big brands”, and what we mean by the two “big brands” today is Google (regarding their Android mobile phone operating system) and Apple (regarding their Mac OS X MacBook Pro laptop operating system). Today we transfer files from the Android mobile phone to our MacBook Pro laptop disk via …
For Share ideas that involve your Android mobile phone and storing media on a local hard disk this could be a great alternative to other Share options for the MacBook Pro and some of the ideas we presented with Android Camera to Mac iPhoto Primer Tutorial.
Today’s tutorial picture shows you the setup for this functionality, and you’ll see the online advice for how you work the Mac OS X application for the Android File Transfer application.
When creating Android apps with Android Studio IDE (or any other IDE, for that matter) it’s great to test the working of the app with various mobile phone and tablet emulators with AVD, and it’s even “greater” to extend that to testing on a real physical device.
Today, we’re going to work with …
MacBook Pro testing that latest Android app using an Android Studio IDE project which we talked about with Android Studio on Mac OS X Primer Tutorial regarding “ESL Ideas”
another (ubiquitous) white lead … called a Micro USB Connector … but not Muc, pleeeeease … decided against the puce one because it just didn’t go with the cushions … but we digress
Samsung GT-S5310B Android 4.1.2 mobile phone … and, today of all days the “4.1.2” is a bit significant … because we want to talk about ant builds … but we digress
The (ubiquitous) white lead goes from the MacBook Pro’s USB port to the “underbelly” of the Samsung GT-S5310B.
One thing to do at the “computer” Android Studio end of the lead is to adjust AndroidManifest.xml to show android:debuggable="true" now.
Now if you’re on Windows I’d have more to say about the “computer” end of the lead, and if that is you, and you’ve never tested on a real device, you’ll want to read this great Google Android Studio page.
Come to think of it, everybody who’s never tested on a real device should read Google Android Studio page. See the advice about Android 4.2 … note that … ie. if the Settings menu’s submenu Developer Options is all grayed out tap on Build number (via Settings->About device) seven times … and “twice on the pipe, if the answer is noooooooooo” … but we digress.
However, we have a mobile phone with Android 4.1.2 … and so … this search got me to this great advice … and the consequent turning on of the Settings->Developer Options “switch” to on meant … Bob’s your uncle, Fanny’s your aunt … Android Studio responded like a … like a … well … a very hot studio.
A “Run App” will default to hooking up to this connected physical device (the Samsung GT-S5310B) and run the resultant mobile app on that device.
There are a lot of choices of IDE for creating mobile applications, and if you are a developer wanting to develop mobile apps for both Android and iOS platforms, you may be looking to try to set up an environment where all this can be achieved on the one piece of computer equipment.
We prefer to think in terms of two IDEs handling the two mobile app types of iOS, with Swift and/or Objective-C as the source language, and Android, with Java as the source language. We don’t mind there being two separate IDEs involved, but we find it amazing enough that they can both sit on the one MacBook Pro laptop without resorting to any Operating System disk partitions. With the Android app, using Mac OS X (MacBook Pro) we asked Google if it could be done, and came up with the marvellous Android Studio IDE as a possibility … yay!
iOS mobile apps get created via the Xcode IDE using Swift and/or Objective-C on a Mac OS X (MacBook Pro)
Android apps get created via the Android Studio IDE using Java on a Mac OS X (MacBook Pro)
Today’s tutorial, as with the WordPress 4.1.1’s Android Studio on Mac OS X Primer Tutorial, hones in on that second idea from the install of Android Studio (to a MacBook Pro) through to the “middle game” emulation of an Android app via Android Studio and AVD onto an HTC Nexus One.
In the context of all this, we see the Android app “end game” as involving the creation of an .apk file that can be uploaded to Google Play for public access.
Fragments – components of the Android UI … and setting of startup fragment of interest … fragment_weblayout.xml … fragments go some way to addressing that common issue for mobile developers that all the UI elements of a mobile application fit and would ideally be displayed with a tablet but it would be best to only conditionally display some when it comes to using a smaller format mobile device such as an Android mobile phone device
WebView … similar to Eclipse … allows an Internet web component in your Android mobile app
Use of myWebView.getSettings().setJavaScriptEnabled(true); to allow Javascript functionality for the WebView
AndroidManifest.xml … INTERNET permission … similar to Eclipse … to Build->”Generate Signed APK…” for Google Play publishing you need the extra … android:debuggable="false" clause
Tools->Android->AVD Manager … emulator organization and emulator deployment help … remains the case that it is best to start the emulator all the way to the home page at the simulated device (right swipe unlocking any locks you get) … then run and attach your mobile app to this pre-established connection
You will be pleased to know that after the Android Studio install today, all is (still) well with Xcode on this Mac OS X (MacBook Pro) setup … we mostly like a happy ending … aaaaaaahhhhhhh!
Yesterday, with Android Studio Tic Tac Toe Game Tutorial as shown below, we reacquainted ourselves with Android Studio as an alternative IDE to Eclipse (and there are others too) to use the Android SDK and Java to develop mobile apps for an Android mobile device and in our aforesaid mentioned “start game”, “middle game” and “end game” view of mobile development we focussed on the “middle game”.
Today, we extend the “middle game” discussion of yesterday, with tutorial functionality touching on the “end game” with respect to Android Studio creating an Android mobile app on Google Play.
Wonder if you were around when we created the Morse Code emailer … HTML Morse Code Primer Tutorial? Well, today, we turn that into an Android mobile application using Android Studio, and publish it to Google Play for general “consumption” by the public.
So what are some of the concepts in the Android Studio project regarding the “middle game”, for which huge help came from this great link … thanks …
Fragments – components of the Android UI … and setting of startup fragment of interest … fragments go some way to addressing that common issue for mobile developers that all the UI elements of a mobile application fit and would ideally be displayed with a tablet but it would be best to only conditionally display some when it comes to using a smaller format mobile device such as an Android mobile phone device
Layout in activity_main.xml … similar to Eclipse
WebView … similar to Eclipse … allows an Internet web component in your Android mobile app
Use of myWebView.getSettings().setJavaScriptEnabled(true); to allow Javascript functionality for the WebView
AndroidManifest.xml … INTERNET permission … similar to Eclipse … to Build->”Generate Signed APK…” for Google Play publishing you need the extra … android:debuggable="false" clause
Tools->Android->AVD Manager … emulator organization and emulator deployment help … remains the case that it is best to start the emulator all the way to the home page at the simulated device (right swipe unlocking any locks you get) … then run and attach your mobile app to this pre-established connection
Source code wise, of interest to the “middle game”, is …
Before leaving the “middle game” thoughts, sometimes you need to adjust the code of a WebView’s innards (especially) if you want to do away with any “Back” or “Forward” button mobile application functionality, because any escape from the WebView’s control is that mobile application being effectively lost for that session. As such, the Morse Code programming HTML source code became morsecode.html (… and how we got there morsecode.html …) and the method of creating the email was made to use a PHP piece of supervised code as per morsecode.php (with a live run non-mobile web page link) to cater for Android mobile WebView compatibility … and thanks to this useful link.
Just to challenge you with a “middle, end, start order” … have a look at some information regarding Android Studio mobile development and the “start game” … Android Studio Primer Tutorial.
Hope this is food for thought for your Android mobile development plans! See the results of the work today at Google Play.
Wonder if you were around when we created Tic Tac Toe (or more like Noughts and Crosses, in Australia) using the HTML5 Canvas element and drag and drop methods (if you liked, or just plain box clicking, otherwise, which will be okay for mobile usage) … HTML/Javascript Canvas Tic Tac Toe Game Drag and Drop Tutorial as shown below? Well, today, we turn that into an Android mobile application using Android Studio.
Android Studio is an alternative IDE to Eclipse (and there are others too) to use the Android SDK and Java to develop mobile apps for an Android mobile device and in our aforesaid mentioned “start game”, “middle game” and “end game” view of mobile development we are just showing you the “middle game” today, but if you were to follow through … fore!!!!!!!! … and not shank … and not hook (ie. narrrrrrr … chortle, chortle) … then we may end up at Google Play with a mobile app … by the way, we talk about the “end game” at Eclipse Android App Google Play Ready Primer Tutorial (Android Studio has all this functionality and capability too).
So what are some of the concepts in the Android Studio project, for which huge help came from this great link … thanks …
Fragments – components of the Android UI … and setting of startup fragment of interest … fragments go some way to addressing that common issue for mobile developers that all the UI elements of a mobile application fit and would ideally be displayed with a tablet but it would be best to only conditionally display some when it comes to using a smaller format mobile device such as an Android mobile phone device
Layout in activity_main.xml … similar to Eclipse
WebView … similar to Eclipse … allows an Internet web component in your Android mobile app
Use of myWebView.getSettings().setJavaScriptEnabled(true); to allow Javascript functionality for the WebView
AndroidManifest.xml … INTERNET permission … similar to Eclipse
Tools->Android->AVD Manager … emulator organization and emulator deployment help … remains the case that it is best to start the emulator all the way to the home page at the simulated device (right swipe unlocking any locks you get) … then run and attach your mobile app to this pre-established connection
So that’s a bit about the mobile world, and so concerning the innards of that WebView …
The Canvas HTML element tag can be used as the container to draw graphics on the fly usually via the use of Javascript functions for rendering and event management.
In today’s tutorial we show some image Drag and Drop functionality that you can use with the Canvas HTML5 element where we create a Tic Tac Toe game webpage. We thank w3schools for the great advice at this link.
The Drag and Drop does not work well on tablets, but for own Tic Tac Toe game today we allow either a drag and drop approach, or a touch/click approach.
HTML/Javascript Canvas Tic Tac Toe Game Drag and Drop Tutorial
The Canvas HTML element tag can be used as the container to draw graphics on the fly usually via the use of Javascript functions for rendering and event management.
In today’s tutorial we show some image Drag and Drop functionality that you can use with the Canvas HTML5 element where we create a Tic Tac Toe game webpage. We thank w3schools for the great advice at this link.
The Drag and Drop does not work well on tablets, but for own Tic Tac Toe game today we allow either a drag and drop approach, or a touch/click approach.
Google Translate WordPress Blog Widget Positioning Tutorial
When we last upgraded our WordPress.org website from 4.1.1. to 6.6.2 the Widget section CSS arrangements, barring the installation of a WordPress plugin to backtrack, caused WordPress to start CSS styling the widget area via a new “block” paradigm.
This “block” paradigm seems to have rearranged a non-mobile user’s view of a Google Translate view of one of our WordPress blog posting webpages, translated from English to another language.
Rather than fight this, we want to …
stop “fight and flight” base thinking …
think more, fitting in … it takes less time … and improves your skills solving problems, we believe
What happens here with non-mobile Google Translate webpage translation scenarios, it starts putting all but our Numerical Quiz (maybe because it is narrower, and we are talking Responsive Design with all of this) Widget components down the bottom of the screen. To us, “above the fold” beats any Responsive Design niceties here. We, at least, want the Search form and Recent Posts widgets to appear to the right and above the fold, predominantly, here, for non-mobile platforms.
Google Translate WordPress Blog Image URL Fix Tutorial
Further to Google Translate Landing Page Changed Interfacing Links Tutorial we’re revisiting Google Translate “translation of WordPress blog webpage” translation functionality, finding some images getting non RJM Programming “src” properties, oddly. We do not remember this, but interfacing rules can change, of course, and it’s been a while?!
We think, perhaps, too, we were more often than we were needing to, asking for a translation of …
https://www.rjmprogramming.com.au/ITblog/
… content, and this is usually not the most apt translation to attempt. The permalink WordPress blog URLs are going to be the usual case, and we can find their ?p=[pId] equivalent (and helpful plugged into the Google Translate window.top URL) can be gleaned as the first mention in document.body.innerHTML of …
With all this, we now fix the HTML img elements sometimes getting a Google Translate related URL via the new Javascript code snippet in the WordPress blog’s TwentyTen theme’s header.php via a delayed call of …
<?php echo ”
function laterimg() {
var imgi = document.getElementsByTagName('img');
for (iyt=0; iyt<imgi.length; iyt++) {
if (('' + top.document.URL).indexOf('rjmprogramming-com-au') != -1) {
if (('' + imgi[iyt].src).indexOf('&u=//') != -1) {
imgi[iyt].src=imgi[iyt].src.split('&u=')[1];
}
}
}
}
But two interfacing to Google Translate aspects have changed since we had occasion to “see how this was going” (oops!) …
enforcing https: protocol … and …
extra &_x_tr_pto=wapp to arguments … as per old versus new Landing Page Javascript code arrangements …
function oldChangeLcodeNow(){
//<![CDATA[
var val = document.getElementById('language');
if (val.value.length != 0 && val.value.indexOf('en') == (0 - 1)) {
var pprefix = val[val.selectedIndex].id;
var dd=new Date();
window.open('//www-rjmprogramming-com-au.translate.goog/ITblog/' + dd.getFullYear() + '/' + ('0' + eval(1 + eval('' + dd.getMonth()))).slice(-2) + '/' + ('0' + eval(0 + eval('' + dd.getDate()))).slice(-2) + '/?_x_tr_sl=en&_x_tr_hl=en-GB&_x_tr_pto=nui&_x_tr_tl=' + val.value, '_blank');
}
//]]>
}
function ChangeLcodeNow(){
//<![CDATA[
var val = document.getElementById('language');
if (val.value.length != 0 && val.value.indexOf('en') == (0 - 1)) {
var pprefix = val[val.selectedIndex].id;
var dd=new Date();
window.open('https://www-rjmprogramming-com-au.translate.goog/ITblog/' + dd.getFullYear() + '/' + ('0' + eval(1 + eval('' + dd.getMonth()))).slice(-2) + '/' + ('0' + eval(0 + eval('' + dd.getDate()))).slice(-2) + '/?_x_tr_sl=en&_x_tr_hl=en-GB&_x_tr_pto=nui&_x_tr_tl=' + val.value + '&_x_tr_pto=wapp', '_blank');
}
//]]>
}
… linking the user picking a non-English language off the dropdown element be able to translate that day’s latest RJM Programming blog post into that language via Google Translate. Thanks heaps!
It’s the start that does not ingrain the webpage HTML to any great permanence, and that is for another “PHP involvement” day.
… and that new day is upon us. Whenever you combine …
PHP writing public HTML webpage data … with …
a user interface (and we’d really only like that “user set” to be an administrator of this blog)
… it’s a potential data security issue you are opening up, and yet, we do want to involve some automation of webpage code here for something that can be ascertained. So let’s try to protect ourselves (to some degree) regarding the PHP below …
<?php
if (isset($_POST['langih']) && strpos(strtolower('' . $_SERVER['HTTP_REFERER']), "rjmprogramming.com.au/about_us.html") !== false) {
$prefis="./";
$ftf=["index.htm","index.html","indexmobile.html","About_Us.html","Contact_Us.html","Guestbook.html","Link.html","Links.html","Services.html","Welcome.html","News.html","Welcome.htm","Welcomeslideshow.htm","Welcomeslideshow.html","slideshow.html"];
$lih=str_replace("+", " ", urldecode($_POST['langih']));
if (strpos("~" . strtolower($lih), "~<option") !== false) {
if (strpos(strtolower($lih) . "~", "</option>~") !== false) {
if (strpos($lih, ">Blog Language") !== false) {
… restricting calling URLs and some of the look and size and content of the posted data, and working with the “About Us” webpage “place” to automate, the idea of choosing “English” from the “Blog Language” dropdown, as per the changed Javascript and Ajax “way in” …
function ChangeLcodeNow(){
var val = document.getElementById('language');
if (val.value.length != 0 && val.value.indexOf('en') == (0 - 1)) {
var pprefix = val[val.selectedIndex].id;
var dd=new Date();
window.open('//www-rjmprogramming-com-au.translate.goog/ITblog/' + dd.getFullYear() + '/' + ('0' + eval(1 + eval('' + dd.getMonth()))).slice(-2) + '/' + ('0' + eval(0 + eval('' + dd.getDate()))).slice(-2) + '/?_x_tr_sl=en&_x_tr_hl=en-GB&_x_tr_pto=nui&_x_tr_tl=' + val.value, '_blank');
} else if (val.value.length != 0 && val.value.indexOf('en') != (0 - 1)) {
if (ajaxitp) { ajaxitp(); }
}
}
function ajaxitp() {
var xurl = './getme.php';
var formis = new FormData();
myxhr = new XMLHttpRequest();
if (myxhr) {
formis.append('langih', document.getElementById('language').innerHTML);
myxhr.open('POST', xurl); //, true);
myxhr.send(formis);
}
}
today we extend that strategy to change the RJM Programming Landing PageGoogle Translate interfacing to change from a “Landing Page content” strategy to a “Navigate to WordPress Blog” strategy (feeding into yesterday’s thinking), our justification being that the better content of the RJM Programming domain sits within the WordPress Blog we support and maintain
… so there, ngarrrrgh!
But (growing up quickly) we see a better arrangement here, just adding the prefix “Blog” onto the old (just) “Language” labelled dropdown to modify the “new “Blog Language” (to end up with HTML snippet <option value=””>Blog Language</option>) dropdown’s Javascript “onchange” event logic …
// To ...
function ChangeLcodeNow(){
//<![CDATA[
var val = document.getElementById('language');
if (val.value.length != 0 && val.value.indexOf('en') == (0 - 1)) {
var pprefix = val[val.selectedIndex].id;
var dd=new Date();
window.open('//www-rjmprogramming-com-au.translate.goog/ITblog/' + dd.getFullYear() + '/' + ('0' + eval(1 + eval('' + dd.getMonth()))).slice(-2) + '/' + ('0' + eval(0 + eval('' + dd.getDate()))).slice(-2) + '/?_x_tr_sl=en&_x_tr_hl=en-GB&_x_tr_pto=nui&_x_tr_tl=' + val.value, '_blank');
}
//]]>
}
// ... From ...
function olderChangeLcodeNow(){
//<![CDATA[
var val = document.getElementById('language');
if (val.value.length != 0 && val.value.indexOf('en') == (0 - 1)) {
var pprefix = val[val.selectedIndex].id;
windowopen('http://translate.google.com/translate?sl=en&js=n&prev=_t&hl=en&ie=UTF-8&layout=2&eotf=1&u=http%3A%2F%2Fwww.rjmprogramming.com.au%2Findex.html&tl=' + val.value, '_blank');
}
//]]>
}
We really like the way Google Translate can language translate whole webpages for URLs of choice, sometimes. We use it here at this blog, but sometime into the past … we cannot recall (sorrrrrryyyyyyyyy!) … the arrangements of use of this great functionality changed, and today we want to go over what we did for this blog to fix some of this interfacing.
It was in good ol’ WordPress TwentyTen theme’s header.php we made the change to facilitate this “reconnection” to this great functionality …
<?php
function ChangeLcodeNow(){
var val = document.getElementById('language');
//alert(val.value);
if (val.value.length != 0 && val.value.indexOf('en') == (0 - 1)) {
//alert(val.value);
var pprefix = val[val.selectedIndex].id;
<?php
$p316 = "316";
$pprefix = "";
if (strpos($_SERVER['QUERY_STRING'], "p=0") !== false) {
$pprefix = "";
} else {
if (isset($_GET['p'])) {
if (strpos($_GET['p'], "304") !== false) {
$p316 = "316";
} else {
$p316 = $_GET['p'];
}
}
CentOS Apache PHP version starting with a 5 … to …
AlmaLinux Apache PHP version starting with an 8
… issues with the PHP. A mute point, though, as we were reminded during our testing, because we made this web application inactive, probably quite wisely, on our live rjmprogramming.com.au version, so the testing was more that we didn’t stuff up the still actively working “download to a local Apache/PHP/MySql web server such as MAMP” mode of use. Spoiler alert … no muck up! So, what did we learn? Trivial, but …
<?php
if ($argv) {
// do a command line usage set of commands ...
// ... until here
}
?>
… is better expressed as …
<?php
if (isset()$argv)) {
// do a command line usage set of commands ...
Surfing the Net … is very interactive and we can use HTML form elements for navigation purposes … for example, URL (on local MAMP (Mac) Apache/PHP/MySql web server) … http://localhost:8888/rename_to_aid_sorting.php?dirone=.%2F&dirtwo=Django_Python-&asteriskybit=%5B0123456789%5D*.* … but more than likely the environment where users will think to use this PHP application is via …
Command Line Usage … for example, be in MAMP’s /Applications/MAMP/htdocs/ directory with … php rename_to_aid_sorting.php ./Django_Python- # or …
Curl Usage … for example, be in MAMP’s /Applications/MAMP/htdocs/ directory with … curl http://localhost:8888/rename_to_aid_sorting.php?inspec=./Django_Python- # you can see in action below …
Up near the top of the code processing input parameters the PHP code differentiation goes …
if (isset($_GET['inspec']) && !isset($_GET['dirone']) && !isset($_GET['dirtwo'])) { // reserved for curl instructions
// Curl usage is hard to differentiate from "Surfing the Net" ... they both ask for a URL whereas Command Line has arguments ... so sometimes Curl usage is best
// organized with one $_GET[] (for us $_GET['inspec']) and limit it to just the one. Why so? Well, "&" on command line is awkward.
// To involve more than one argument in Curl use an internal delimitation character like ^ or ! perhaps to proceed. We were able to just keep it to one today.
//
// ... curl argument processing code goes here
//
} else if ($argv) { // command line usage
//
// ... command line argument processing code goes here
//
} else { // surfing the net usage
//
// ... surfing the net argument processing code goes here
//
}
… and down near the bottom, differentiation regarding the look of the outputs, it goes …
if ($argv || (isset($_GET['inspec']) && !isset($_GET['dirone']) && !isset($_GET['dirtwo']))) { // command line or curl ... just show commands for user to try or not ... they may want a pipe like " | tee do_these_renames.ksh" (and then follow up "ksh -x do_these_renames.ksh")
$outp="";
if (strpos(strtoupper(('' . PHP_OS)), "WINDOW") !== false) {
$lines=explode("\nren" . "ame ");
for ($oi=1; $oi<sizeof($lines); $oi++) {
$outp.="ren" . "ame " . explode("\n", $lines[$oi])[0] . "\n";
}
} else {
$lines=explode("\nm" . "v ",$htmlis);
for ($oi=1; $oi<sizeof($lines); $oi++) {
$outp.="m" . "v " . explode("\n", $lines[$oi])[0] . "\n";
}
}
echo $outp;
} else { // surfing the net form interactions below
echo $htmlis;
}
If you watch the video above, you’ll see us touching on some piping ideas too, with respect to Command Line and Curl modes of use, taking place at the command line. These modes of use just output a set of operating system proposed rename (or non-Windows mv) commands to achieve the same default decisions the Surfing the Net program first shows after you Click/Touch the “Analyze” button. These commands have not been done by the application, as we leave this up to the user, as much as anything because the joys of piping can be used. Take a look at …
Command Line Usage … for example, be in MAMP’s /Applications/MAMP/htdocs/ directory with … php rename_to_aid_sorting.php ./Django_Python- | tee do_renames.ksh # or …
Curl Usage … for example, be in MAMP’s /Applications/MAMP/htdocs/ directory with … curl http://localhost:8888/rename_to_aid_sorting.php?inspec=./Django_Python- | tee do_renames.ksh # you can see in action below …
To make these (default) renamings happen (and now the operating system will supply any error messages, and here, we use our favourite scripting shell on non-Windows …ksh … Korn Shell) …
ksh -x do_renames.ksh
For Windows …
Command Line Usage … for example, be in MAMP’s /Applications/MAMP/htdocs/ directory with … php rename_to_aid_sorting.php ./Django_Python- > do_renames.bat # or …
Curl Usage … for example, be in MAMP’s /Applications/MAMP/htdocs/ directory with … curl http://localhost:8888/rename_to_aid_sorting.php?inspec=./Django_Python- > do_renames.bat # you can see in action below …
To make these (default) renamings happen, opening the Windows command line application (and now Window’s command line (DOS) operating system will supply any error messages) …
Notice “the home of PHP”‘s webpage’s blurb about alternatives …
system() – Execute an external program and display the output
passthru() – Execute an external program and display raw output
escapeshellcmd() – Escape shell metacharacters
pcntl_exec() – Executes specified program in current process space
backtick operator
Renaming to Aid with Numerical File Sorts Actions Tutorial
Ah, that’s the thing! “Actions” sounds good’n’all but … and didn’t you … we can’t let anybody loose with a “fully functional” live run to the RJM Programming web server with this renaming web application. We’ll just have to show you what the same codebase produces on our local MAMP (Mac) Apache/PHP/MySql web server in “fully functional” form.
So after an initial phase of imagining how to resist bad usage thoughts, there were also more things to consider when allowing for real operating system rename commands (or mv on non-Windows operating systems), such as …
error (and status) messaging … related to
input file does not exist
output file already exists
rename fails
(else mention if successful)
individual checkboxes to allow for individual renamings (which happen at an HTML iframe “child” run of the same codebase PHP that performs an exec rename call from the (relevant) operating system (though we could have used PHP’s rename command to not have to differentiate via operating system, this way), the PHP’s way to tell happening via PHP_OS global)
overall checkbox to allow for any non-checked individual checkboxes to be clicked in a batch … and if so …
stagger the timing of it happening so user can read a status message between setTimeout controlled renamings
give a report on the overall run at the end of this run
show progress via cursor:progress; on the overall checkbox going back to cursor:pointer; at the finish
control of the individual checkbox “checked” look happens at that HTML iframe’s onload event “Client Pre-Emptive Iframe” inspired logic
after a successful rename ensure no bad repeated action, by use of [HTMLinputTextElement].readOnly=true on middle textbox and [HTMLinputCheckboxElement].style.display=’none’ on right hand side checkbox
spaces in filenames requires double quoting delimitation
It’s amazing how much extra thought you need to put into procedural web applications like this, because the user needs follow up information in a real sense.
Did you know?
What is behind how PHP takes the input entries and obtains a set of file names (we refer to as “input” files above)? It’s done via one of our favourite PHP functions … (good ol’) …
foreach (glob($dprefix . $asteriskybit) as $filename) {
// process $filename here
}
Notice its abilities as far as wildcards go … * (for any number of character) and ? (for one character) and [0123456789] (we use in this project, for one counting number character).
Renaming to Aid with Numerical File Sorts Primer Tutorial
It’s not just the operating systems that throw up issues regarding file names with numerical parts to them that when displayed get sorted alphabetically, but you’d like it either …
numerically … or …
a hybrid of numerically and alphabetically
We’re not there yet … but “are we there yet”, now? … but we’re starting down the road to this with some PHP we’re developing. This might be useful as a tool because sometimes with real work, you could be talking about hundreds of files needing renaming either to …
suit some procedural (process) that is looking for the numbers to determine order, and yet uses defaulting file sorting algorithms … ie. what we are talking about today is a program to make it that both are satisfied, so long as the procedure doesn’t mind filenames being changed this way, to still work
annoyance factor issues, the one that springs to mind for me being the assembly of some images that we use Mac OS X desktop application Preview to use to assemble into a PDF slideshow via being in the Mac OS X Finder and highlighting our files and running into the alphabetic/numerical sort conundrum … annoyance only? … by that I mean, you can fix this at Preview, so it rates as an “annoyance” only
What’s involved? Lots … think of this in terms of prefixing the correct number of “0”‘s (ie. zeroes) in the right place of the filename …
the file extension … we decide not to cross across file extensions with our mini-renaming-rule sets
the number of delimited sets before the period (ie. dot “.”) of the file extension … we decide not to cross across “file extension/number of delimited sets before the period”s with our mini-renaming-rule sets
the delimiter itself before the period (and if none, call it the period) … we decide not to cross across “file extension/number of delimited sets before the period/delimiter”s with our mini-renaming-rule sets
how many “delimited sets before the period” to apply the renaming logic attempts onto … we’ve decided just the first for now
what about non-numerical and non-delimiter characters before the period … hand me the Bex, will you?!
The first, what we’d categorize as an annoyance, using it was the lack of a designed “back button” equivalent, so that a user does not have to figure this out for themselves, useful for when the multiple selection dropdown page displays, and the user may want to go back to the previous initial webpage.
We thought that when the user gets to that multiple selection dropdown page we saw that a double click on the dropdown caused some more content to show, but for non-mobile onmouseover and for any onclick events associated with the dropdown option elements we should do more over to the right where nothing was happening before, via, in the HTML, encasing the page content within a new table element consisting of two cells, the right hand one (id=’tdright’) …
<?php
echo "<html><head><script type='text/javascript'> var isonclick=1; var multi=1; var comma=''; " . $ctn . " </script><title>Ask About Course</title></head><body style='background-color:lightgray;'>" . $bodyi . "<table id=mytable style=width:100%;><tr id=mytr><td id=tdleft style=vertical-align:top;width:70%;><h1 id=myh1 align='center'>" . $thetopic . " Course Designer</h1><h3 id='sofar'></h3><br><form align='center' action='./design_a_course.php?show=y' method='POST'><input type='hidden' name='courselsq' id='courselsq' value=''></input><input type='hidden' name='coursesq' id='coursesq' value=''></input><a target=_self href=./design_a_course.php title=Back>Cou</a><a target=_blank href=./design_a_course.php title=New>rse</a> Name: <input type='text' style='display:block;' name='coursename' id='coursename' value='" . $topics[0] . "'></input><br><div id='list' style='display:none;'>" . via("") . "</div><select title='Tutorials for course ... you can double click for a preview of any one tutorial below when in Multiple selection mode' id='bc' onchange=' if (multi == 1) { multi = 0; document.getElementById(\"topic\").innerHTML = document.getElementById(\"topic\").innerHTML.replace(/size=20 multiple/g, \"\"); } else { multi=1; document.getElementById(\"topic\").innerHTML = document.getElementById(\"topic\").innerHTML.replace(/select /g, \"select size=20 multiple \"); } '><option value='Multiple'>Multiple (entry mode below)</option><option value='Single'>Single (has advantage that date order can be changed)</option></select><div id='topic' style='display:block;'>" . str_replace("ChangeTutNow(this);", " if (multi == 0) { var ahuh=this.value.split(\"=\"); if (ahuh[ahuh.length - 1] != \"\") { var bhuh=ahuh[1].split(\"&\"); document.getElementById(\"coursesq\").value = document.getElementById(\"coursesq\").value + comma + bhuh[0]; document.getElementById(\"courselsq\").value = document.getElementById(\"courselsq\").value + comma + ahuh[ahuh.length - 1].replace(/_/g, \" \"); document.getElementById(\"sofar\").innerHTML = document.getElementById(\"sofar\").innerHTML + \"<\" + \"br\" + \">\" + ahuh[ahuh.length - 1].replace(/_/g, \" \"); document.getElementById(\"topic\").innerHTML = document.getElementById(\"topic\").innerHTML.replace(ahuh[ahuh.length - 1],\"\").replace(ahuh[ahuh.length - 1],\"\"); comma=\",\"; } } ", via($topics[0])) . "</div><br><br><input onclick='return(ChangeTutNow(document.getElementById(\"" . $thetopic . "tuts\")));' onmouseover=' isonclick=0; ChangeTutNow(document.getElementById(\"" . $thetopic . "tuts\")); isonclick=1; ' align='center' type='submit' name='submit' id='submit' value='Create Your " . $thetopic . " Course Design'></input></form>" . "<h3 id='sofar1'></h3></td><td id=tdright style=vertical-align:top;></td></tr></table></body></html>";
?>
… ready to contain blog content via Javascript DOM logic associated with those events talked about above …
<?php echo ”
var lasturl='';
function wopen(oopt) {
var ooptouterHTML=oopt.outerHTML.replace(/\"\;/g,'\"');
if (ooptouterHTML.indexOf('windowopen(') != -1) {
var pone=ooptouterHTML.split('windowopen(')[1].substring(1).split(ooptouterHTML.split('windowopen(')[1].substring(0,1))[0];
if (pone.indexOf('title=') != -1 && pone.indexOf('?') != -1) {
document.getElementById('tdright').innerHTML='<iframe style=width:100%;height:90vh; src=\"' + pone.split('?')[0] + pone.split('title=')[1].toLowerCase().replace(/\//g,'').replace(/\_/g,'-') + '#content\"></iframe>';
if (lasturl != pone) { lasturl=pone; setTimeout(function(){ window.scrollTo(0,0); }, 5000); }
} else if (pone.trim() != '') {
document.getElementById('tdright').innerHTML='<iframe style=width:100%;height:90vh; src=\"' + pone + '#content\"></iframe>';
if (lasturl != pone) { lasturl=pone; setTimeout(function(){ window.scrollTo(0,0); }, 5000); }
}
}
}
blog posting “thread” ideas (where those horizontal rule <hr /> elements “continue the conversation”) … but today we want to add …
blog posting “topic” ideas …
… by taking that (“FirstWord”) blog posting title’s “lead word” as getting us to construct a new “Suggestion” select (dropdown) element collection of relevant blog postings of a “topic”.
Think of a “lead word” like Javascript as an example. “Thread wise” the blog posting “Javascript Rectangle Analyze Follow Up Tutorial” teamed up with blog posting “Javascript Convex Polygon Analyze Tutorial” helps with context and blog posting logic flow. But the user may be interested in other blog posts where the “lead word” of the title (or “topic”) is also Javascript. We gather these blog posting “lead word” Javascript blog postings together into a “Suggestion” select (dropdown) element to overlay onto the “Next” link’s “Suggestion” (wording) hardcoding (as of yesterday’s work), as per PHP code in wp-content/themes/twentyten/functions.php off the WordPress Blog’s document root directory needing to change …
We’re revisiting Online Course ideas onto the last ideas at WordPress Blog Course Design Double Click Tutorial by adding to the previously catered for “Course Design at a peer to peer level by users”, in favour of offering the idea that simply navigating to this WordPress Blog off the RJM Programming Landing Page‘s blog posting dropdown element (improves on the current iframe content all the same as the current blog post) will use …
the blog posting title as selected by the user …
as applicable, the blog post pointed to down past the first relevant <hr /> …
as applicable, previous blog post of interest down below in the Landing Page dropdown content (latest blog posts up the top) that matches the first word of the current blog post title as selected by the user …
as applicable, next blog post of interest up above in the Landing Page dropdown content (latest blog posts up the top) that matches the first word of the current blog post title as selected by the user …
… to navigate the user to a web page that goes …
WordPress Blog Content via the blog posting title as selected by the user
Previous FirstWord Suggestion (link to 3 above)
Hashtag Link to Current Blog Post … Next FirstWord Suggestion (link to 4 above)
WordPress Blog Iframe Content (as of 2 above)
WordPress Blog Iframe Content (as of the blog posting title as selected by the user)
… to offer the user the optional chance to get the context of any previous blog postings of relevance, immediately, presented to them, before their eyes.
The PHP code in wp-content/themes/twentyten/functions.php off the WordPress Blog’s document root directory needed to change quite a bit …
Wordpress Blog Course Design Double Click Tutorial
As a web application programmer do you go around looking at a webpage design and think in an “event driven” way for ways to add functionality? I’m forever thinking this way, as what has mostly disappointed me as an “out there” (but pretty mild, you’d have to agree) way to “leave things as they are but” (the land surveyor’s adage (without that danged “but” … and isn’t there always a “but”?!!) around farmer gates for example) extend functionality is the Javascript event …
But … it got out on “good behaviour” and smooching with the parole officer … go figure … today, we think we’ve found a really good and practical use for the …
HTML select element's ondblclick ("on double click") event, on the proviso that the select element is in multiple selection mode
Can you picture this scenario? Sorry, mobile “touch” gestures aren’t relevant here. This scenario is normally accompanied by an HTML input type=button (or HTML button element) (or some other HTML element “onclick” event scenario) that is responsible to say …
Hey, web browser?! Yeh, waddaUwant.
We’ve finished selecting. Howse about analyzing, bud! Pal?! My liege. Yeh, waddevvvvvvvver.
This thing about clicking in an HTML select element, though, is that it is so tied up with selections you can’t differentiate that from another purpose unless the ondblclick event (sorry, no mobile usage applicability here) can be “purloined” into use. And we do have another usage in mind for today’s application of all this, namely …
… WordPress blog functionality here at this blog. Have you ever tried it? Up at the menu above there is a “Course” menu item. Click it and you are offered lots of ways to arrive at a single word … recently modifications allowing for the word to be situated …
anywhere in a blog posting title … and always it has been the case that it could be …
the first word of a blog posting title
… either way, once you get past this, you arrive at an …
HTML select element (dropdown) in multiple selection mode that today's changes add on a new ondblclick ("on double click") event piece of logic
How does this logic proceed? It depends on a global variable … shock, horror!! within our Design a Course‘s PHP design_a_course.php changed this way (and which can be seen in its WordPress blog context at this link) … initialized …
var dblclickedlist=',';
… that is “analyzed” each time this HTML select (dropdown) detects an ondblclick event, and if a selected option value appears in that dropdown’s selected item hasn’t yet appeared in that global variable …
function odcc(sin) {
if (multi == 1 && parent.document.getElementById('dblcdiv')) {
for (var i=0; i<sin.options.length; i++) {
if (sin.options[i].selected) { if (dblclickedlist.indexOf(',' + sin.options[i].value + ',') == -1) {
dblclickedlist+=sin.options[i].value + ',';
parent.document.getElementById('dblcdiv').style.marginTop='-260px';
parent.document.getElementById('dblcdiv').style.width='100%';
parent.document.getElementById('dblcdiv').style.height='1500px';
parent.document.getElementById('dblcdiv').innerHTML='<iframe style=width:100%;height:1500px; src=' + sin.options[i].value + '#content></iframe>';
}
}
}
}
}
… you get a preview of the blog posting hosted in an HTML iframe element (within that aforesaidlater mentioned HTML div element), below.
Also, setting up the “creation” of that HTML select element (dropdown) within design_a_course.php we needed to (within PHP function via()) …
And second lastly you will have noticed in the “if” controlling whether we do any of this functionality it was on the proviso that the WordPress blog webpage “parent” had in it (existant) an HTML element with an ID=dblcdiv (we make this an HTML div element). Where’s that done? Well, that’s done within the WordPress Blog’s “Add Page” administration area under where design_a_course.php is housed within its HTML iframe element …
And lastly it’s good to give the user a hint that they can use this functionality, and we choose to apply this to HTML select (dropdown) element (as they hover over it) above the multiple mode dropdown we have been discussing above (still within design_a_course.php‘s PHP) …
echo "<html><head><script type='text/javascript'> var isonclick=1; var multi=1; var comma=''; " . $ctn . " </script><title>Ask About Course</title></head><body style='background-color:lightgray;'>" . $bodyi . "<h1 align='center'>" . $thetopic . " Course Designer</h1><h3 id='sofar'></h3><br><form align='center' action='./design_a_course.php?show=y' method='POST'><input type='hidden' name='courselsq' id='courselsq' value=''></input><input type='hidden' name='coursesq' id='coursesq' value=''></input>Course Name: <input type='text' style='display:block;' name='coursename' id='coursename' value='" . $topics[0] . "'></input><br><div id='list' style='display:none;'>" . via("") . "</div><select title='Tutorials for course ... you can double click for a preview of any one tutorial below when in Multiple selection mode' id='bc' onchange=' if (multi == 1) { multi = 0; document.getElementById(\"topic\").innerHTML = document.getElementById(\"topic\").innerHTML.replace(/size=20 multiple/g, \"\"); } else { multi=1; document.getElementById(\"topic\").innerHTML = document.getElementById(\"topic\").innerHTML.replace(/select /g, \"select size=20 multiple \"); } '><option value='Multiple'>Multiple (entry mode below)</option><option value='Single'>Single (has advantage that date order can be changed)</option></select><div id='topic' style='display:block;'>" . str_replace("ChangeTutNow(this);", " if (multi == 0) { var ahuh=this.value.split(\"=\"); if (ahuh[ahuh.length - 1] != \"\") { var bhuh=ahuh[1].split(\"&\"); document.getElementById(\"coursesq\").value = document.getElementById(\"coursesq\").value + comma + bhuh[0]; document.getElementById(\"courselsq\").value = document.getElementById(\"courselsq\").value + comma + ahuh[ahuh.length - 1].replace(/_/g, \" \"); document.getElementById(\"sofar\").innerHTML = document.getElementById(\"sofar\").innerHTML + \"<\" + \"br\" + \">\" + ahuh[ahuh.length - 1].replace(/_/g, \" \"); document.getElementById(\"topic\").innerHTML = document.getElementById(\"topic\").innerHTML.replace(ahuh[ahuh.length - 1],\"\").replace(ahuh[ahuh.length - 1],\"\"); comma=\",\"; } } ", via($topics[0])) . "</div><br><br><input onclick='return(ChangeTutNow(document.getElementById(\"" . $thetopic . "tuts\")));' onmouseover=' isonclick=0; ChangeTutNow(document.getElementById(\"" . $thetopic . "tuts\")); isonclick=1; ' align='center' type='submit' name='submit' id='submit' value='Create Your " . $thetopic . " Course Design'></input></form>" . "<h3 id='sofar1'></h3></body></html>";
Voila! A completely independent “add-on” piece of functionality, and the kind we are very fond of here … the type that …
doesn’t interfere with the expected (or main) workflow of the web application
one that may have occurred to a user to try, anyway, in that intuitive way a lot of us navigate the web
… at least in our programming dreams.
Which brings us to the question? How do the web browsers differentiate an onclick (event) from an ondblclick (event)? Sorry, have to go! See you! Can you just post me the answer! Taaaaaaa!
The recent “Feedback” web application’s Contact Us Feedback Filtering WordPress Tutorial had us scouring blog posting titles here at this blog for a sorted wordlist to offer in an HTML select (dropdown) element to facilitate more savvy user functionality. This same logic can also be useful to the “Design a Course” we have here at this blog in its menu (pages) and that we talked about at WordPress Blog Course Design Cookies Tutorial for your perusal.
You will see in today’s tutorial picture a newly introduced HTML select (dropdown) element with a list of words. Sounds familiar? No? If you are a goldfish click here.
We were able to use that “Feedback” web application’s “reduced” functionality call in an HTML iframe element within design_a_course.php (changedthis way) …
Populating that new HTML select (dropdown) wordlist and the establishment of a new “logic set” for that dropdown’s onchange event is the job for feedback.htm (changedthis way) …
awordlistc.sort();
wordlistc='';
for (ioptl=0; ioptl<awordlistc.length; ioptl++) {
wordlistc+='<option value="' + awordlistc[ioptl].toLowerCase() + '">' + awordlistc[ioptl] + '</option>';
} var wow=false;
if (parent.document) {
if (parent.document.getElementById('header_course_designer')) {
wow=true;
}
}
if (wow) {
var hdg=parent.document.getElementById('header_course_designer').innerHTML;
parent.document.getElementById('header_course_designer').innerHTML="<select title=\"Course Word Anywhere in Blog Title\" onchange=\" if (this.value != '') { location.href='//www.rjmprogramming.com.au/PHP/design_a_course.php?topic=' + encodeURIComponent(this.value) + '&anywhere=y'; } \"><option value=''></option>" + wordlistc + "</select> " + hdg;
} else if (specifically == '') {
document.getElementById('bigselect').innerHTML+=wordlistc;
}
… making use of the parent/childwebpage/iframe arrangements that cause parent.document to be defined (and being the object of that webpage).
As the last follow up to … “This WordPress blog could benefit from a directed order of tutorials studied for a particular topic. This may not suit everybody, but it may suit some, and if a system is created that is optional, that can sit on top of what functionality is already there, all the better.” … how about we improve the looks and cookie functionality (panned out that it was best to use cookies to remember the client’s last course viewed) of the WordPress page by which users of this blog can control what order tutorials for a range of subjects or topics could be for Course they design from the list of tutorials at this blog, building on the tutorial of a couple of days ago called WordPress Blog Course Design Looks Tutorial as shown below?
How about we work on the “Course” WordPress “New Page” ( as of a few days ago … as simple as <iframe id="icourse" src="../PHP/design_a_course.php?show=y" width="100%" height="800"></iframe> )) that appears in the top menu that contains up to three parts:
new (as of two days ago) optional dropdown up the top that exists if another IP address user has shared any/all of their Course Designs, that you can include in your own IP address user list of Course Designs so that they then show in the next section down as a link (with background image)
links (with background images) to previously created courses by any user on the IP address involved (yes, cookie logic introduced today to allow user to go back to last course blog posting undertaken via a new “Last” menu option (on top of the “Course” menu option)) … like a few days back, but as of a couple of days ago there was an improved look, via CSS and PHP
an iframe to some PHP which asks the user to optionally create new Course Design for users of the IP address involved … like a few days back, but as of a couple of days ago there was an improved look, via CSS and lots more functionality via PHP
So what changes were needed to the landing page updater? None, but we needed to update the PHP file for the iframe as mentioned above, as below …
… and there were changes needed for PHP code in wp-content/themes/twentyten/header.php because it establishes the header Javascript and two sections of code are involved …
var ourck=location.search.split('ck=')[1] ? location.search.split('ck=')[1].split('&')[0] : '';
var ourpp=location.search.split('pp=')[1] ? location.search.split('pp=')[1].split('&')[0] : '';
var ourpn=location.search.split('pn=')[1] ? location.search.split('pn=')[1].split('&')[0] : '';
var ourpage=location.search.split('page_id=')[1] ? location.search.split('page_id=')[1].split('&')[0] : '';
var ourp=location.search.split('p=')[1] ? location.search.split('p=')[1].split('&')[0] : '';
var ourcourseurl='';
var ourcoursetitle='';
… at the top just under <script type=’text/javascript’> and …
An idea for a live run could be to look at the WordPress blog’s Newish (menu) Page called “Course”, and note that if you ever follow through, yourself, and ever undertake a course then a cookie will be created so that the next time you visit the blog a new “Last” menu item will be over the usual “Course” menu item to allow you to go to that last Course blog posting you were last visiting however long ago (within last 6 months, I think). Hope the tutorial can help you out in some way.
As another further follow up to … “This WordPress blog could benefit from a directed order of tutorials studied for a particular topic. This may not suit everybody, but it may suit some, and if a system is created that is optional, that can sit on top of what functionality is already there, all the better.” … how about we improve the looks and functionality of the WordPress page by which users of this blog can control what order tutorials for a range of subjects or topics could be for Course they design from the list of tutorials at this blog, building on yesterday’s WordPress Blog Course Design Page Tutorial as shown below?
How about we work on the “Course” WordPress “New Page” ( as of yesterday … as simple as <iframe id="icourse" src="../PHP/design_a_course.php?show=y" width="100%" height="800"></iframe> )) that appears in the top menu that contains up to three parts:
new optional dropdown up the top that exists if another IP address user has shared any/all of their Course Designs, that you can include in your own IP address user list of Course Designs so that they then show in the next section down as a link (with background image)
links (with background images) to previously created courses by any user on the IP address involved (no cookies used yet) … like yesterday, but today there is an improved look, via CSS and PHP
an iframe to some PHP which asks the user to optionally create new Course Design for users of the IP address involved … like yesterday, but today there is an improved look, via CSS and lots more functionality via PHP
So what changes were needed to the landing page updater? None, but we needed to update the PHP file for the iframe as mentioned above, as below:
As a further follow up to … “This WordPress blog could benefit from a directed order of tutorials studied for a particular topic. This may not suit everybody, but it may suit some, and if a system is created that is optional, that can sit on top of what functionality is already there, all the better.” … how about we set up a WordPress page by which users of this blog can control what order tutorials for a range of subjects or topics could be for Course they design from the list of tutorials at this blog?
How about we create a “Course” WordPress “New Page” ( as simple as <iframe id="icourse" src="../PHP/design_a_course.php?show=y" width="100%" height="800"></iframe> ) that appears in the top menu and it contains two parts:
links to previously created courses by any user on the IP address involved (no cookies used yet)
an iframe to some PHP which asks the user to optionally create new Course Design for users of the IP address involved
So what changes to the landing page updater are required? None, but we need to create a new PHP file for the iframe as mentioned above, as below:
And did the PHP code in wp-content/themes/twentyten/functions.php off the WordPress Blog’s document root directory need to change … yes, to code so that there is no “Previous link” for the first tutorial of a course and no “Next link” for the last tutorial of a course:
if ( ! function_exists( 'get_tutorial_topic' ) ) :
/**
* Get tutorial topic (word).
*
* @since October 2014 by RJM Programming
*/
function get_tutorial_topic($thistopic) {
$words = explode(" ", str_replace(" ", "++", str_replace("~~", "#~", $thistopic)));
if (sizeof($words) > 1) {
return " " . $words[0];
}
return "";
}
endif;
if ( ! function_exists( 'previous_next' ) ) :
/**
* Allow for next and previous via &pn= and &pp= respectively.
*
* @since October 2014 by RJM Programming
*/
function previous_next($both = true) {
if (isset($_GET['pp']) || isset($_GET['pn'])) {
An idea for a live run could be to look at the WordPress blog’s New (menu) Page called “Course”. Hope the tutorial is of some interest for you, and see you later.
As another follow up to … “This WordPress blog could benefit from a directed order of tutorials studied for a particular topic. This may not suit everybody, but it may suit some, and if a system is created that is optional, that can sit on top of what functionality is already there, all the better.” … how about we set up a WordPress database means by which the the administrator of this blog can control what order tutorials for a range of subjects or topics could be?
How about we allow for the WordPress MySql wp_posts table’s post_excerpt field be used to contain either …
a degree of difficulty numerical rating
the query string parts &pp=[blog id of previous blog post of interest to current one] and &pn=[blog id of next blog post of interest to current one]&title=[blog posting title]
… because the post_excerpt database column is currently not being utilized, and is easier to implement than WordPress custom fields.
So what changes to the landing page updater are required? For the background to it please read the blog posting called Extended Linux Crontab Curl Tutorial would hold the answer to where the most efficient solution to this lies, in adjusting the PHP code called tutorial_options.php here as below:
And did the PHP code in wp-content/themes/twentyten/functions.php off the WordPress Blog’s document root directory need to change … do fish swim? … see the bits in bold, in particular below:
if ( ! function_exists( 'get_tutorial_topic' ) ) :
/**
* Get tutorial topic (word).
*
* @since October 2014 by RJM Programming
*/
function get_tutorial_topic($thistopic) {
$words = explode(" ", str_replace(" ", "++", str_replace("~~", "#~", $thistopic)));
if (sizeof($words) > 1) {
return " " . $words[0];
}
return "";
}
endif;
if ( ! function_exists( 'previous_next' ) ) :
/**
* Allow for next and previous via &pn= and &pp= respectively.
*
* @since October 2014 by RJM Programming
*/
function previous_next($both = true) {
if (isset($_GET['pp']) || isset($_GET['pn'])) {
Access the rjmprogramming.com.au domain Landing Page
At the tutorial dropdown you’ll see the 3 blog postings that had their post_excerpt fields filled out up the top and you could “motor” down to the second one dated 20130722 … these are blog posts flagged as part of a course in the order from start of course through to end of course where the Course name is the first word of the blog posting title as shown on the dropdown (so you can tell where one course starts and the next starts)
Hopefully … voila (as per live run as was the “live run” from tutorial way below + a Course name inclusion functionality improvement so that it is like … live run again) … do the same for 20141006 (today’s) and you don’t get the new functionality, but hopefully it doesn’t cause any bugs (as you change code the top priority should be firstly not to break other parts that used to work, and to proceed successfully with new functionality that works)
By the way, the file methodologies of the tutorial below are still active, and we still have to explain how a user can control their own personalized Course Designs, and this file method will come back to the fore then, am pretty sure.
As a follow up to … “This WordPress blog could benefit from a directed order of tutorials studied for a particular topic. This may not suit everybody, but it may suit some, and if a system is created that is optional, that can sit on top of what functionality is already there, all the better.” … how about we set up the means by which the user or the administrator of this blog (I knew it) can control what order tutorials for a range of subjects or topics could be?
If you’re designing this (and please don’t get any ideas that there is just the way suggested here) you set a “get parameters” way to express the fact that you want this “guided” Course Design help but don’t know what is a good tutorial to come before nor after, and what logic paths, in order …
accept last recorded &pp=[blog id of previous blog post of interest to current one] and &pn=[blog id of next blog post of interest to current one] advice for this current blog posting from this user (ie. use cookies)
accept last recorded &pp=[blog id of previous blog post of interest to current one] and &pn=[blog id of next blog post of interest to current one] advice for this current blog posting from this client using their IP address
accept last recorded &pp=[blog id of previous blog post of interest to current one] and &pn=[blog id of next blog post of interest to current one] advice for this current blog posting from the administrator of this blog
accept last recorded &pp=[blog id of previous blog post to current one] and &pn=[blog id of next blog post to current one]
disregard display of previous and next suggested tutorials
… to follow in order to come up with the blog posting display that you end up with.
Let’s just first concentrate on options 3 and 4 and 5 above … how about we use &pp=&pn= to mean that if no previous and/or next tutorial information is found anywhere you should (5) “disregard display of previous and next suggested tutorials”, whereas if you specify &pn=&pp= to mean that if no previous and/or next tutorial information is found anywhere you should (4) “accept last recorded &pp=[blog id of previous blog post to current one] and &pn=[blog id of next blog post to current one]”.
This sounds a silly detail to worry about, but the fact is, if this detail is sorted out, this whole “guided” Course Design system can be automated from this domain’s landing page‘s tutorial dropdown, or any other dropdown you want to design to direct people to this WordPress Blog’s tutorials.
And where could we intervene to fix this up? Well, well, well (three holes in the ground … chortle, chortle) … you’d have to be an avid follower of this blog to remember, but the blog posting called Extended Linux Crontab Curl Tutorial would hold the answer to where the most efficient solution to this lies, in adjusting the PHP code called tutorial_options.php here as below …
… to enable an ID= on the links to allow for future Javascript DOM possibilities and a file arrangement for admin and/or IP user based tailoring of previous and/or next blog posting “get” parameters. Future tutorials on this “theme” will look at functionality to maintain and populate these files in a sensible way.
Another question occurs to me. Shouldn’t the name of the proposed Course a blog posting belongs to be part of the display? No, I wouldn’t do that!“Yeah, but who asked you? You’re a cat, remember?”No furry beastings were hurt during the creation of this blog posting.
Is the name of the Course a thing that the Course Designer should designate, or can it be derived from the WordPress blog? This will vary in people’s outlook. Some will be fine for (one of) the WordPress blog posting Category (or Tag?) (names) to suffice, and think I’d be in that camp. But I’m also in the camp that says this could be overridden by a user or administrator defined method … feel a “get parameter” coming on … so let’s see what the adjusted code for the “framework” of these new requirements looks like (the tutorial_options.php needed adjustment for this concept as well) … it panned out to be better to focus on the first word of the blog posting’s title as a better bet for what the Course name could be derived from … the PHP code (snippet) goes into wp-content/themes/twentyten/functions.php off the WordPress Blog’s document root directory …
if ( ! function_exists( 'get_tutorial_topic' ) ) :
/**
* Get tutorial topic (word).
*
* @since October 2014 by RJM Programming
*/
function get_tutorial_topic($thistopic) {
$words = explode(" ", str_replace(" ", "++", str_replace("~~", "#~", $thistopic)));
if (sizeof($words) > 1) {
return " " . $words[0];
}
return "";
}
endif;
Access the rjmprogramming.com.au domain Landing Page
At the tutorial dropdown “motor” down to the tutorial at 20130722 … OOPs (chortle, chortle) … and choose this
Hopefully … voila (as per live run as was the “live run” from tutorial below + a Course name inclusion functionality improvement so that it is like … live run again) … do the same for 20141006 (today’s) and you don’t get the new functionality, but hopefully it doesn’t cause any bugs (as you change code the top priority should be firstly not to break other parts that used to work, and to proceed successfully with new functionality that works)
This WordPress blog could benefit from a directed order of tutorials studied for a particular topic. This may not suit everybody, but it may suit some, and if a system is created that is optional, that can sit on top of what functionality is already there, all the better.
When you want to add PHP (or HTML, for that matter) functionality, with web work, I personally find the get parameters useful, and this is usually fine as long as the data required of this functionality …
is not too long
is not sensitive (ie. not a password or username)
… otherwise it is better to use post parameters or a database or a file arrangement of some sort.
Step one in our Course Design ideas is to introduce two new ideas with two new get parameters, so that:
&pp=[blog id of previous blog post of interest to current one]
&pn=[blog id of next blog post of interest to current one]
Here’s a first draft of a PHP snippet of code to use (though over time it may change):
if ( ! function_exists( 'previous_next' ) ) :
/**
* Allow for next and previous via &pn= and &pp= respectively.
*
* @since October 2014 by RJM Programming
*/
function previous_next($both = true) {
if (isset($_GET['pp']) || isset($_GET['pn'])) {
echo "<table style='width:98%; background-color: #F6F5F1;'><tbody><tr>";
if (isset($_GET['pp'])) {
echo "<th><a target=_blank title='Previous' href='" . str_replace("?" . $_SERVER['QUERY_STRING'], "", $_SERVER['REQUEST_URI']) . "?p=" . $_GET['pp'] . "&pn=" . $_GET['p'] . "'>Previous Suggestion</a></th>";
}
if (isset($_GET['pn'])) {
echo "<th><a target=_blank title='Next' href='" . str_replace("?" . $_SERVER['QUERY_STRING'], "", $_SERVER['REQUEST_URI']) . "?p=" . $_GET['pn'] . "&pp=" . $_GET['p'] . "'>Next Suggestion</a><th>";
}
if ($both) {
echo "</tr><tr>";
if (isset($_GET['pp'])) {
echo "<td><iframe src='" . str_replace("?" . $_SERVER['QUERY_STRING'], "", $_SERVER['REQUEST_URI']) . "?p=" . $_GET['pp'] . "#content' width=400 height=800></iframe></td>";
}
if (isset($_GET['pn'])) {
echo "<td><iframe src='" . str_replace("?" . $_SERVER['QUERY_STRING'], "", $_SERVER['REQUEST_URI']) . "?p=" . $_GET['pn'] . "#content' width=400 height=800></iframe></td>";
}
}
echo "</tr></tbody></table>";
}
}
endif;
So where does the code above belong in the WordPress source code? Well, for the TwentyOne theme of this blog, the answer is wp-content/themes/twentyten/functions.php off the WordPress Blog’s document root directory (where PHP functions go, generally).
And the plan will be to call it, for the top and bottom of current posting respectively:
<?php previous_next(false); ?>
<?php previous_next(true); ?>
So where does this code go? Well, for the TwentyOne theme of this blog, the answer is, in WordPress terminology, in The Loop, for the particular scenario, and the scenario here is the display of a single WordPress Blog posting, as typically happens via the Search Engine links or relevant dropdown links within this rjmprogramming.com.au domain … and this pans out to be within wp-content/themes/twentyten/single.php off the WordPress Blog’s document root directory … after these two lines of PHP code respectively …
<?php if ( have_posts() ) while ( have_posts() ) : the_post(); ?>
Try an example of a live run of the use of this new functionality here at this WordPress Blog … but there is more to do … and we will visit these other “things to do” over time … thanks for visiting … bye for now.
If this was interesting you may be interested in this too.
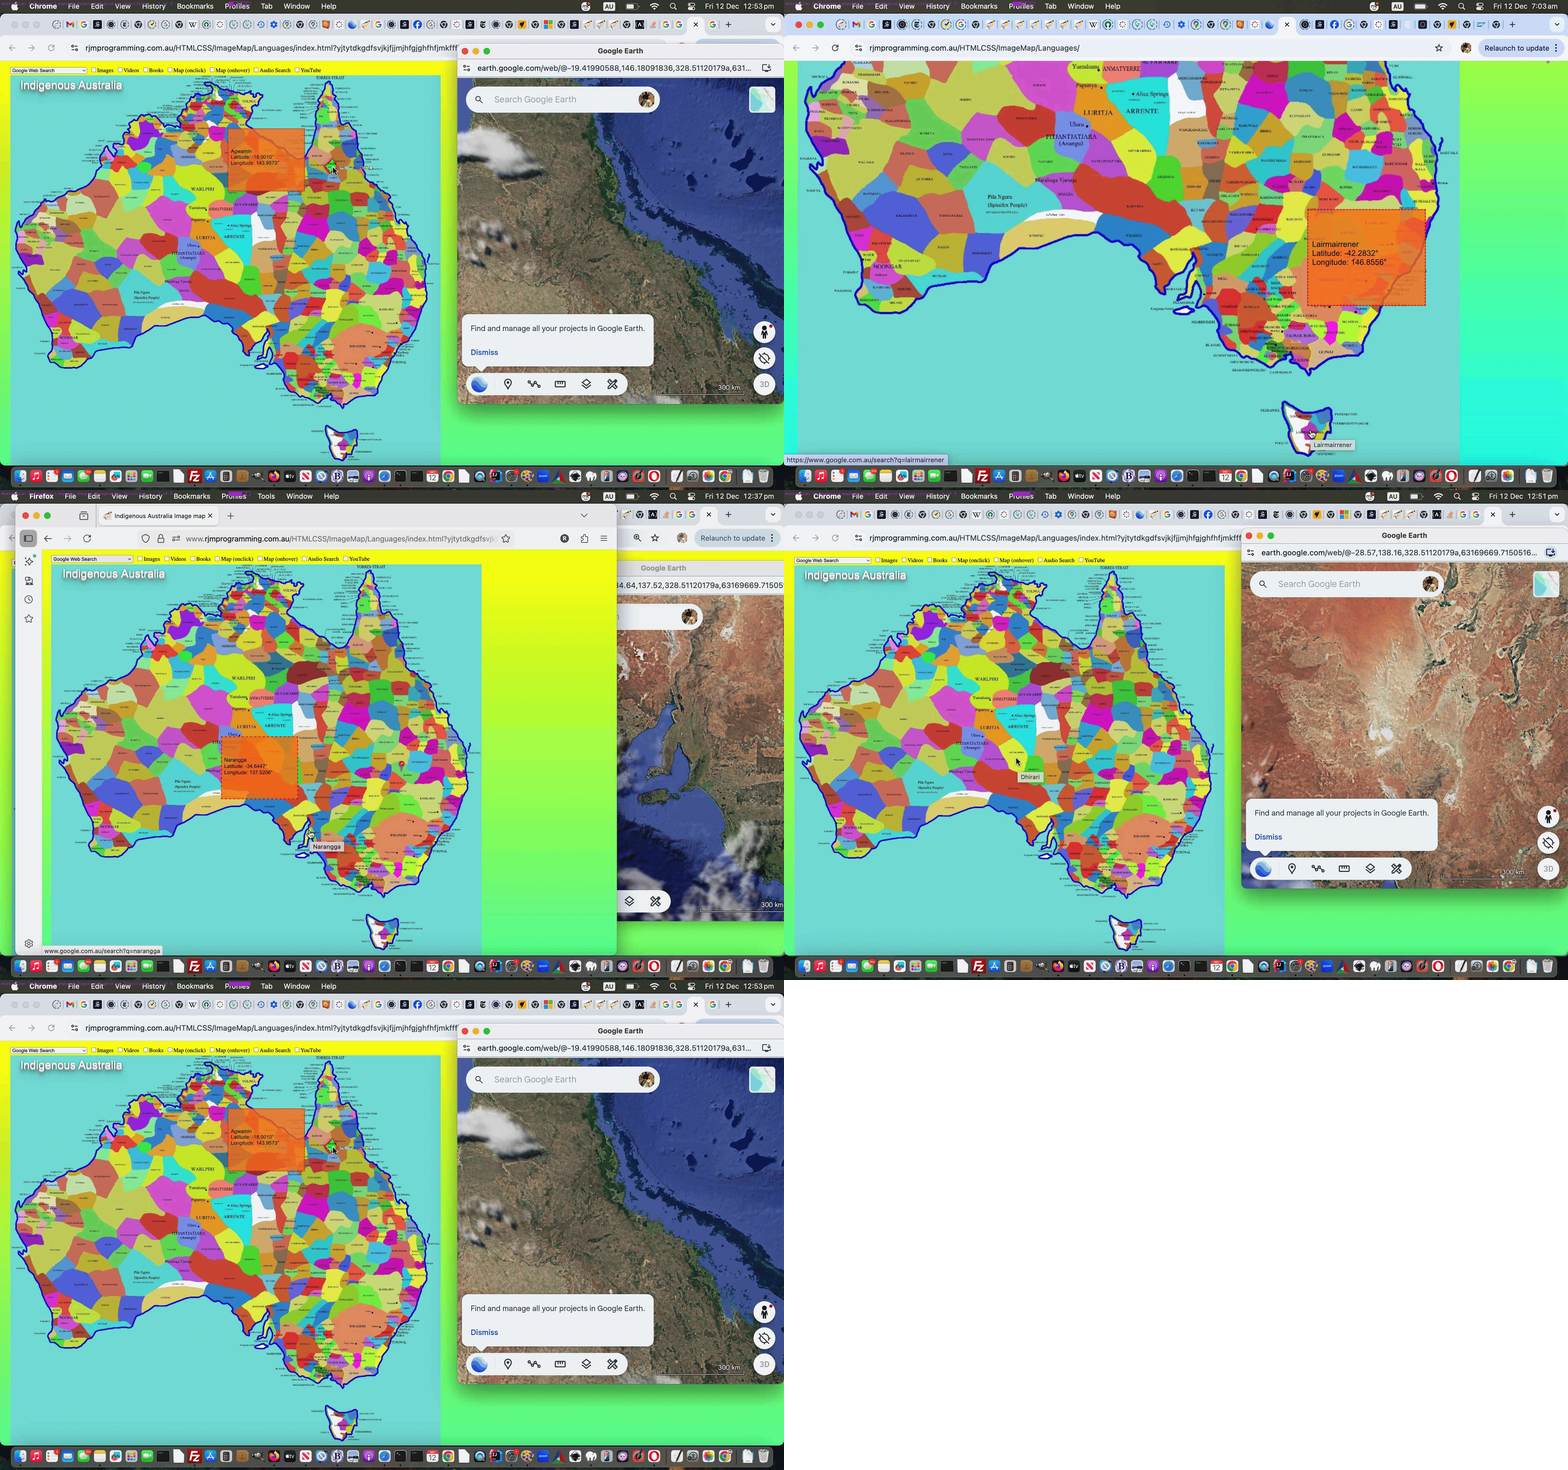
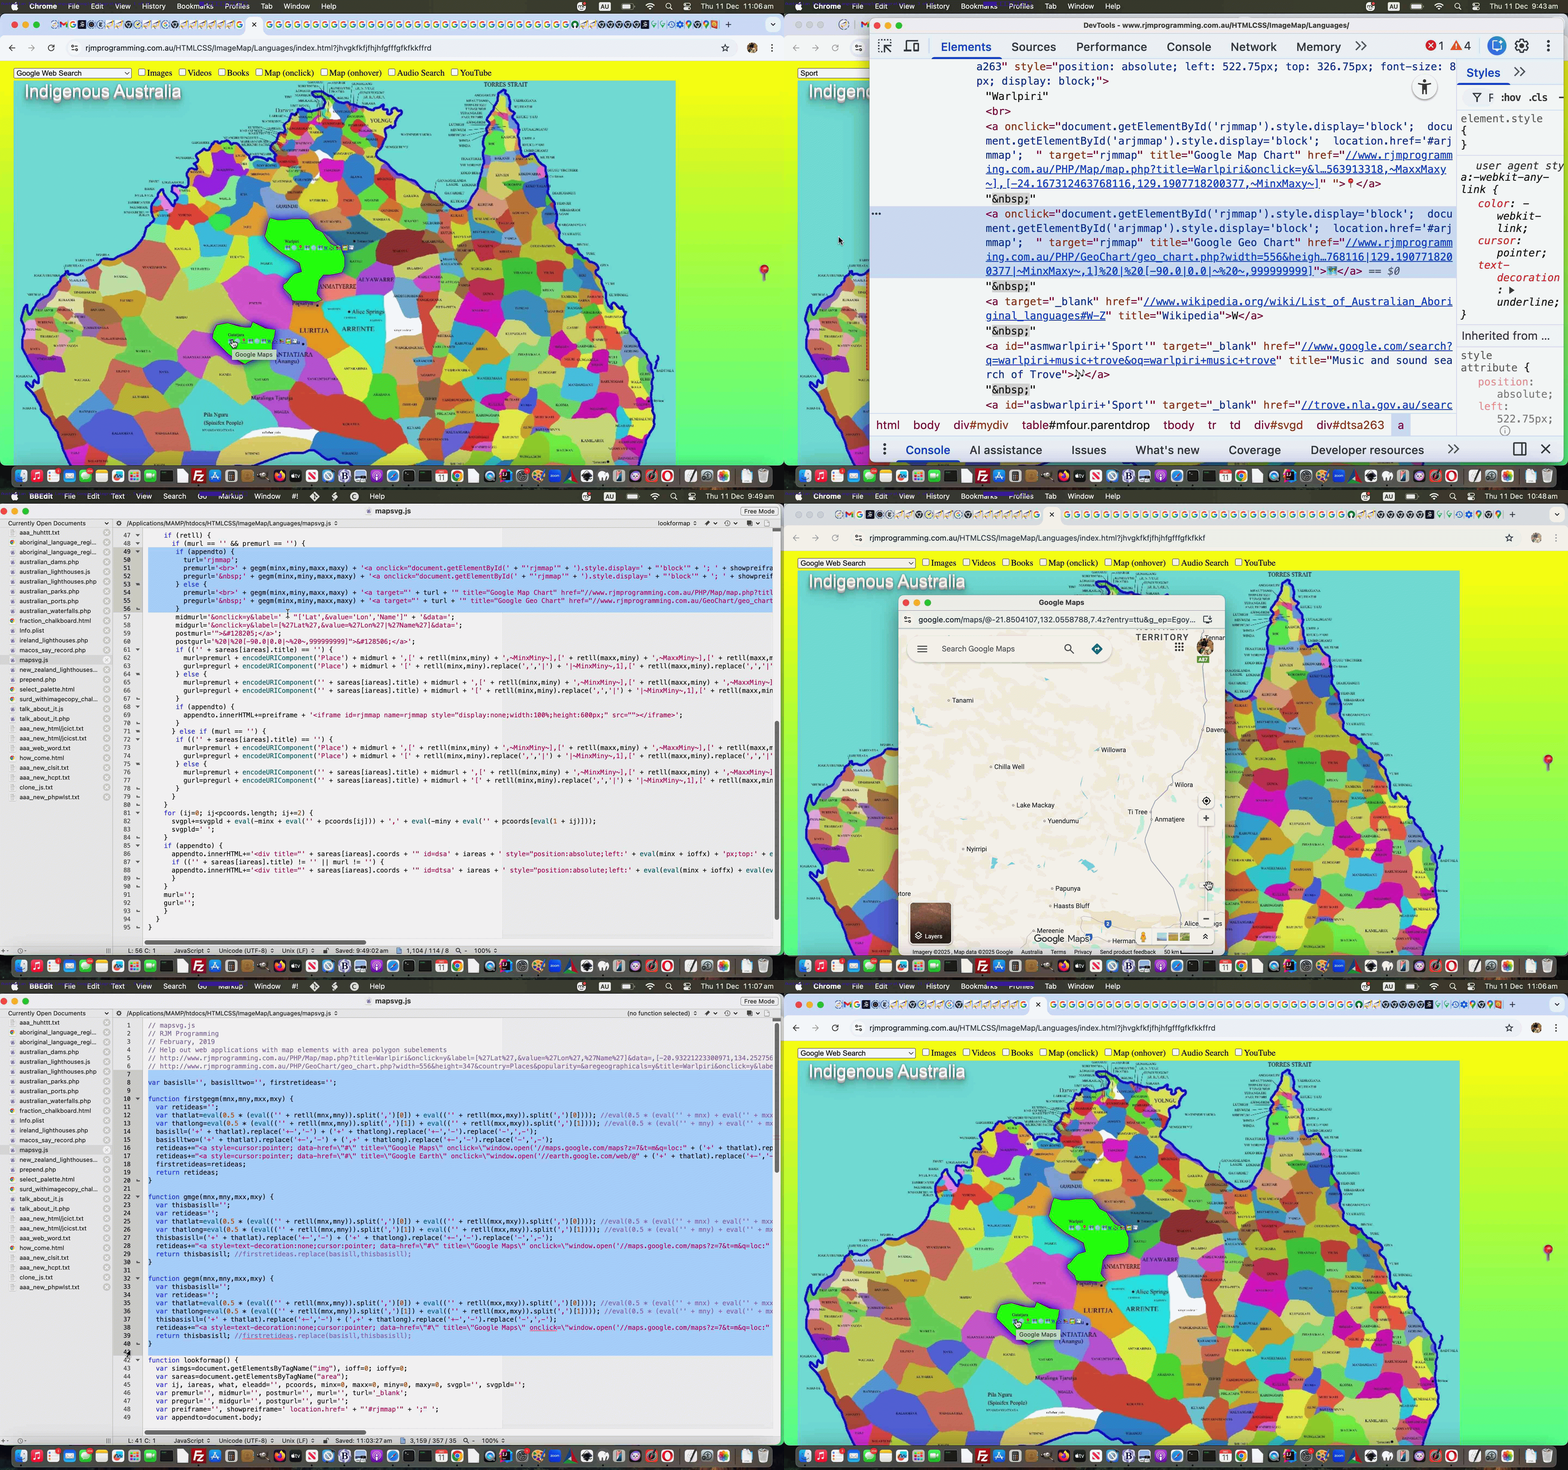
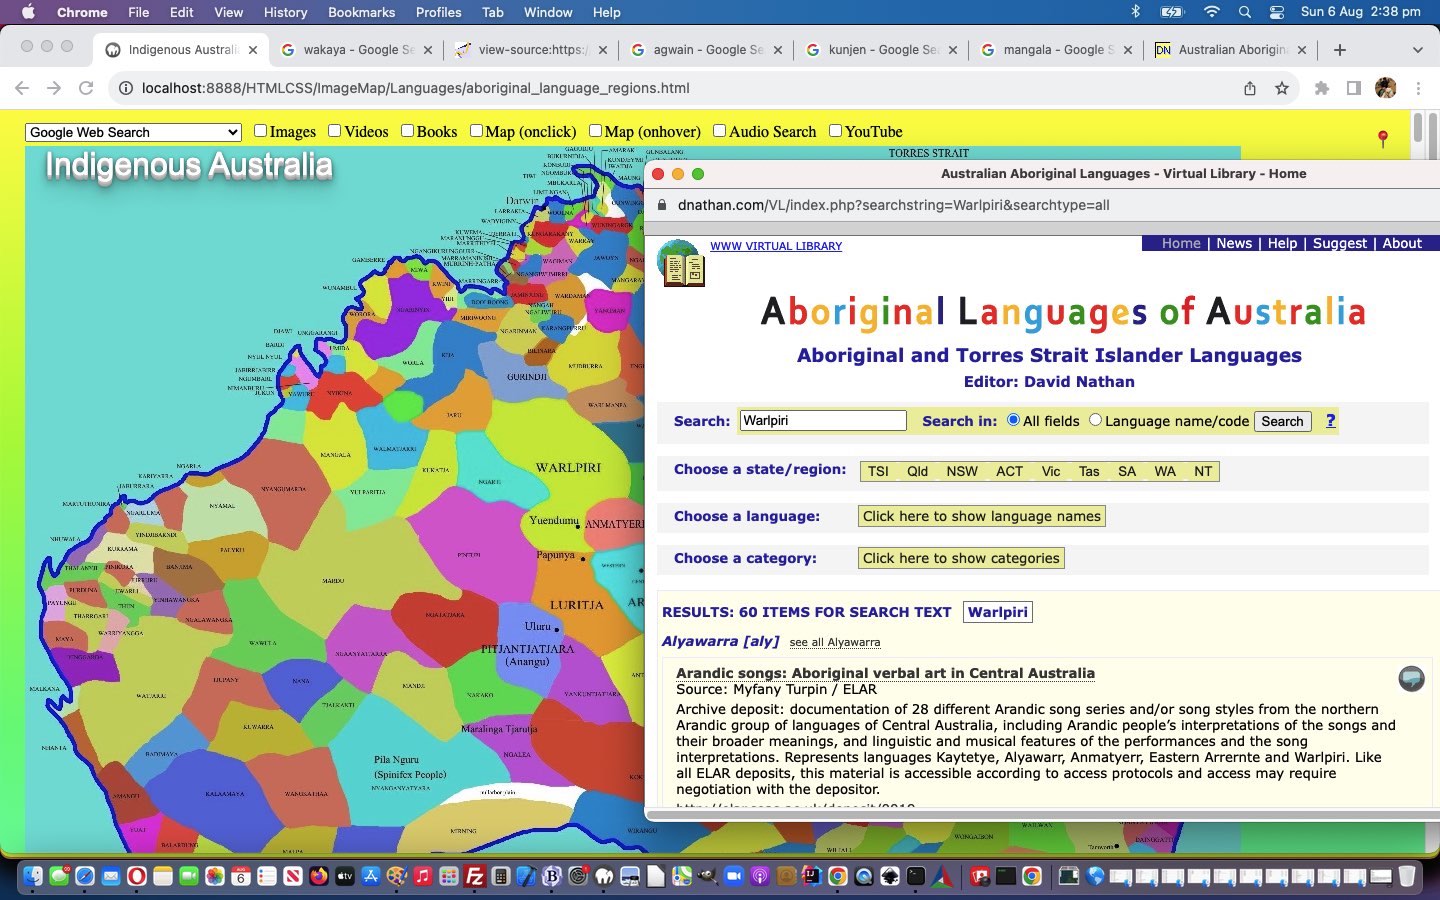
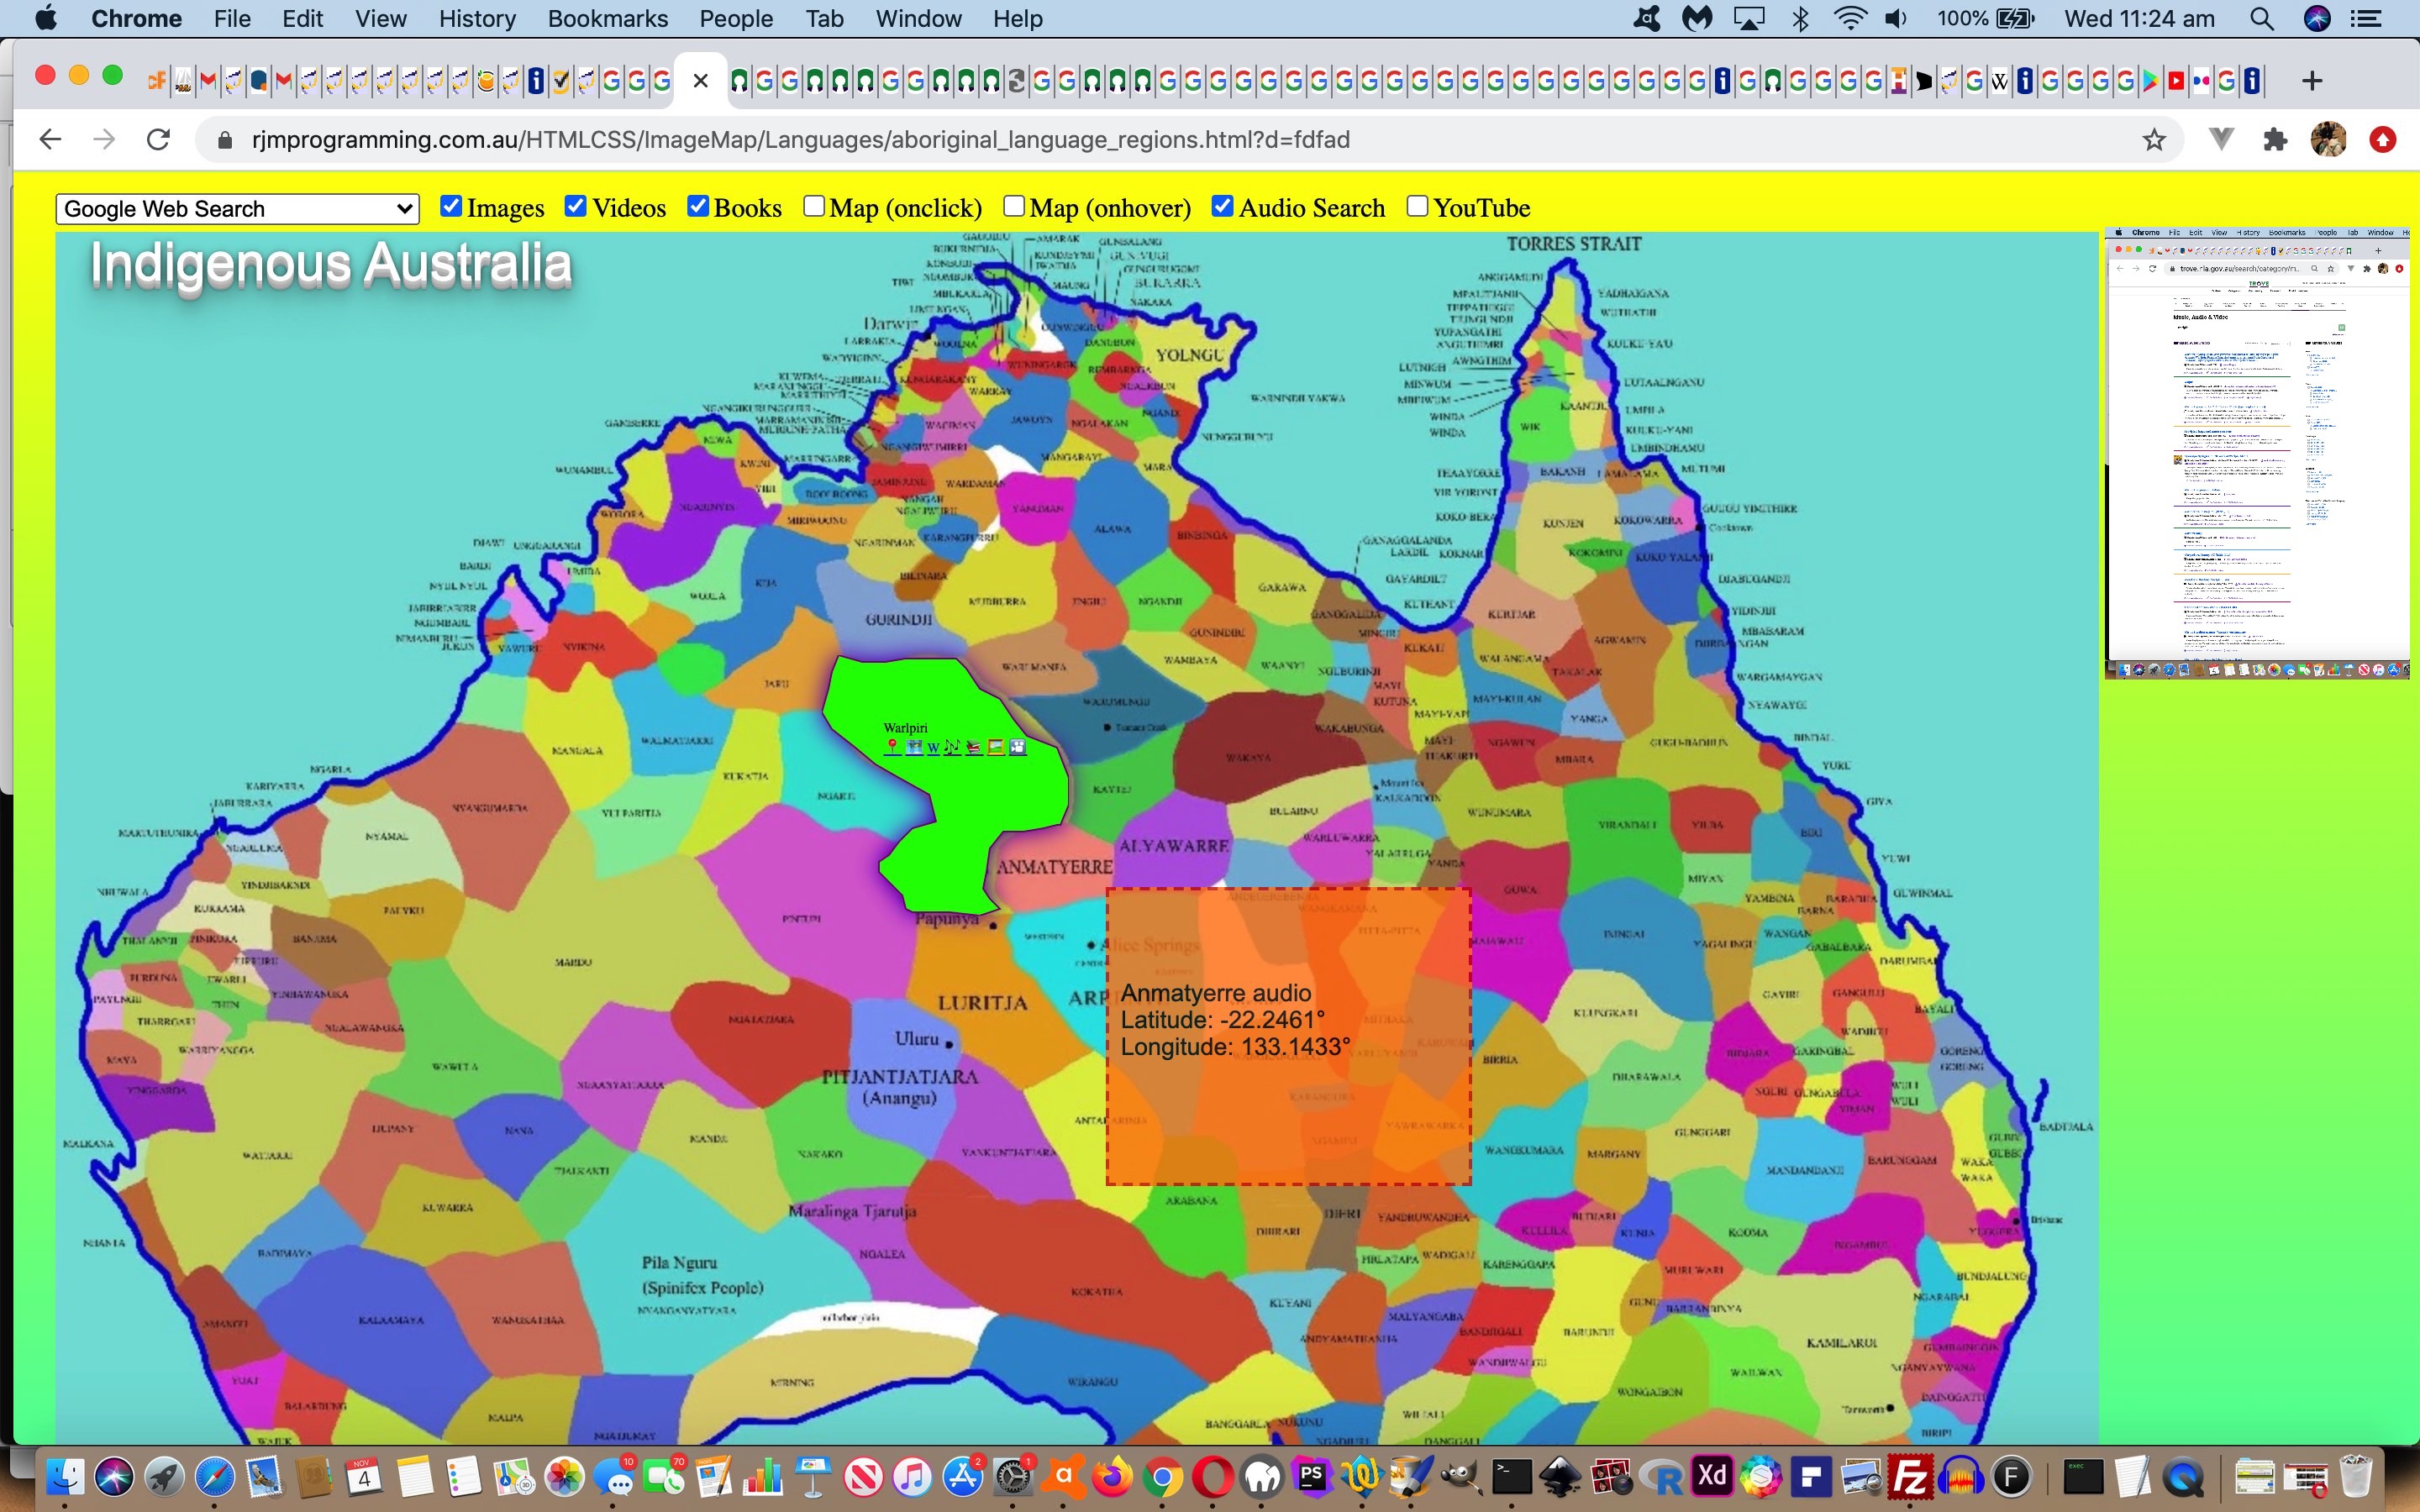
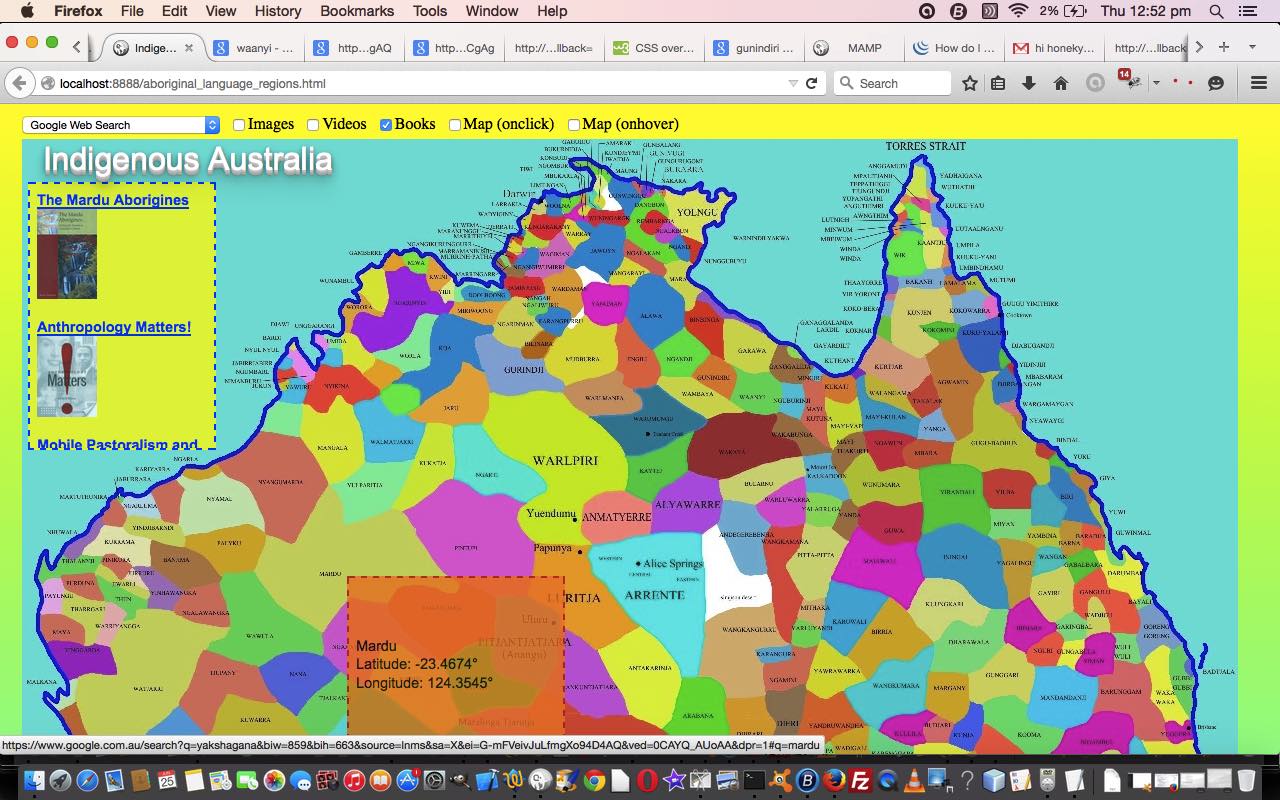
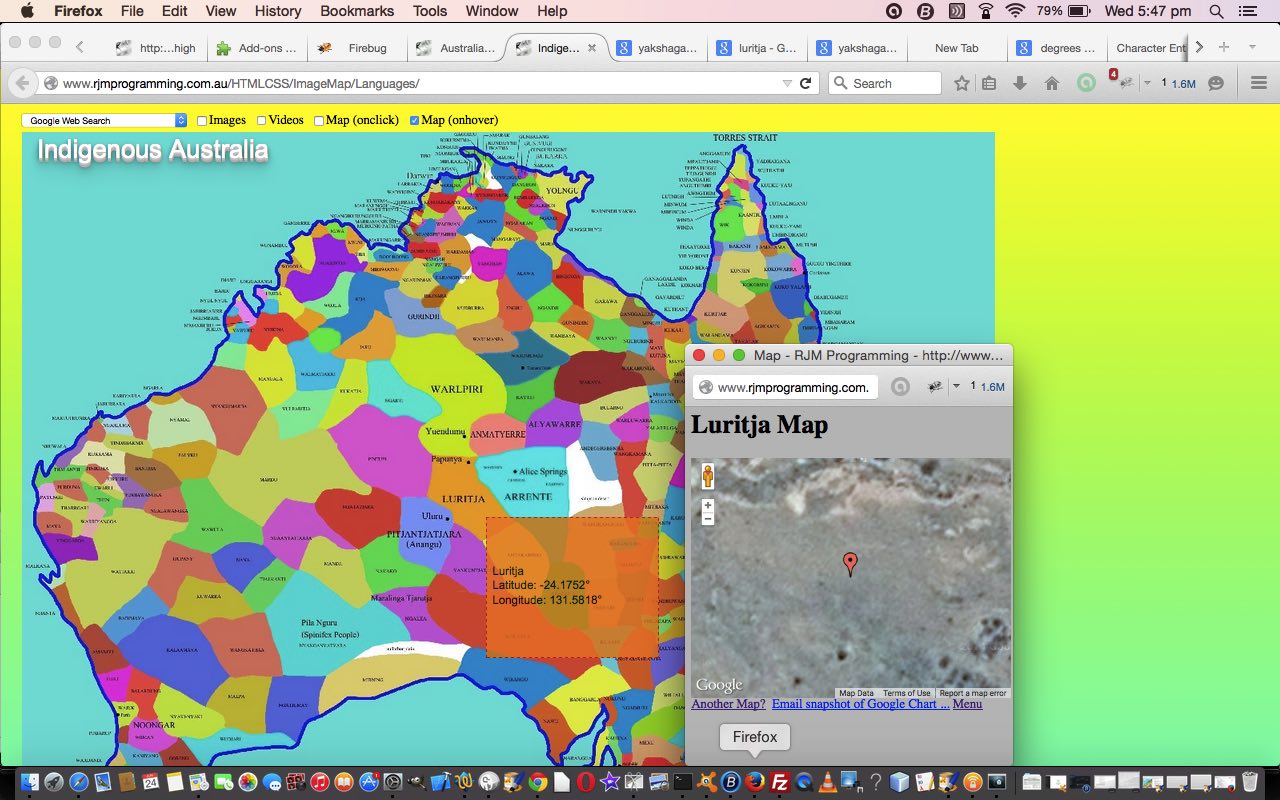
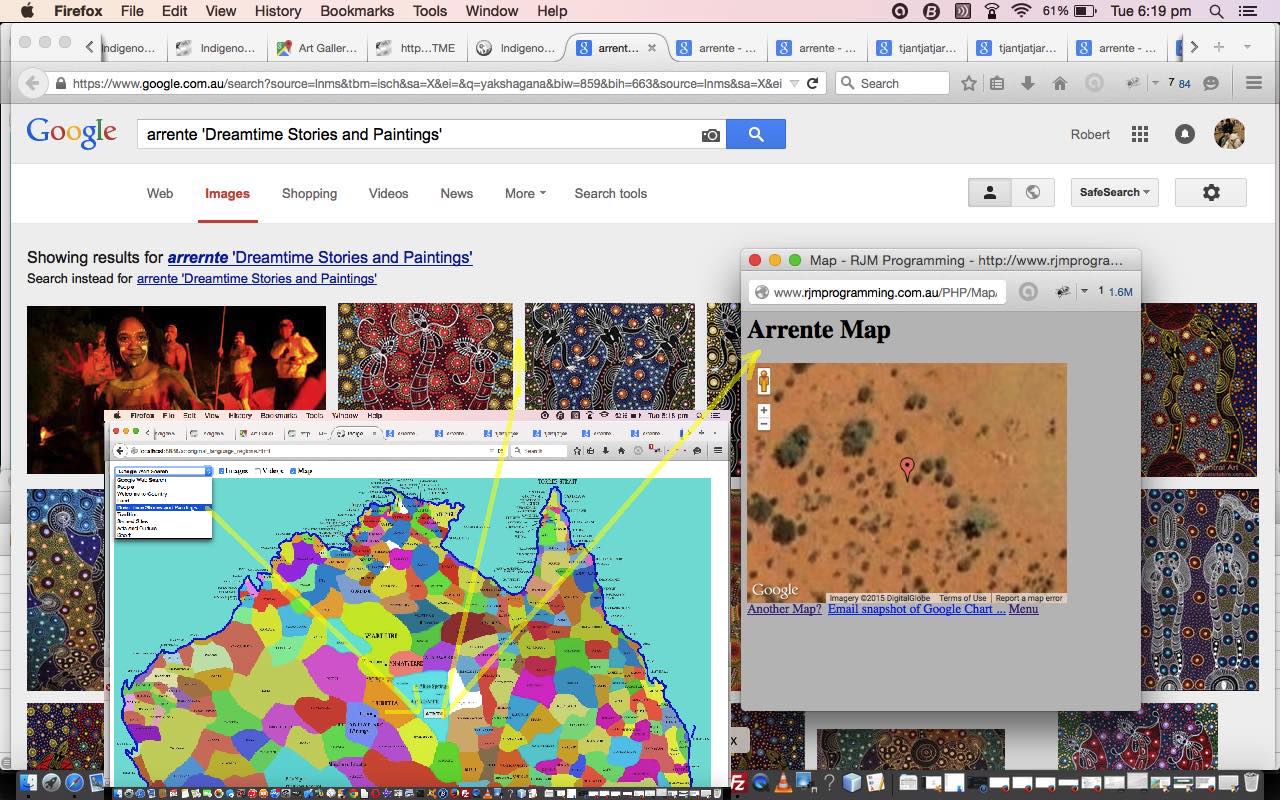
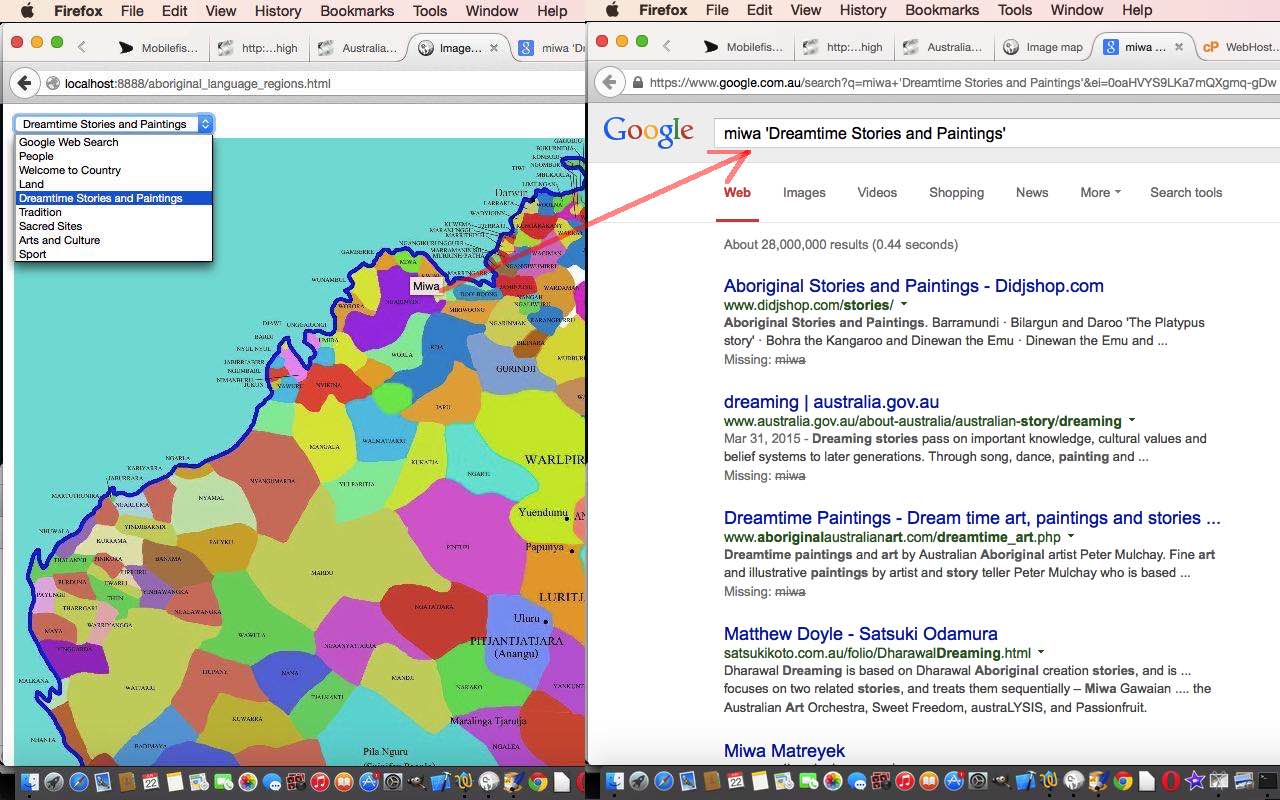
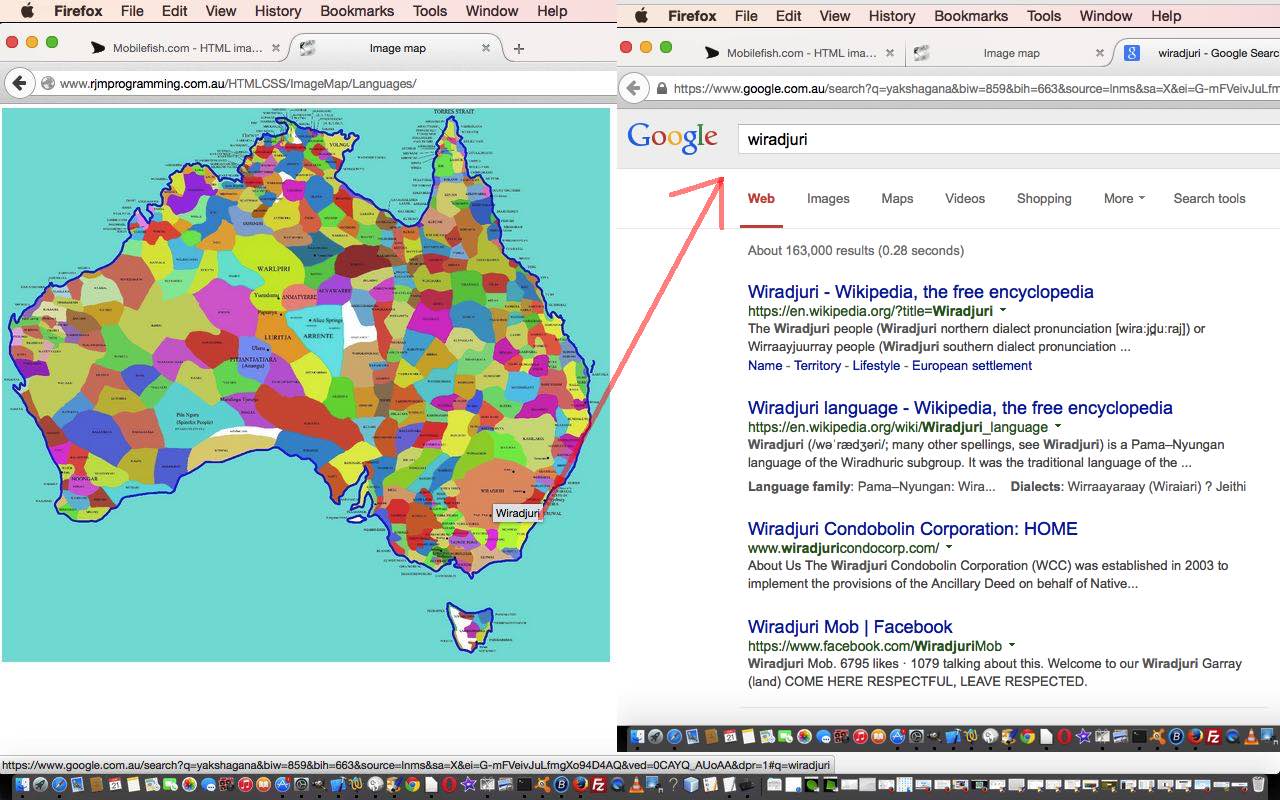
What’s “uniquify” in terms of Information Technology?
To turn an instance of a type into an instance of a new unique copy of the original type.
For us, it is a concept often called into play to separate one online viewer’s data from affecting the viewing of another’s data, or “settings”, concepts which cover the recent web browser tab icon SVG emoji ideas we talked about at the recent SVG Emoji Favicon and Title Tutorial. There we hadn’t coded with much thought to “personalizing” one “Emoji Menu” viewer’s web browser tab icon SVG emoji from another.
This “Emoji Menu” web browser tab icon SVG emoji creation work uses PHP to write out those favicon images (and yes, favicon images do not have to be named “favicon.svg” or “favicon.ico”), and we are choosing a guise of a user’s IP address as our “uniquifier” conduit means. You’ll see it being used in the latest draft …
favicon web browser tab icon … SVG type not accepted by all browsers and platforms …
dynamism … and today we start with another offshoot of thought regarding this, as well as …
document.title also showing in the web browser tab icon … universally accepted …
… ideas we wanted to get into by writing a pretty simple generic PHP helper emojiicon.php, we got a great heads up from regarding its logic, thanks, to dynamically create favicon.svg, currently looking like …
… in our nominated folder (so, so far not catering for a lot of online traffic … we’ll see) …
Well, we were re-researching the topic of Favicon (those images on the tabs of your web browser tabs) that we talked about when we presented Gimp Favicon via Logo Primer Tutorial, but we realize now, things have moved on with the web browsers supporting SVG svg+xml “favicons” so much better these days, that we’d better “get with the plan”, so to speak (though it might be better if I give that a rest for a minute).
…
…
…
…
…
…
…
…
…
…
…
…
Okay, minutes up!
With increased usage of SVG svg+xml text element solutions for things around here lately, we wondered whether there was a dynamic way to start using these SVG favicons, in some way. Then we thought of our SVG Clock work. At first we thought a favicon that is a relevant timestamp, but realized the impost on the web server is too big for that, and so we set out to present a local start time of the SVG Clock for a user of this web application. The SVG favicon basis is so simple …
Stick the SVG file in Document Root folder, and replace “11:54” with the relevant timestamp and we’re away, right? Yes, sort of, but there is the little matter of the relevant favicon link statement existing as a non-dynamic call to that SVG in the head section of the webpage.
Bit onerous, huh? But, what did work for us was to have a static starting wrong favicon SVG link (in head) statement that now goes in the parental svg_clock.htmlSVG Network Clock …
… those Page Visibility API ideas you might equate to “minimize” concepts, that originated when GUIs were left to deal with how to present the representation of an application when it is no longer front and center in front of the user as an opened up window. We’d “minimize” back down to the desktop icon or toolbar view of the application. Web browsers can have tabs for this equivalent purpose, and we can improve the usefulness of a web application that can still be useful when “minimized” out of the top viewing tab. Date and time themed web applications can be your more obvious candidate for usefulness here. Just present a form of “digital clock readout” and your web applications like our SVG Network Clock can still be a source of information, even when “minimized”. We think that is an improvement?!
MAMP Timekeeping Web Application Desktop Application Tutorial
We figured that an improvement on the progress with our Timekeeping web application of the recent MAMP Timekeeping Web Application Audio Broadcast Tutorial would be to mention what macOS or Mac OS X Desktop Application is topmost when the screenshot is taken. When thinking about solutions for this, there was not much time before thinking turned to …
Apple Script, which has its GUI Apple “look” … but also …
Apple Script PHP shell_exec and (macOS Terminal) command line accessible osascript command line “look” too
… and excellent resources such as this excellent one to read that made us realize a PHP codeline such as …
<?php
$tma="";
if (!file_exists($_SERVER['DOCUMENT_ROOT'] . DIRECTORY_SEPARATOR . 'script.jxa')) {
// Thanks to https://stackoverflow.com/questions/5292204/macosx-get-foremost-window-title
$scris="var seApp = Application(\"System Events\");
var oProcess = seApp.processes.whose({frontmost: true})[0];
var appName = oProcess.displayedName();
var url;
var title;
switch(appName) {
case \"Safari\":
url = Application(appName).documents[0].url();
title = Application(appName).documents[0].name();
break;
case \"Opera\":
url = Application(appName).windows[0].activeTab().url();
title = Application(appName).windows[0].activeTab().name();
break;
case \"Google Chrome\":
url = Application(appName).windows[0].activeTab().url();
title = Application(appName).windows[0].activeTab().name();
break;
case \"Google Chrome Canary\", \"Chromium\":
url = Application(appName).windows[0].activeTab().url();
title = Application(appName).windows[0].activeTab().name();
break;
default:
title = oProcess.
windows().
find(w => w.attributes.byName(\"AXMain\").value() === true).
attributes.
byName(\"AXTitle\").
value()
}
offer an optional audio broadcasting piece of functionality … presented via a new 📢 (📢) emoji button, that might accompany …
notifications
… when a screenshot is taken. As good as notifications are, it could be that the user is beavering away with their head down at work as the screenshot is taken, but welcome the audio queue that a Timekeeping screenshot has been taken. As well as that, with this new audio broadcasting, the *.aiff audio files created are available to share via email or SMS using the Web Share API interfacing code. This involved changes to …
MAMP Timekeeping Web Application Web Share Personalization Tutorial
Your words, helped out by some computer derived detail data, can help personalize your work using the Quarter Hour Timekeeping web application of yesterday’s MAMP Timekeeping Web Application Web Share API Tutorial which, at least with the Safari browser (and a whole lot of other macOS conditions), now integrates with the Web Share API to attach images to prepared emails with a “body blurb”. It is that prepared “body blurb” we are trying to refine, today, should the user attach any of those Timekeeper screenshot files created via macOS screencapture command.
This is because these screenshot file names, by our convention, are of the format …
screen-yyyymmdd-hhmi.jpg
… within the macOS MAMP‘s $_SERVER[‘DOCUMENT_ROOT’] folder (though the path to the file is unavailable to File API File object programmers).
That, teamed with the fact that individual user comments linked to any one quarter hour screenshot image has an ID attribute of the form …
tatd_yyyymmdd_hhmi
… and you have modified Javascript helping the user to tailor better personalized and detail email or SMS communications using the changedmacos_say_record.js external Javascript via …
var wsadate=new Date();
var lfd=String.fromCharCode(10);
function getwsadate(dd, mm, yyyy, hh, mi) {
wsadate=new Date(yyyy, eval(-1 + eval('' + mm)), dd, hh, mi, 0, 0);
var outdstr=wsadate.toDateString() + ' ' + wsadate.toTimeString();
outdstr=outdstr.replace('Sun ', 'Sunday ').replace('Mon ', 'Monday ').replace('Tue ', 'Tuesday ').replace('Wed ', 'Wednesday ').replace('Thu ', 'Thursday ').replace('Fri ', 'Friday ').replace('Sat ', 'Saturday ');
outdstr=outdstr.replace(':00 ', ' ').replace(' Jan ', ' January ').replace(' Feb ', ' February ').replace(' Mar ', ' March ').replace(' Apr ', ' April ').replace(' Jun ', ' June ').replace(' Jul ', ' July ').replace(' Aug ', ' August ').replace(' Sep ', ' September ').replace(' Oct ', ' October ').replace(' Nov ', ' November ').replace(' Dec ', ' December ');
//console.log('tatd_' + yyyy + mm + dd + '_' + hh + mi);
if (document.getElementById('tatd_' + yyyy + mm + dd + '_' + hh + mi)) {
//console.log('yes tatd_' + yyyy + mm + dd + '_' + hh + mi);
if (document.getElementById('tatd_' + yyyy + mm + dd + '_' + hh + mi).value.trim() != '') {
outdstr+=' ' + String.fromCharCode(10) + '"' + document.getElementById('tatd_' + yyyy + mm + dd + '_' + hh + mi).value + '"';
} else if (document.getElementById('tatd_' + yyyy + mm + dd + '_' + hh + mi).innerHTML.trim() != '') {
outdstr+=' ' + String.fromCharCode(10) + '"' + document.getElementById('tatd_' + yyyy + mm + dd + '_' + hh + mi).innerHTML + '"';
}
}
lfd='';
return outdstr + String.fromCharCode(10);
}
async function atclick() {
const files = document.getElementById('files').files;
var moressi='', ifl=0, lessssi='';
lessssi=moressi;
while (lessssi.indexOf(String.fromCharCode(10)) != -1) {
lessssi=lessssi.replace(String.fromCharCode(10), ' ');
}
// feature detecting navigator.canShare() also implies
// the same for the navigator.share()
if (!navigator.canShare) {
//if (document.URL.indexOf('localhost') != -1) { alert('Can not share'); }
document.getElementById('output').textContent = `Your browser doesn't support the Web Share API.`;
return;
//} else {
//if (document.URL.indexOf('localhost') != -1) { alert('Can Share'); }
}
if (navigator.canShare({ files })) {
try {
console.log('Can share');
await navigator.share({
files,
title: 'Timekeeping screenshots' + lessssi + ' or media or documents',
text: 'Timekeeping screenshots' + moressi + ' perhaps?! Take a look at media or documents below' + String.fromCharCode(10) + String.fromCharCode(10)
});
document.getElementById('output').textContent = 'Shared!';
} catch (error) {
document.getElementById('output').textContent = `Error: ${error.message}`;
}
} else {
//if (document.URL.indexOf('localhost') != -1) { alert('Cannot share'); }
document.getElementById('output').textContent = `Your system doesn't support sharing these files.`;
}
lfd=String.fromCharCode(10);
}
the changed HTML and Javascriptquarter_hour_timer.html (we still ask you to download to MAMP‘s $_SERVER[‘DOCUMENT_ROOT’] “HTMLCSS” subfolder) Web Application supervisor …
<script type='text/javascript' src='//www.rjmprogramming.com.au/web_share_api_test.js?populate=as_necessary' defer></script>
… nicely
… but as we’ve warned before you may need all these for total success for the Timekeeping Quarter Hour Timer web application (that can screenshot, can create notification when screenshot taken, and have audio commentary, and share screenshot image(s) or Timekeeper URL) …
… sitting up at the Document Root of your public domain, that “?ongoing=” based $_GET[‘ongoing’] argument deliberate, effectively asking the code to look out for “on the fly” HTML elements created within an execution run of the webpage.
<script type='text/javascript'>
var commentary_array=['textarea', 'You can enter comments about this screenshot here %value%outerHTML%@yyyymmdd%hhmm%.', 'img', 'Timekeeper screenshot here %id%@yyyymmdd%hhmm%.'];
</script>
… where the first field describes an HTML element attribute to first look at, the optional second is a stand by attribute, followed by “date extraction” fields to match with numerical data found so as to substitute the blue parts with a “date and timestamp” string.
not necessarily frontmost … but benefitting from any …
notification reminders separate from web activities and webpage focus issues can help tell the user when they might want to turn back attention to the timekeeping screenshot recording
This needs PHP to work and it needs real access via PHP exec function to underlying operating system commands. When this happens, we still try to offer a public RJM Programming interface but this interface is far less useful if you have not downloaded to your local Apache/PHP/MySql local web server (such as a MAMP one) as per …
settle for mobile platforms never being able to screenshot, on this round of looking, and redirecting to the “Monthly Chronicler” web application (of (the unchanged) monthly_chronicler.html we ask you to download to MAMP‘s $_SERVER[‘DOCUMENT_ROOT’] “HTMLCSS” subfolder) …
<script>
if (navigator.userAgent.match(/Android|BlackBerry|iPhone|iPod|iPad|Opera Mini|IEMobile/i)) {
document.write("<scri" + "pt> location.href='./monthly_chronicler.html'; </scr" + "ipt> <style> a.adate { border:1px solid green; background-color:#f0f0f0; border-radius:50px; } </style> <table id=mtable style=display:none;width:95%;><tr><th><input style=width:450px; placeholder='' id=iask type=text value=''></input><</th><th><input onclick=\" document.getElementById('mtable').style.display='none'; document.getElementById('mybod').style.opacity='1.0'; postask(document.getElementById('iask'));\" type=button value=OK></input></th><th><input onclick=\"document.getElementById('iask').value=''; document.getElementById('mtable').style.display='none'; document.getElementById('mybod').style.opacity='1.0'; \" type=button value=Cancel></input></th></tr></table>");
}
</script>
… dumbing down, but working more reliably, using “Javascript writes Javascript” methodology
Again, feel free to try the changedquarter_hour_timer.html (we ask you to download to MAMP‘s $_SERVER[‘DOCUMENT_ROOT’] “HTMLCSS” subfolder) Timekeeping Web Application suited to macOS (or Mac OS X) “screencapture” command line usage, is helped out by a “mobile platform check” changedquarter_hour_timer.php PHP (we ask you to download to MAMP‘s $_SERVER[‘DOCUMENT_ROOT’] “HTMLCSS” subfolder) for you to try out on your MAMP macOS environment, or all showing up at an RJM Programming public domain webpage, in an iframe element, visible now.
… which you may glean has a Windows “fallback” position (with that “copy” codeline). Why? Well, we found a .Net framework “exe creation via bat” using ScreenCapture.bat (thanks to this useful link) created black screen shots. Probably a privilege thing or PHP exec thing, but we’ve opted for the workaround, which is just “Windows talk” …
write Windows batch scapcontinuous.bat as a continuous fifteen minute user of the .Net Framework (ScreenCapture.exe) derived from above
set up a task via “Task Schedular” (please ignore the warts ‘n all “garden path” schtask ideas in the video below) that has an action “C:\MAMP\htdocs\scapcontinuous.bat” and starts when the Windows user logs in and takes (successful) screen shots at 14 and 29 and 44 and 59 minutes (in the hour) times
Take a more detailed look at “warts ‘n all” crab progression towards the Windows (client) solution, below …
This bit of functionality works (interfacing) both with MAMP and with the public RJM Programming domain incarnation of the Timekeeping web application, so that could be interesting. It can interface via …
… modes of use. In action, should you create an iCal file this way, the web application will download the resultant .ics file into your Downloads folder and to interface into your default online Calendar application double click that Downloads folder file to complete the Calendar integration …
function icalpostit(tl, tg) {
var today = new Date();
var dd = today.getDate();
var mm = today.getMonth()+1; //January is 0!
var yyyy = today.getFullYear();
var hh = today.getHours();
var minm = today.getMinutes(); //January is 0!
//if (icalavailable) { alert('is ' + ('' + yyyy + ('00' + mm).slice(-2) + ('00' + dd).slice(-2) ) + ' >= ' + tl.substring(1)); }
if ((document.getElementById('yics').value.indexOf('all') != -1 || tl.substring(1) >= ('' + yyyy + ('00' + mm).slice(-2) + ('00' + dd).slice(-2) )) && icalavailable && document.getElementById('yics').value != '') {
if (document.getElementById('yics').value.indexOf('nw') != -1) {
icald=tl.substring(1) + ':' + ('00' + hh).slice(-2) + ('00' + minm).slice(-2) + '59';
icalg=tg;
if (icalwo != null) { icalwo.close(); icalwo=null; }
icalwo=window.open('../PHP/ics_attachment.php','_blank','top=100,left=100,width=740,height=800');
if (1 == 1) {
setTimeout(icalw, 3000);
} else {
icalwo.document.getElementById('datestart').value=icald;
icalwo.document.getElementById('dateend').value=icald;
icalwo.document.getElementById('eventwords').value=icalg.replace(/\<br\>/g, String.fromCharCode(10)).replace(/\<Br\>/g, String.fromCharCode(10)).replace(/\<BR\>/g, String.fromCharCode(10));
if (document.URL.indexOf('localhost') != -1) {
var jcald=icalg.replace(/\<br\>/g, String.fromCharCode(10)).replace(/\<Br\>/g, String.fromCharCode(10)).replace(/\<BR\>/g, String.fromCharCode(10)).replace(/\ \;>/g, ' ');
while (jcald.indexOf(String.fromCharCode(10)) != -1) { jcald=jcald.replace(String.fromCharCode(10),' '); }
icalwo.document.getElementById('title').value=jcald;
} else {
icalwo.document.getElementById('title').value='Calendar event at ' + icald;
}
icalwo.document.getElementById('description').value='Calendar event at ' + icald;
icalwo.document.getElementById('address').value=document.URL.split('?')[0].split('#')[0];
icalwo.document.getElementById('mmdatestart').value=icald.substring(4,6);
icalwo.document.getElementById('mmdateend').value=icald.substring(4,6);
icalwo.document.getElementById('dddatestart').value=icald.substring(6,8);
icalwo.document.getElementById('dddateend').value=icald.substring(6,8);
icalwo.document.getElementById('ssdatestart').value='59';
icalwo.document.getElementById('ssdateend').value='59';
icalwo.document.getElementById('yyyydatestart').value=icald.substring(0,4);
icalwo.document.getElementById('yyyydateend').value=icald.substring(0,4);
if ( ('' + today.getTimezoneOffset()).replace('null','').replace('undefined','') != '' ) {
//alert(('' + eval(eval('' + qd.getTimezoneOffset()) / 60.0)).replace('.00','').replace('.0',''));
icalwo.document.getElementById('tz').value=('' + eval(eval('' + today.getTimezoneOffset()) / 60.0)).replace('.00','').replace('.0','');
}
//icalwo.document.getElementById('pform').onsubmit=function() { window.opener.document.getElementById('icalstatus').innerHTML=' '; return true; };
Mac OS MAMP Timekeeping Web Application PHP Calendar Contenteditable Tutorial
We’ve spoken quite a bit in the past about the joys of involving the “contenteditable=true” attribute for HTML elements that have an “innerHTML” (ie. they have a formalized end tag arrangement eg. div, span, p, td, th etcetera) and with today’s work which extends that started with yesterday’s Mac OS MAMP Timekeeping Web Application PHP Calendar Past Tutorial it is the turn of a set of “p” elements it helps out today.
The scenario is that yesterday’s work did not allow for “orphaned screenshots” of the past be allowed to be brought back into play to “annotate them” and in so doing “give them a home”. This led us to …
allow for a new “Infill Earlier Days All Screenshots” button augment yesterday‘s “Infill Earlier Days Just Annotated Screenshots” button …
the pressing of that new “Infill Earlier Days All Screenshots” button causes all screenshot 15 minute entries relevant to the current year be displayed in the calendar … but then it occurred to us users might want to “annotate them” … but how? …
in the PHP we introduced code …
<?php
if (isset($_GET['yourta'])) {
$dru="http://" . $_SERVER['SERVER_NAME'] . "" . str_replace("~","",str_replace(":443~","",str_replace(":80~","",(":" . $_SERVER['SERVER_PORT'] . "~")))) . "/";
$cet="";
if (strlen($_GET['yourta']) != 0) { $cet=" contenteditable=true onblur=repostit(this); onfocus=wopen(event,false); "; }
// blah blah blah
$ccpre="
?>
… to, when an “orphaned” screen shot image is happened upon, allows …
contenteditable=true “does its stuff” turning might might have been a pretty unintelligent HTML element into a “textarea” type collector of user input, and then that onblur event logic’s “midair feeling” Ajax/FormData “recursive feeling” methodology …
function repostit(ih) {
var ihis=(ih.innerText || ih.contentWindow || ih.contentDocument);
var pathpart=ih.id;
if (ihis != '') {
var xzhr = new XMLHttpRequest();
var xform=new FormData();
xform.append('myta',ihis);
xform.append(pathpart.split('.')[0].replace('ip_','screen-').replace('_','-'),'');
xzhr.open('post','./quarter_hour_timer.php',true);
xzhr.send(xform);
}
}
… which can cement that (newly user entered) annotation into future permanency in the “Yearly Report Calendar” section
… feel to it all. Today, we improve on the latter “restrictiveness” issue, within yesterday’s “Yearly Report Calendar” new functionality, by looking back into the current calendar year’s “past” with respect to the date of using the web application, whether that be …
screen captures from days in the current calendar year’s “past”
text entries made and remembered (in window.localStorage) in the current calendar year’s “past”
if ($bcontis != "''" && $bcontis != "") {
if ($htmlis == '') {
$htmlis="<html><head><script type=text/javascript> var imois=null, iwo=null; function wopen(event,overvsout) { if (!overvsout) { if (imois == event.target) { imois=null; } return; } imois=event.target; setTimeout(postwopen, 2000); } function postwopen() { var pois=imois; if (pois.outerHTML.indexOf('URL(') != -1) { window.open(pois.outerHTML.split('URL(')[1].split(')')[0].replace(String.fromCharCode(34),'').replace(String.fromCharCode(34),''),'_blank','top=50,left=50,width=600,height=600'); } }</script></head><body onload=\" var huhg=''; if (parent.document.getElementById('" . $idcali . "')) { huhg='" . $ccpre . $bcontis . $ccpost . "'; while (huhg.indexOf(String.fromCharCode(10)) != -1) { huhg=huhg.replace(String.fromCharCode(10),'<br>'); } parent.document.getElementById('" . $idcali . "').innerHTML+=huhg; } \"></body></html>";
} else if (strpos($htmlis, $bcontis) === false) {
$htmlis=str_replace("+=huhg; }", "+=huhg; huhg='" . $ccpre . $bcontis . $ccpost . "'; while (huhg.indexOf(String.fromCharCode(10)) != -1) { huhg=huhg.replace(String.fromCharCode(10),'<br>'); } parent.document.getElementById('" . $idcali . "').innerHTML+=huhg; }", $htmlis);
}
}
}
}
if ($htmlis != "") { echo $htmlis; }
}
}
}
}
}
}
// blah else if blah else if blah
?>
… which you may notice implements a “long hover” window.open scenario (using non-mobile platforms) for screenshot images on the calendar by combining the use of …
global variables …
var imois=null;
var iwo=null;
onmouseover event logic …
Call
onmouseover=wopen(event,true);
setTimeout delays …
Called
function wopen(event,overvsout) {
if (!overvsout) {
if (imois == event.target) {
imois=null;
}
return;
}
imois=event.target;
setTimeout(postwopen, 2000);
}
function postwopen() { //pois) {
if (imois) {
var pois=imois;
if (pois.outerHTML.indexOf('URL(') != -1) {
if (iwo) { iwo.close(); iwo=null; }
iwo = window.open(pois.outerHTML.split('URL(')[1].split(')')[0].replace(String.fromCharCode(34), '').replace(String.fromCharCode(34), ''), '_blank', 'top=50,left=50,width=600,height=600');
}
}
}
onmouseout event logic …
Call
onmouseout=wopen(event,false);
… so that this logic is not responsible for clobbering the default “hover” shows of the “p” element “title” attribute with the onmouseover event for non-mobile platforms.
Mac OS MAMP Timekeeping Web Application PHP Image Metadata Tutorial
In our opinion, what would make the day before yesterday’s Mac OS MAMP Timekeeping Web Application PHP Intranet Tutorial “Timekeeping Web Application” cooler would be to add to the intelligence of the screen capture images, ahead of other data related improvements to come.
We’ve spoken in the past about Exif in that respect but PHP has Iptc image metadata functions we can call on …
iptcembed to embed new metadata into an existant image from those associated “caption” textarea elements we offer
iptcparse to extract old metadata from an existant image into those associated “caption” textarea elements we offer
This metadata can be like a database source we use moving forward on this project, meaning the one image data entity can suffice for both visual and textual usage purposes.
Mac OS X MAMP Timekeeping Web Application Email Tutorial
The practicalities of yesterday’s (Mac OS X MAMP Timekeeping Web Application Primer Tutorial) timekeeping Mac OS X Web Application, left as they are, would leave you with a somewhat useful web application whose use is only for the here and now, but what if you want it to be more accountable? Well, that is when we, here, at RJM Programming, like to use that tried and trusted email form of communication.
Today’s email methods spurn the use of server-side intervention, at least for now. So what is available to us as tools, if we don’t include Ajax nor jQuery in that list? Well, we have, to our minds …
the body section of that email can have a clipboard image pasted into it, for which we can utilize HTML5 canvas element’s toDataURL() method, teamed up with a window.open popup window of the toDataURL image data, which can be selected and copied, optionally, by the user themselves, should they wish this to make their email more self explanatory
We rely on the crontab functionality, being as there is no server-side help, to create the image file, whose contents eventually go to make up the contents that can be selected and copied and pasted by the user into the body section of the email (and sent off to whosoever they feel like sending it too, as you have the full power of the email client available to you with the interaction you have with an actual email client program).
Here is the HTML and Javascript quarter_hour_timer.html which changed to cater for today’s email functionality in this way, and, as per the Stop Press from yesterday, we’ll also have a live run link here today.
Mac OS X MAMP Timekeeping Web Application Primer Tutorial
Sometimes when you program, especially for administrative type functionality, there are useful programs to write, that are able to become web applications, but in a limited set of platforms. So it is today with our timekeeping web application that relies on …
MAMP installed to, in our case, /Applications/MAMP/htdocs/ (as is mentioned in the relevant crontab background task that snapshots the user’s screen every quarter hour) that maps to the MAMP web application URL http://localhost:8888/ … or …
crontab directory mention that corresponds to a URL call of our web application like for our Google Chrome example (where the directory below, used, could be a place of your choosing (that matches what is in your crontab task entry)) …
file:///Applications/MAMP/htdocs/quarter_hour_timer.html?localplace=
… or just, via the web browser’s File -> Open File menu …
file:///Applications/MAMP/htdocs/quarter_hour_timer.html
… pretty restrictive, huh? … but pretty useful for our quarter hour timekeeping purposes today.
We want to have a web application that is running at the user’s discretion, and when first fired up, looks for outputs from crontab tasks above …
… for the current day in question and if existant show …
a date and time stamp +
the snapshot of what you were doing at the quarter hour, that is clickable to make bigger for more in depth viewing +
an HTML textarea element in which you can optionally type in more specifics about that quarter hour
So, as much as we like to think of Mac OS X Terminal application’s BSD (a unix derivative) operating system, as being a lot like Linux, there are some commands and usage that …
adds Mac OS X specific command line functionality to a Linux or unix base set of functionality, like for today’s screencapture command … and we’ve included another such example, below, with the command say featuring in Mac OS X Text to English Speech Primer Tutorial as shown below
changes switches on Linux or unix commands
won’t have some Linux or unix commands that other platforms do
In the great tradition of behoving … we behove … we behove thee quarter_hour_timer.html if you like, my liege. On this occasion you’ll have gleaned that there is no live run link, because the RJM Programming web server is not Mac OS X … so command line screencapture has no meaning for a CentOS web server’s operating system command line. You’ll see in the code that rather than use “Client Pre-emptive Iframe” concepts to check for existence of crontab screen capture images, we, instead use the onerror event for HTML img elements to check for non-existance.
Stop Press
Just noticed that, perhaps, after all, a live run from the RJM Programming website can make sense if you have a Mac OS X laptop, for instance, that is running that suggested crontab entry as explained in tutorial above. That type of live run managed to latch on to our local crontab screencaptures on my MacBook Pro.
Text to English Speech via Mac OS X’s command line say command used by PHP via exec to make say.php (which is useful as a download to a Mac OS X laptop using MAMP) which, today, does not have a live run because the web server of domain rjmprogramming.com.au is a CentOS Linux server … Linux equivalent of Mac OS X’s say? … read here
Trying to present this brought up the usual movie production problem with iMovie overlaying the audio on top of the video (though you may want to try, and you could start reading with this link) versus QuickTime Player talent to catch both audio and video tracks (and that we ended up using), but not of the “screen goings on”, alas versus MPlayer OSX Extended which can play separately but not two tracks on top and doesn’t do any reconstituting … so …
Improved on our inhouse Video/Audio synchronizing efforts by allowing audio_video.html supervisor (changed in this way) be able to be called to press one of its preconceived synchronization buttons onload which we do with (the newly added) Macbeth Act 1 Scene 1 … in a small celebration of the Bard … who, am thinking (in that Falstaff way), would have got a huge chuckle out of “anonymous” instead of “anon” during the Three Witches scene … we had to do something to say Happy Birthday
Along the way we tried filming the MacBook Pro with the iPad to a YouTube …
… but weren’t happy with the audio quality, alas (too/two).
If this was interesting you may be interested in this too.
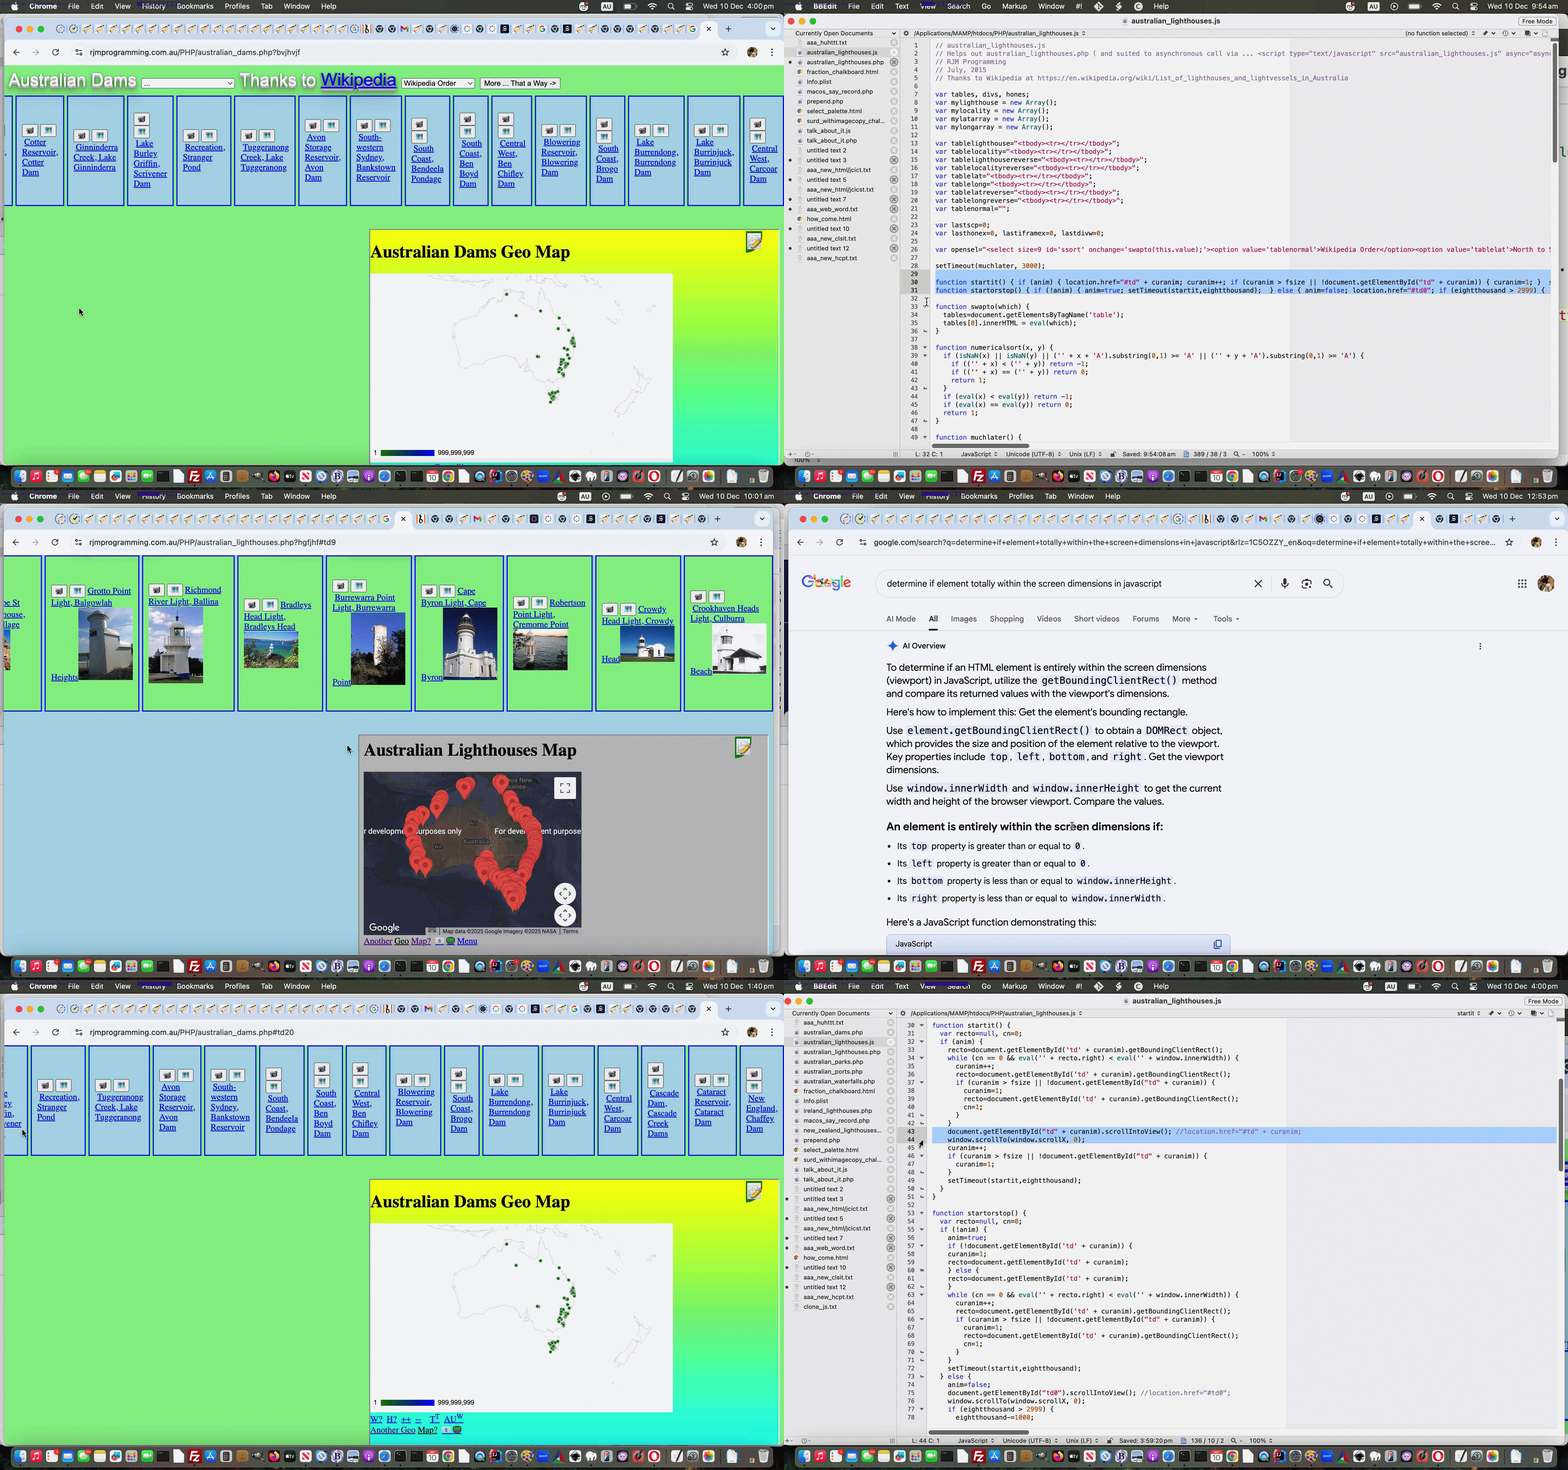
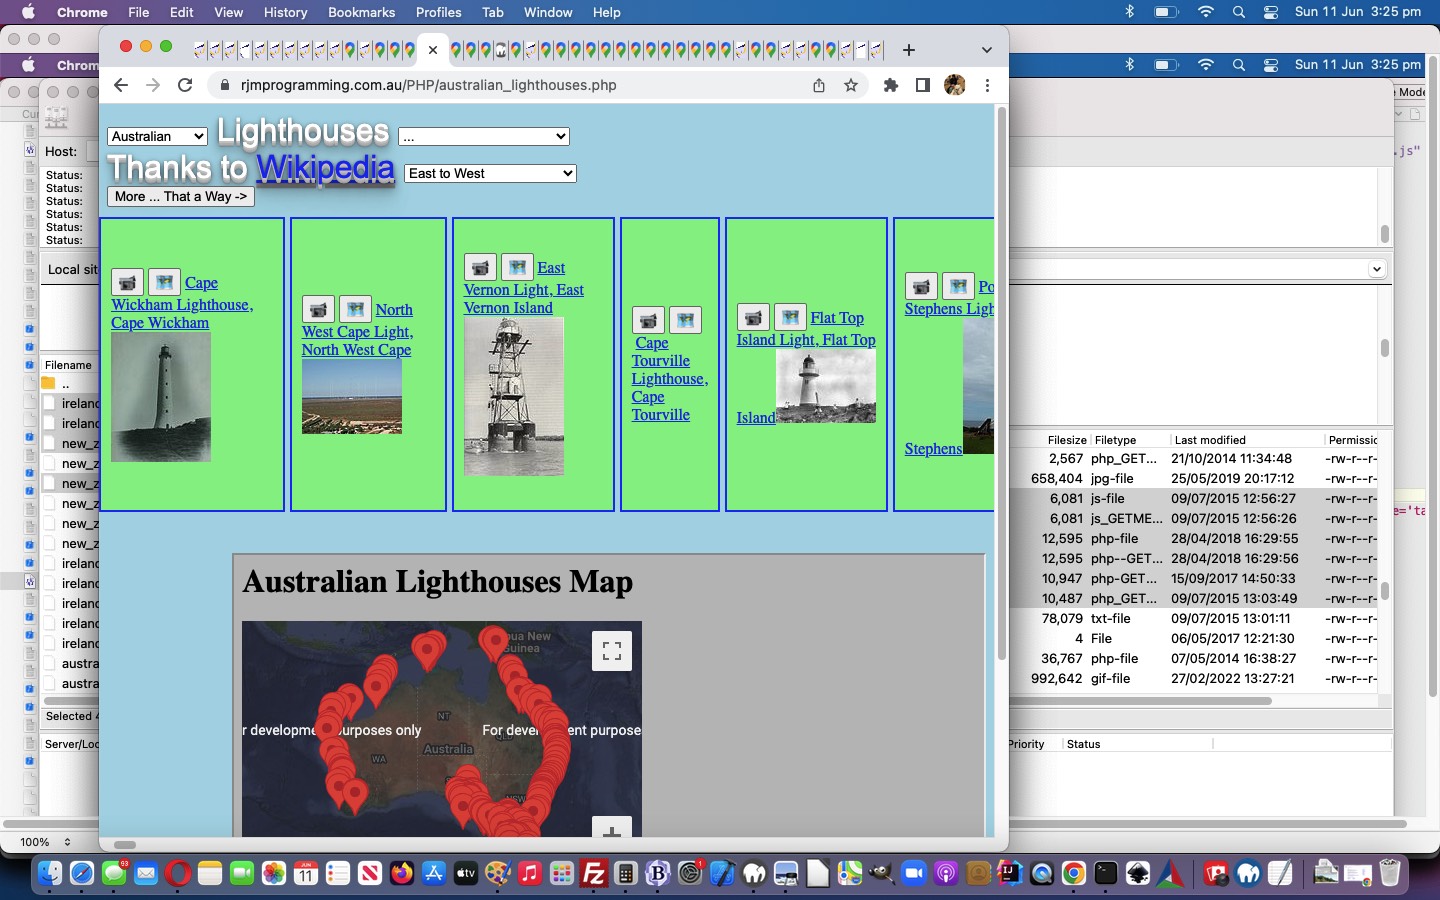
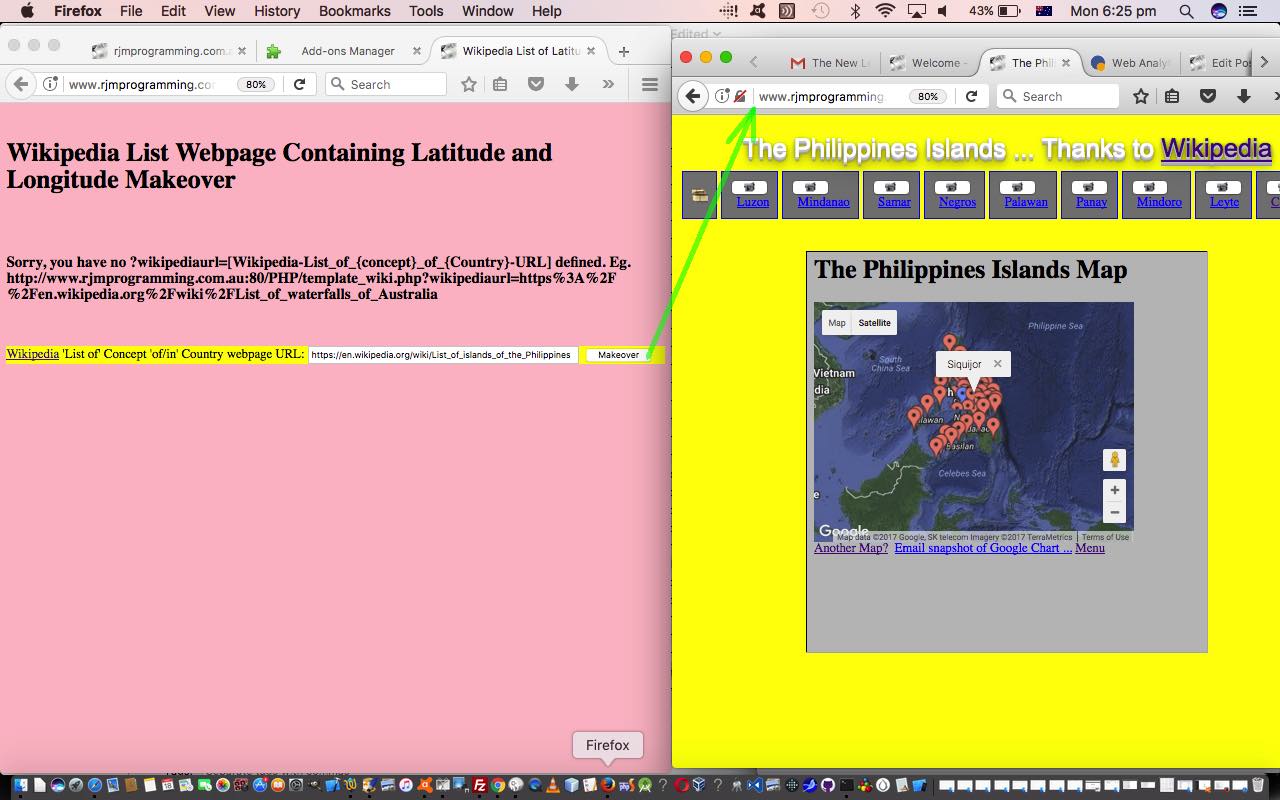
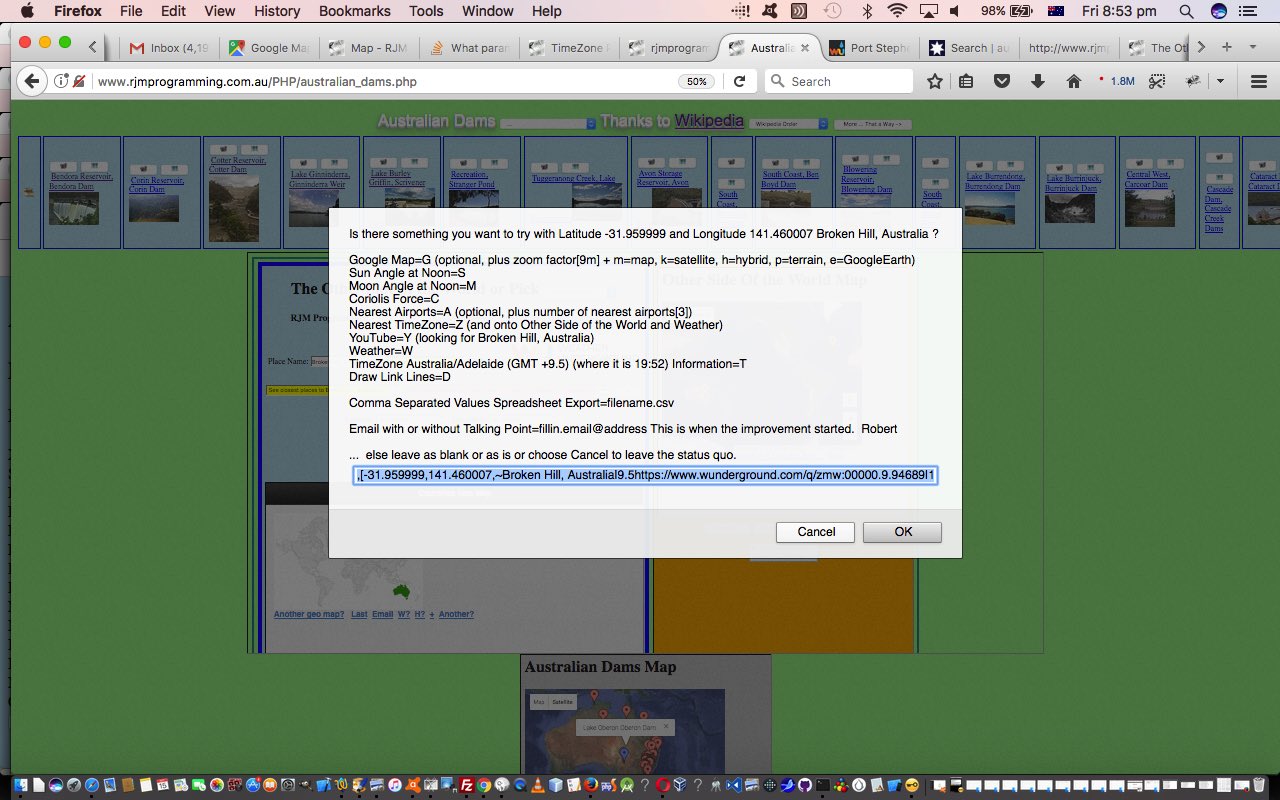
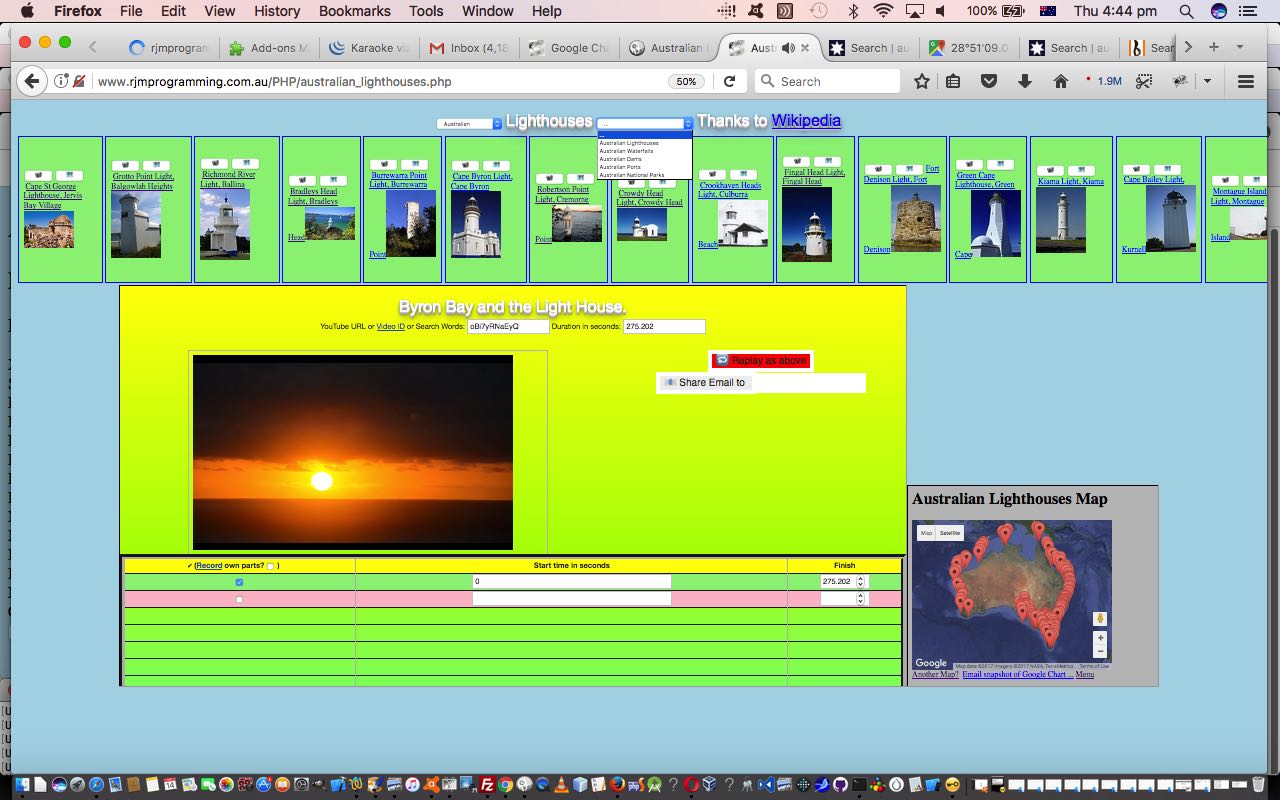
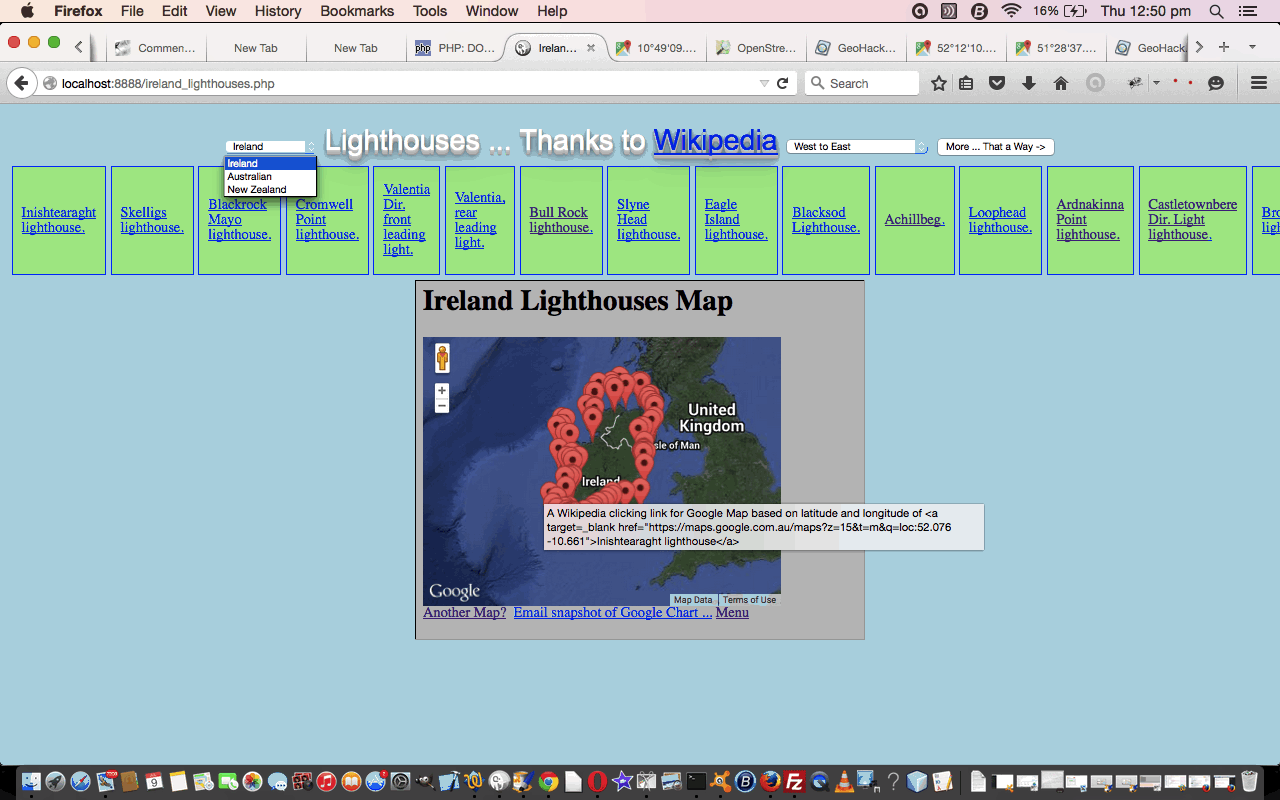
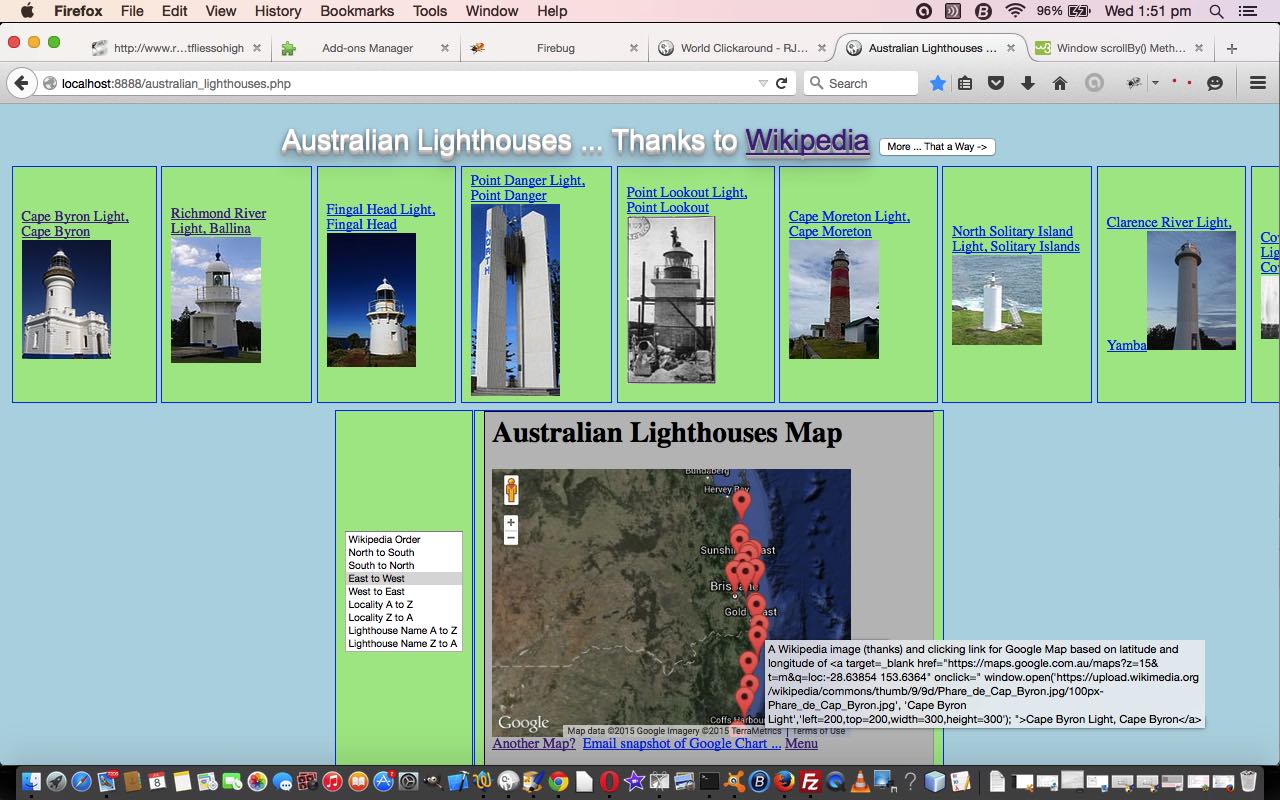
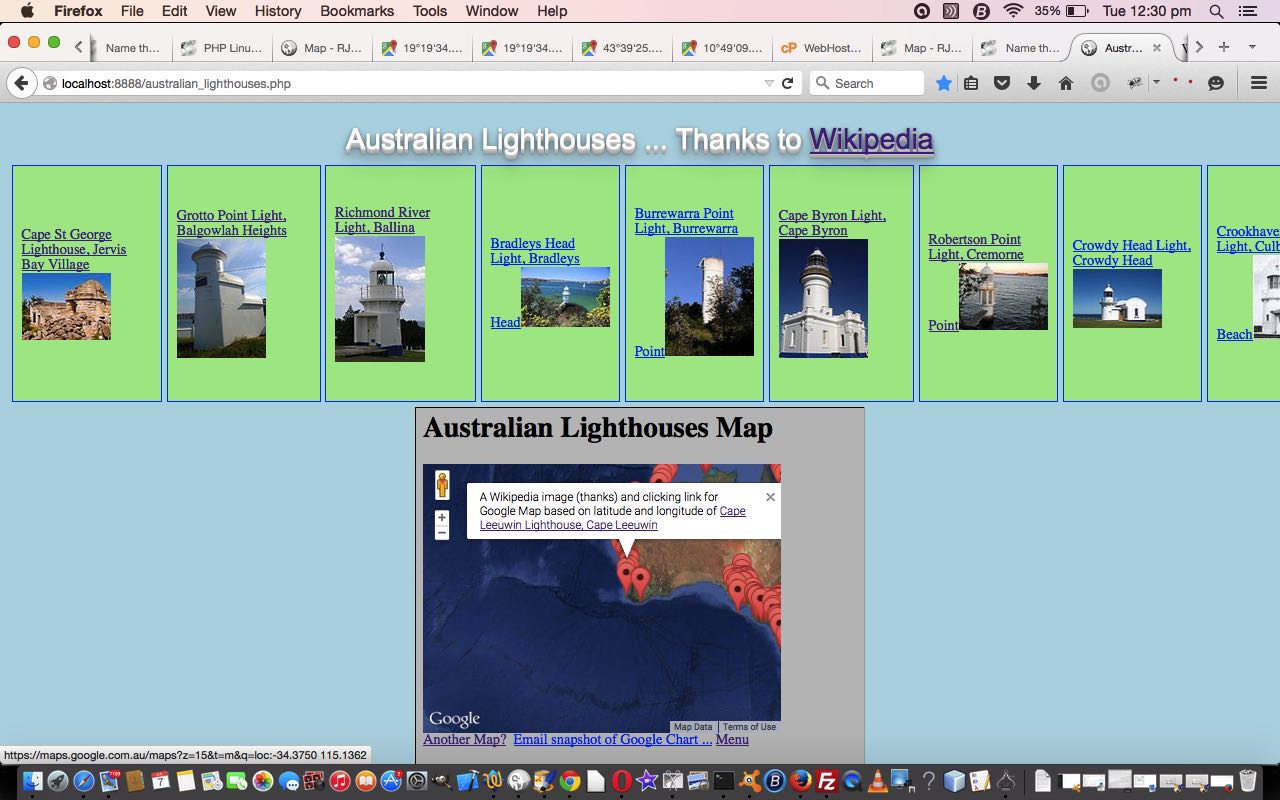
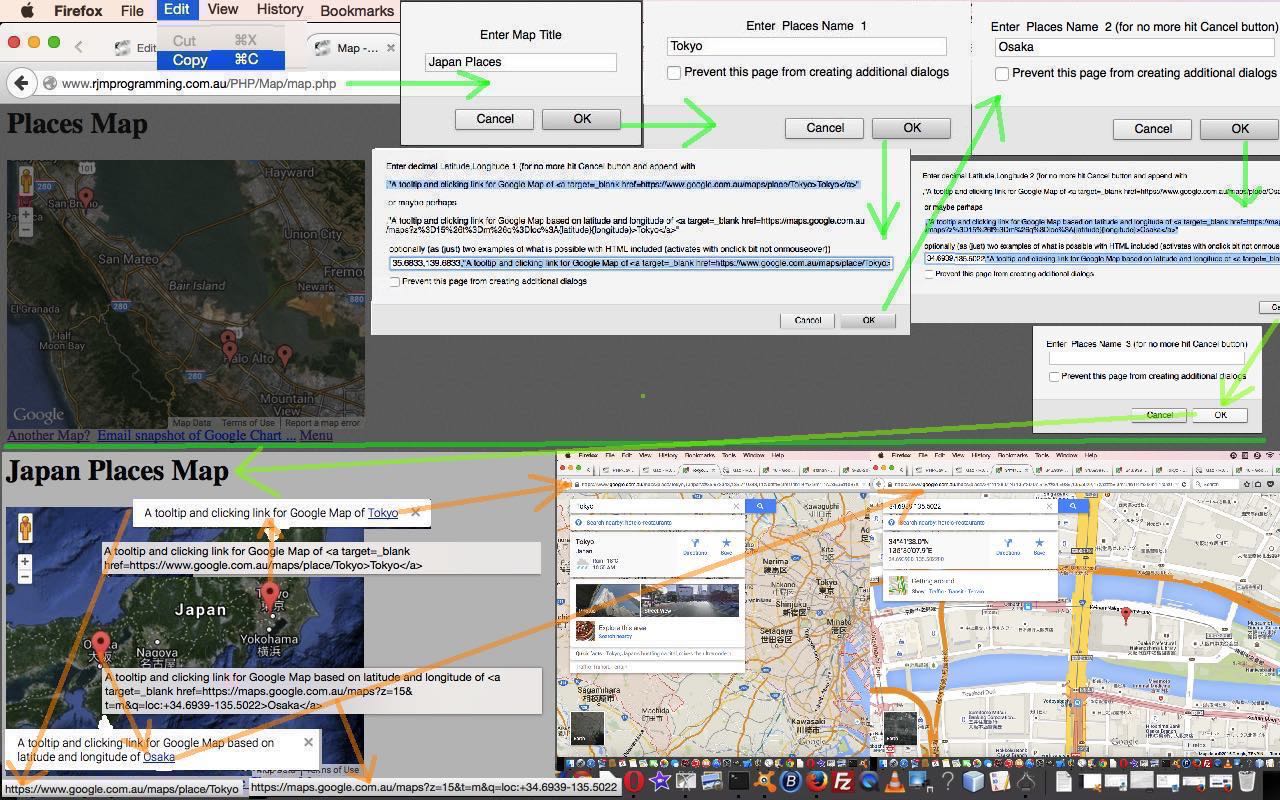
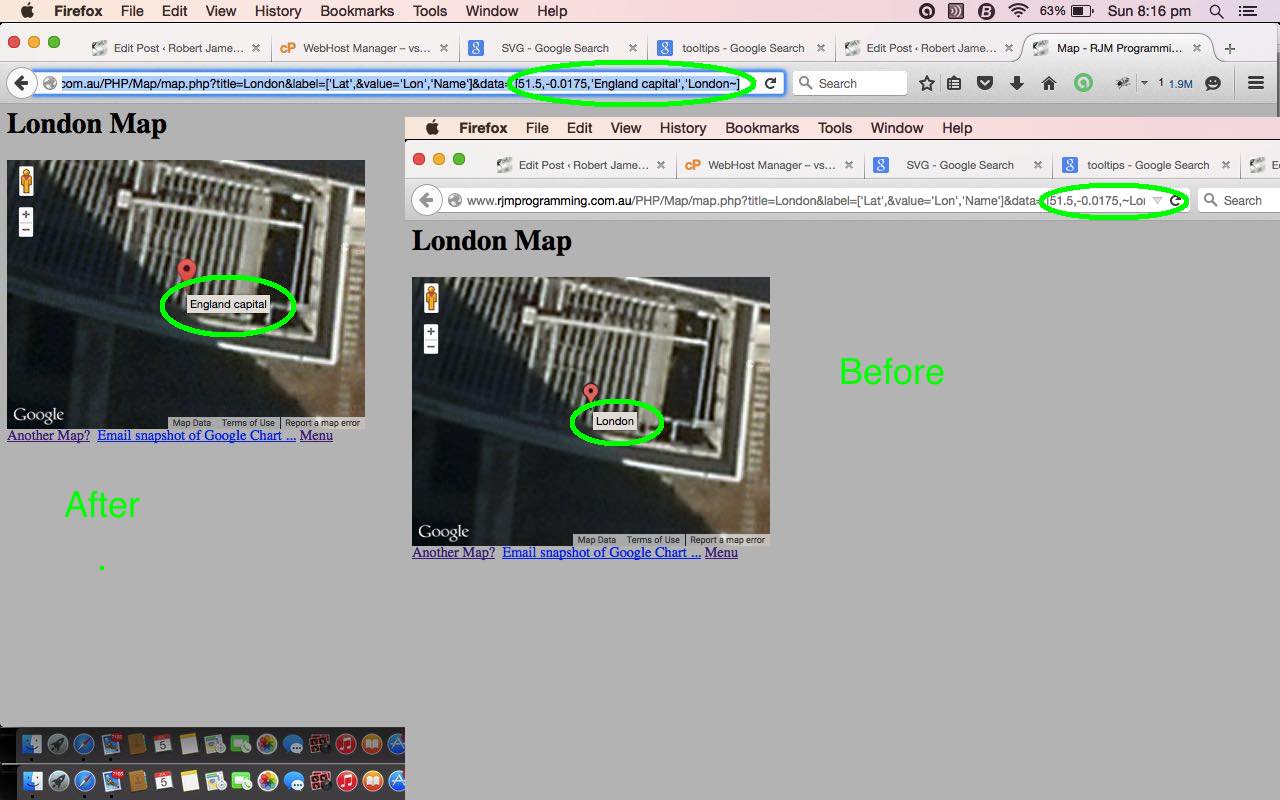
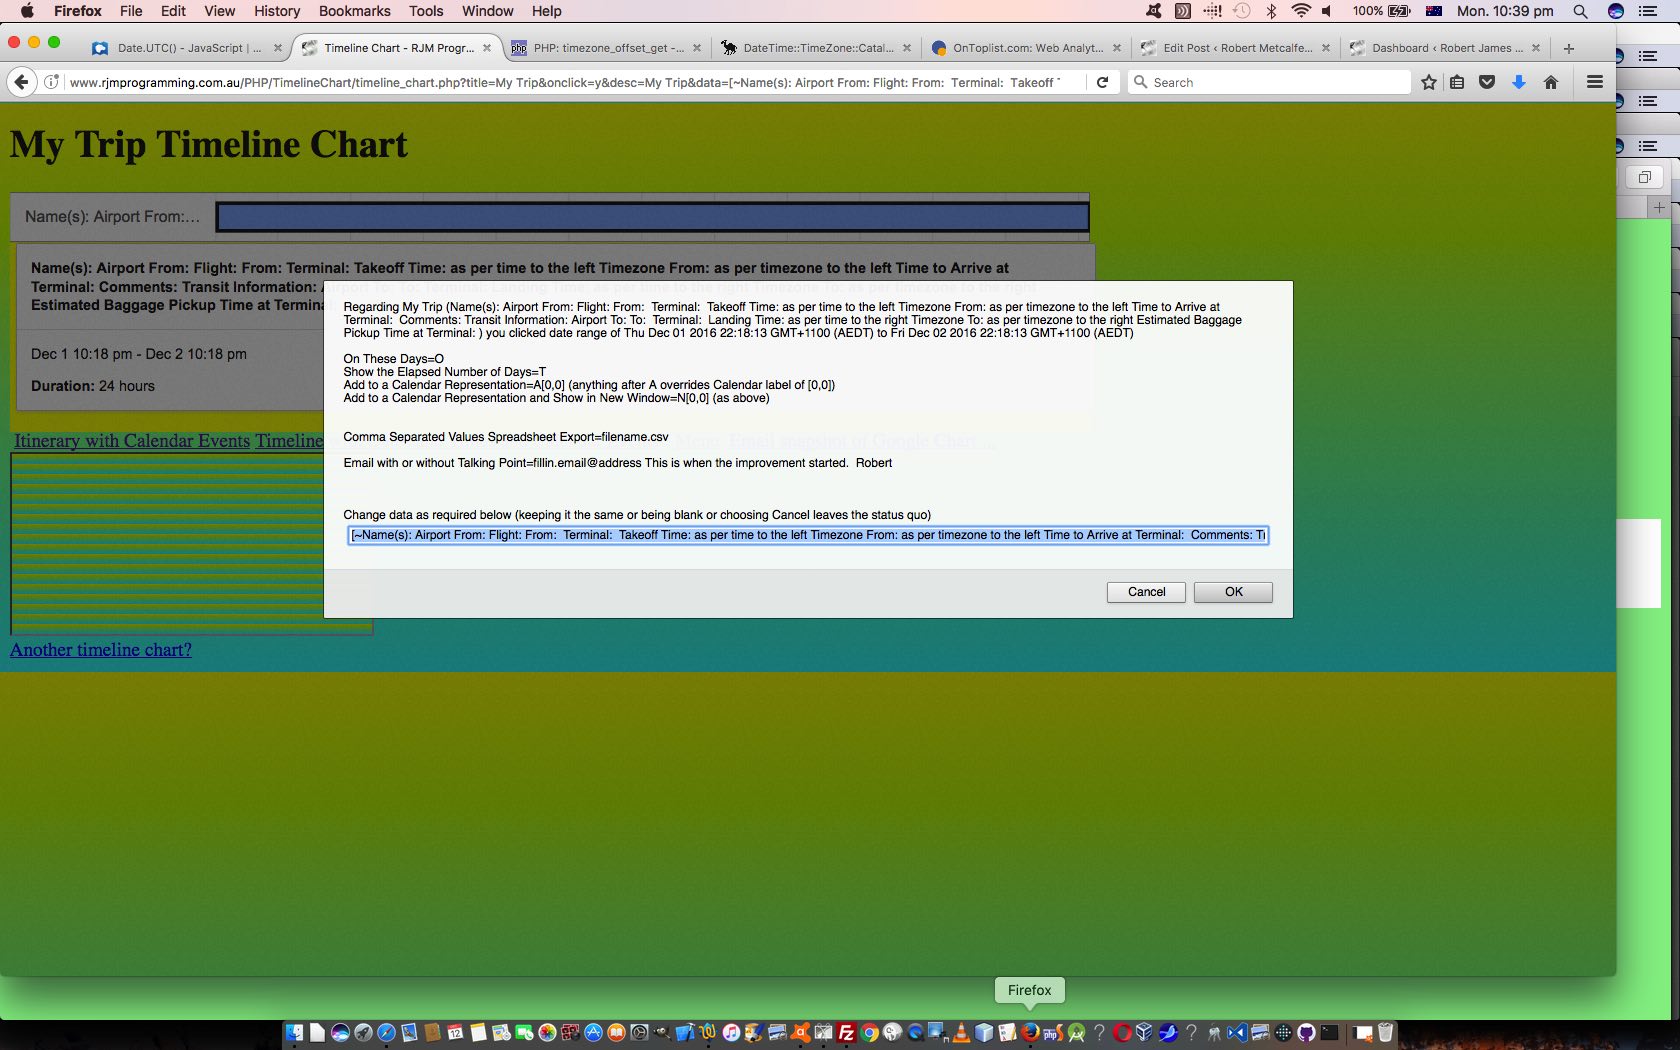
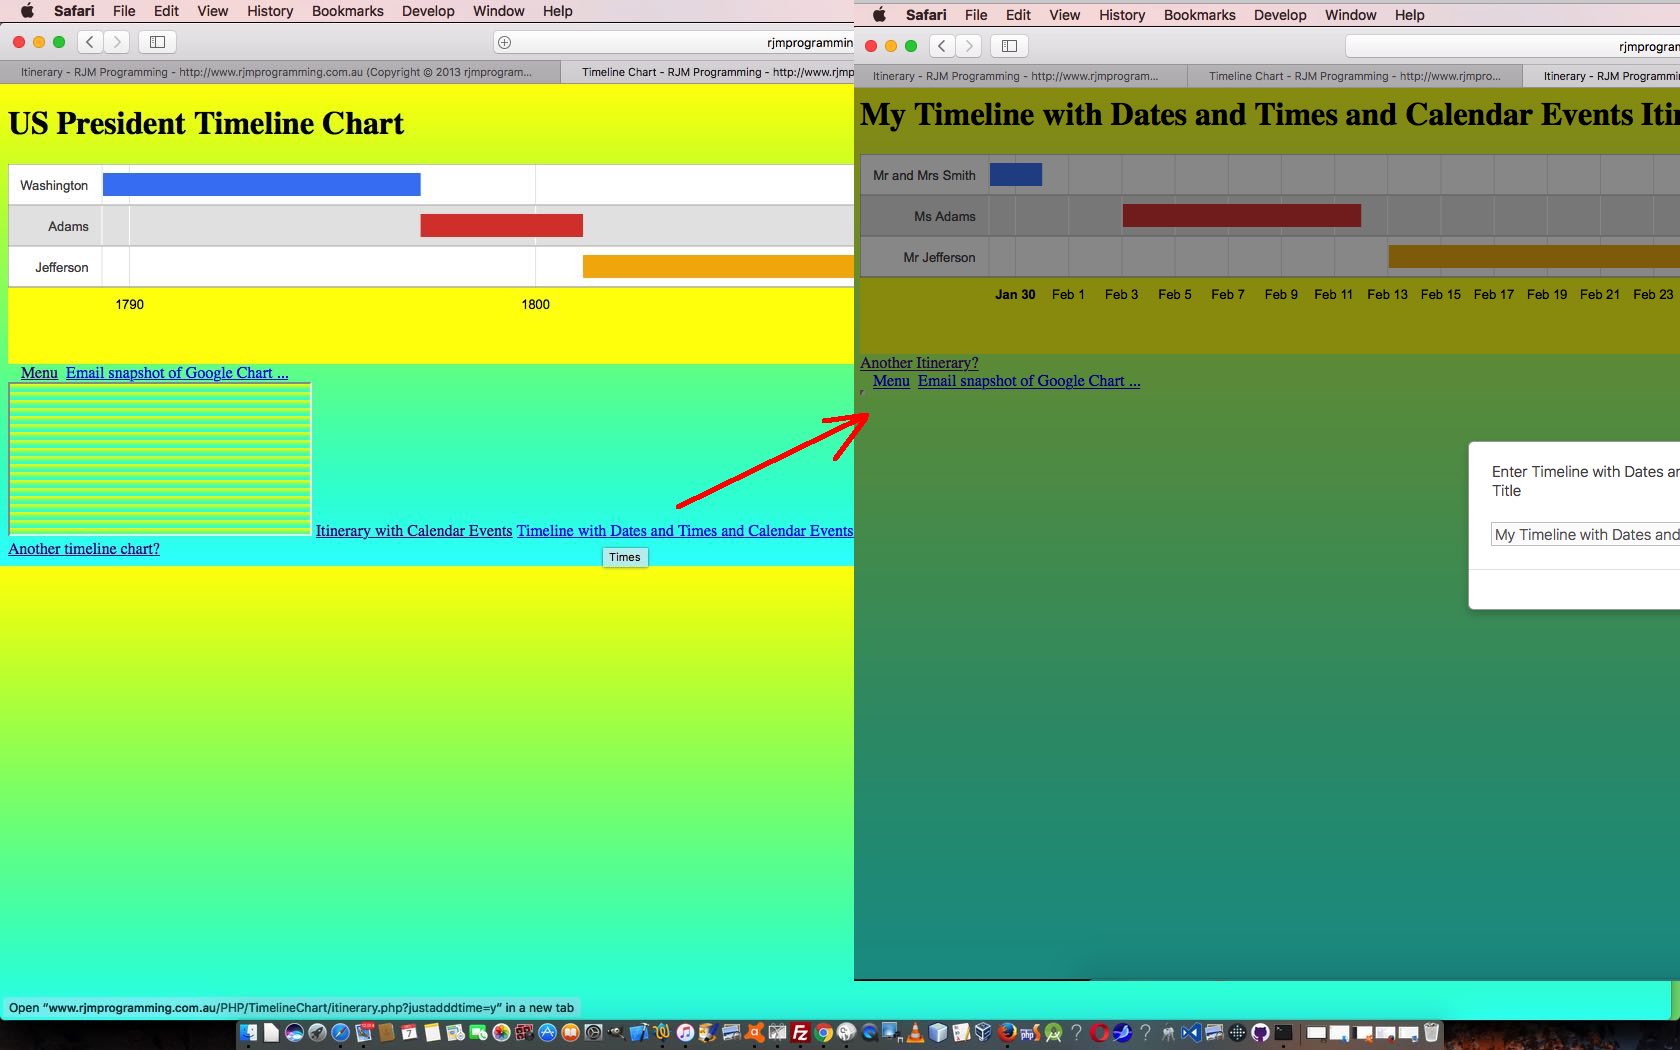
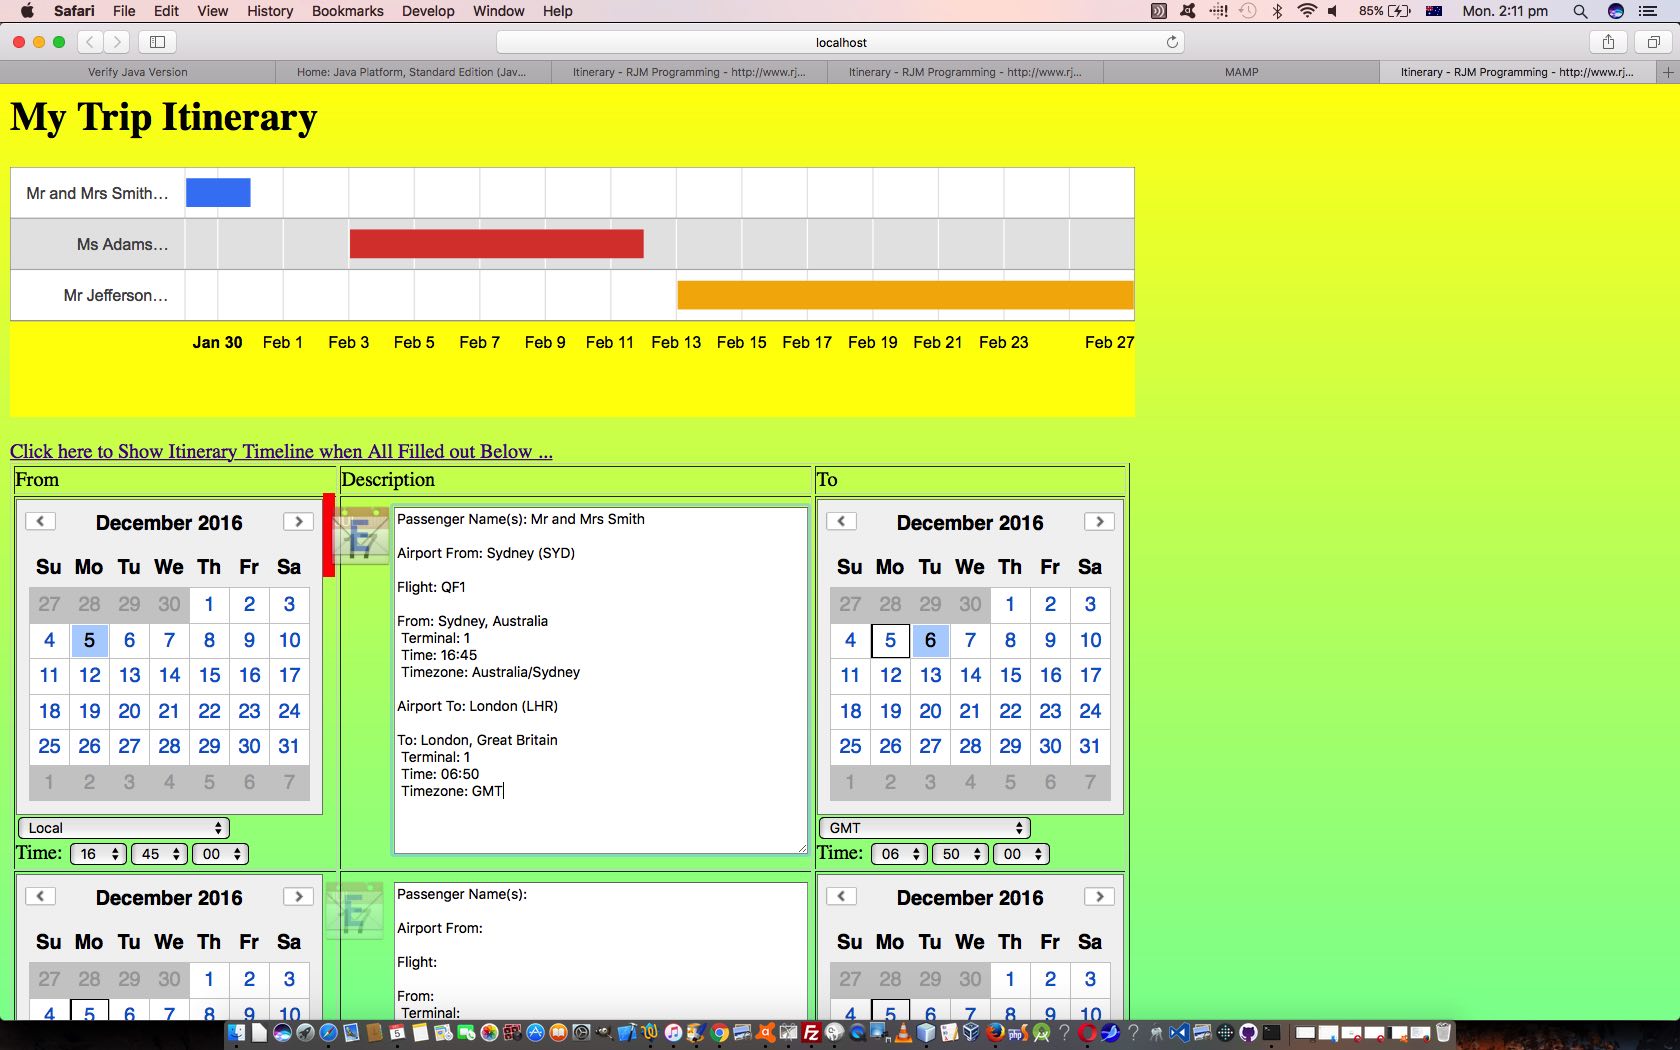
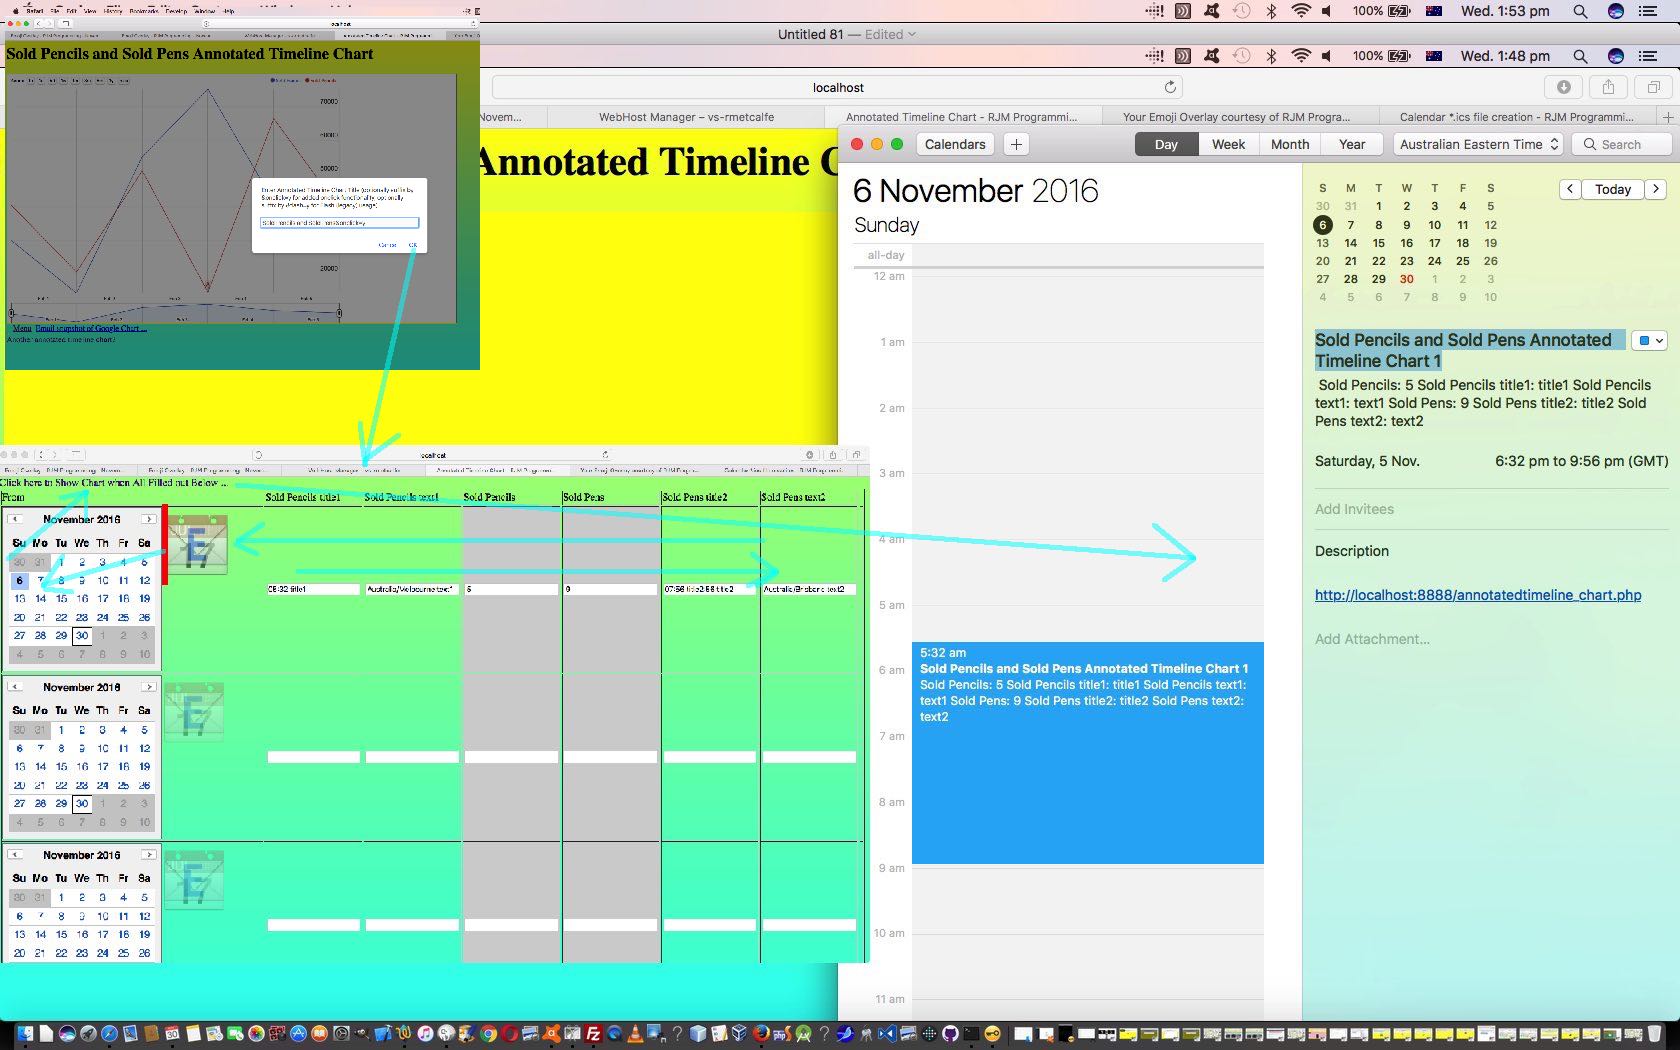
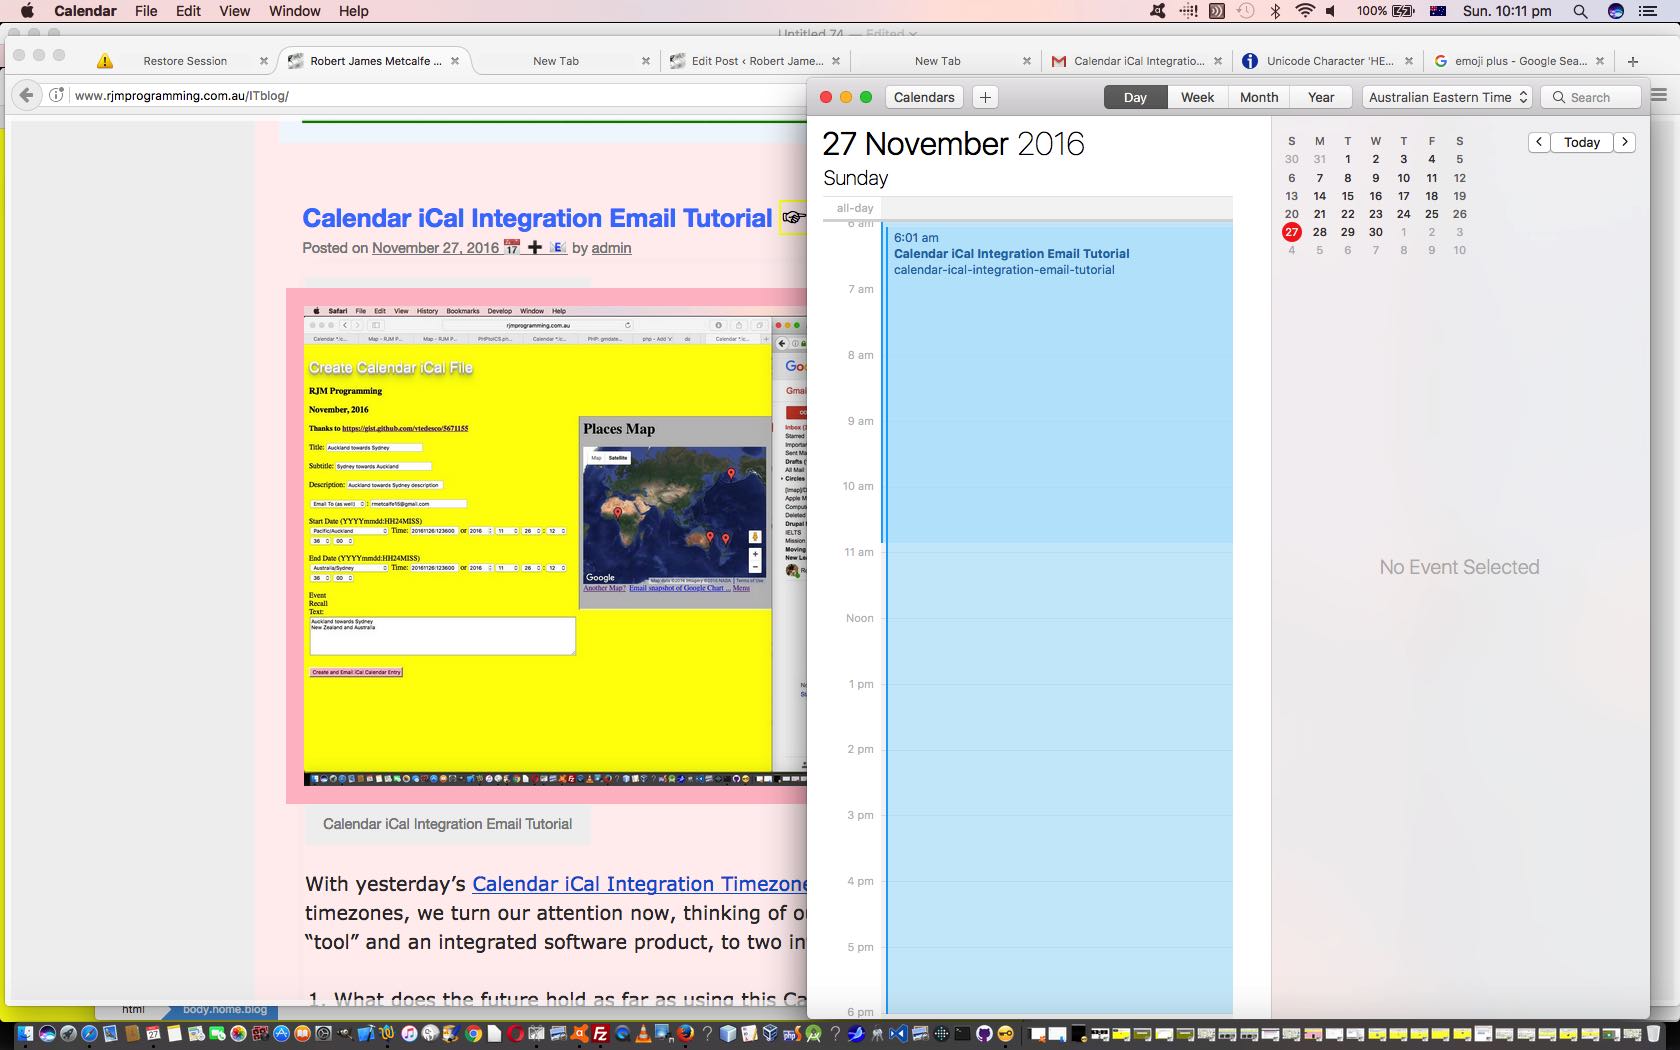
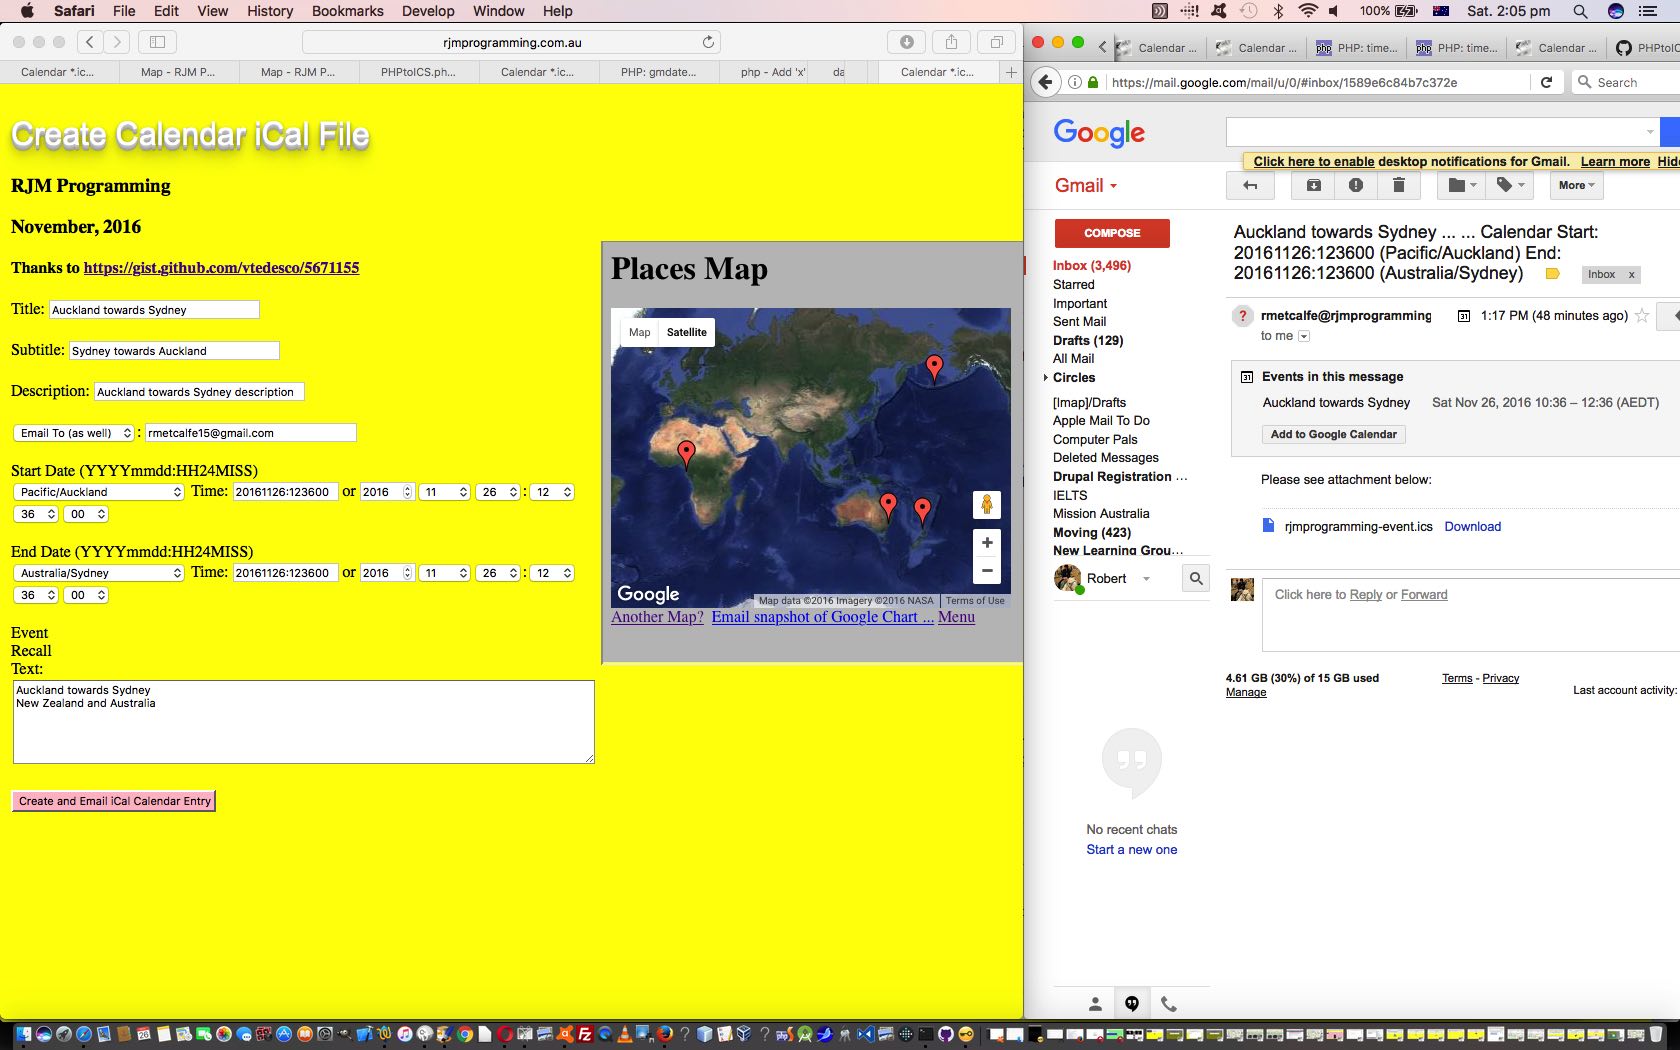
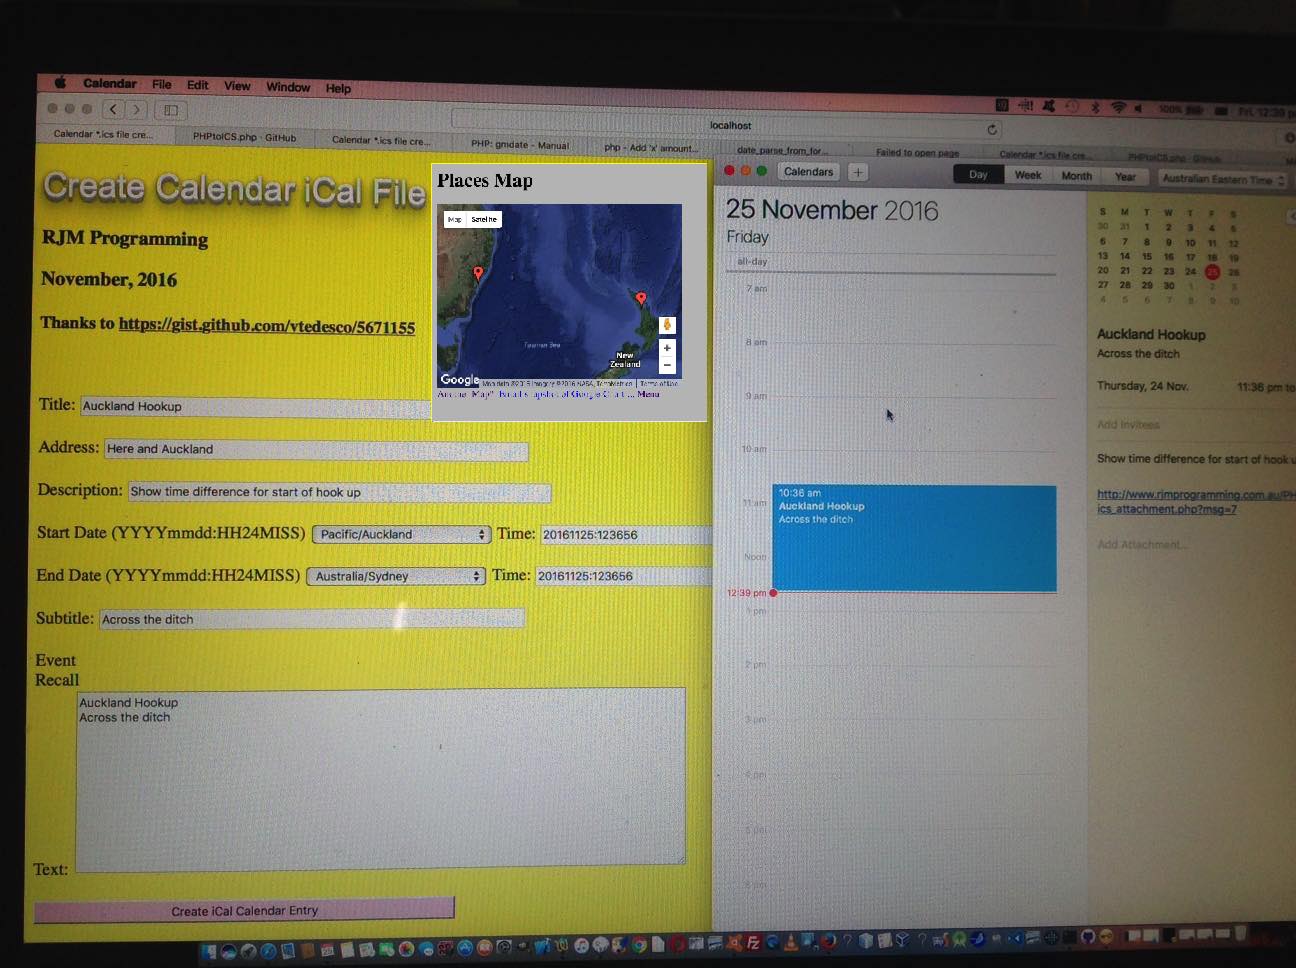
Further to yesterday’s Background Image User Interaction Visibility Tutorial, regarding today’s work adding the possibility for foreground HTML div content via a combination of contenteditable=true and onblur event logics, you might be inclined to observe that this current web application is very …
back to front
… about which we would …
not be insulted
observe that any web application “worth its salt” will mainly be “worth its salt” because of the “back” parts … ie. the data parts and/or the background display components
We find, generally speaking, it is the “back” of the project of most enduring interest, though the “front” …
has the most impact
is the easiest to tweak
The contenteditable=true HTML element attribute is soooooooo useful. It makes what you think of as a display only innerHTML type of HTML element into a …
onblur event sensitive means by which such an element can take on a lot of the appealing qualities of HTML input type=text and/or textarea elements …
interplay of such an element’s innerText (containing the < and > HTML, kind of counterintuitively) versus the innerHTML (containing the HTML entities < and >) in the onblur event contenteditable=true (HTML element like div) scenario
It’s small disadvantage is that the user may not be aware the foreground content via contenteditable=true and onblur event logics is there, available, and so we add a new User Interaction Menu dropdown option where, for the first time we can remember …
we don’t use a Javascript prompt window to ask, but, rather …
a window.open (seen on the other side as window.opener) new incarnation of our codebase …
function askcont() {
if (wo) {
if (!wo.closed) {
wo.close();
wo=null;
}
}
wo=window.open('./dappled_light.html?justtextarea=y', '_blank', 'top=100,left=100,width=600,height=600');
wo.document.write('<textarea id=myta style="width:100%;height:100%;" onblur="window.opener.primarycontent(window.opener.document.getElementsByTagName(' + "'div'" + ')[0], this.value);" placeholder="' + wopl + '"></textarea>');
}
Background Image User Interaction Visibility Tutorial
We have a purpose around here of writing code with a view, when generic enough, to allow newbies a dynamic way to learn, and we do learn stuff ourselves performing these projects … so, thanks. That’s all fine and good, but then we wonder after a while if there are “content creators” not interested in the user interaction menu parts of yesterday’s Background Image Data URI Animation Tutorial‘s Dappled Light web application (after using them to get to a certain point)? Are such users being put off because up until now there was no way to turn off the user interaction menu occasional displays?
Just in cases we’ve thought about available “unused, so far functionality layers” we could apply for non-mobile and mobile users alike and came up with …
Concept
Non-mobile applicability
Mobile applicability
Double click (anywhere outside the interaction menu) Toggles user interaction menu visibility status
✔
✔
Keyboard W Makes user interaction menu invisible in subsequent cycles
✔ (anywhere)
In menu textboxes (tabbed out of)
Keyboard M Makes user interaction menu visible in subsequent cycles
✔ (anywhere)
❌
… for mobile keyboard relying on textbox onblur event logics (also working for non-mobile), and for non-mobile anywhere, a generic document.body onkeydown event logic as per …
function okd(evt) {
var char = evt.which || evt.keyCode;
switch (char) {
case 77: // M
titlenuance('block'); //alert('m detected');
break;
case 87: // W
titlenuance('none'); //alert('w detected');
break;
default:
break;
}
return true;
}
function titlenuance(inidc) {
if (inidc == 'none') {
if (document.title.indexOf('Dappled Light') != -1) {
document.title=String.fromCodePoint(10060) + ' Dappled Light' + document.title.split('Dappled Light')[1];
}
document.getElementsByTagName('div')[0].title=document.getElementsByTagName('div')[0].title.replace('(as the default at start, and currently)', '(as the default at start, but not currently)').replace('(as the default at start)', '(as the default at start, but not currently)');
document.getElementById('dstyles').innerHTML+='<style> body { background-color: rgb(240,240,240) !important; </style>';
} else {
if (document.title.indexOf('Dappled Light') != -1) {
document.title=String.fromCodePoint(10004) + ' Dappled Light' + document.title.split('Dappled Light')[1];
}
document.getElementsByTagName('div')[0].title=document.getElementsByTagName('div')[0].title.replace('(as the default at start, but not currently)', '(as the default at start, and currently)').replace('(as the default at start)', '(as the default at start, and currently)');
document.getElementById('dstyles').innerHTML+='<style> body { background-color: rgb(255,255,255) !important; </style>';
}
toorig=document.getElementsByTagName('div')[0].title;
seeingisbelieving=inidc;
document.getElementById('mc').setAttribute('data-sib', inidc);
return inidc;
}
… as ways to facilitate such user interaction control of this web application’s workings. As you might have surmised, especially pertinent for mobile users who do not see on hover HTML element titles …
relevant information is added into first textbox marquee style placeholder wording …
document.title (ie. wording in web browser tab) is prefixed by ❌ (if menu flagged as invisible) and the document.body background colour is darkened a little, else menu is visible (including when prefixed by ✔) and the document.body background colour is made to be white
non-mobile users will see status in the document.body’s first div’s on hover title wording
… effectively avoiding the need to ever need to use PHP file_get_contents to retrieve that /tmp/ content, which we found was quite a harrowing thing to try?!
… panning out to be a bug at our end (sorrrrrrrry), opens the door, today, to try out an idea we had regarding an email or SMS recipient’s “lived experience” regarding our Dappled Image Background Image Sharing web application when data URIs were involved with the originator piecing together their creation ahead of sending it to their chosen recipient.
You may have been reading this thread of postings earlier, and know we started using Document Rootsoft links, as per …
… meaning that our PHP helping legend_via_map.php changing in this way now starts creating Document Root soft links (as can happen on Linux and Unix and macOS) pointing back to the /tmp/ folder content, no longer a base64 data URI (as was the case with the Media YouTube Interfacer Interspersing Image Text Tutorial project style of legend_via_map.php interfacing usage) but actual image file contents …
… to get around errors that could happen as the originator shaped to email or SMS a creation involving image data URI(s). The thing is, though, that our design only stores the /tmp/ (web server) content underpinning of the Document Root soft link for a couple of days in legend_via_map.php changing in this way …
<?php
if (isset($_GET['getthisback']) || isset($_GET['andcleanup'])) {
if (isset($_GET['getthisback'])) {
$fnm=str_replace('+',' ',urldecode($_GET['getthisback']));
if (strpos($fnm, 'rjmprogramming.com.au/bigmedia_') !== false) {
//file_put_contents('xv.xv', '/tmp/' . explode('.txt', basename($fnm))[0] . '.txt');
if (!file_exists('/tmp/' . explode('.txt', basename($fnm))[0] . '.txt')) {
//file_put_contents('xv0.xv0', '/tmp/' . explode('.txt', basename($fnm))[0] . '.txt');
echo "<html><body>Not Found is " . $fnm . "</body></html>";
} else {
//file_put_contents('xv1.xv1', '/tmp/' . explode('.txt', basename($fnm))[0] . '.txt vs ' . 'http://' . explode('//', $fnm)[1]);
$myfile = fopen('/tmp/' . explode('.txt', basename($fnm))[0] . '.txt', "r") or die("Unable to open file!");
$img_file=fread($myfile,filesize('/tmp/' . explode('.txt', basename($fnm))[0] . '.txt'));
fclose($myfile);
//file_put_contents('xv2.xv2', strlen($img_file) . ' /tmp/' . explode('.txt', basename($fnm))[0] . '.txt vs ' . 'http://' . explode('//', $fnm)[1]);
echo "<html><body><p id=pid>data:image/" . explode('.', $fnm)[-1 + sizeof(explode('.', $fnm))] . ';base64,' . base64_encode($img_file) . "</p></body></html>";
}
} else {
if (!file_exists($fnm)) {
echo "<html><body>Not found is " . $fnm . "</body></html>";
} else {
$myfile = fopen($fnm, "r") or die("Unable to open file!");
$img_file=fread($myfile,filesize($fnm));
fclose($myfile);
echo "<html><body><p id=pid>" . $img_file . "</p></body></html>";
}
}
}
if (isset($_GET['andcleanup'])) {
foreach (glob('/tmp/bigmedia_*.txt') as $tfl) {
$filemtime = filemtime($tfl);
if (time() - $filemtime >= 172800) {
unlink($tfl);
}
}
}
exit;
}
?>
… a period of time we consider generous for a recipient to attend to the communication’s link clicking, as interested. But what if that email or SMS link’s content has data URI content which a user may want to recall some days later? Well, we now add a new dropdown option …
Cache Data URIs (then Bookmark for later viewing)
… which instigates this Javascript when selecting …
alert('We are redirecting you to new webpage that is good to Bookmark (after a few seconds) for future reference, else image data URIs will be forgotten after a couple of days.');
location.href=document.URL.replace('cacheit=', 'cacheit=Y');
… and then accessing that debugged iframe (hosting the call to our helper PHP talked about above) onload event Javascript code …
function checkthis(iois) {
if (iois.src.indexOf('About_Us.htm') == -1) {
var aconto = (iois.contentWindow || iois.contentDocument);
if (aconto != null) {
if (aconto.document) { aconto = aconto.document; }
… we are back with “originator data URI(s)” finding their way back to “recipient webpage data URI referencing background image” webpage data.
Then, should a recipient want to have the best chance of storing this scenario days out into the future we think it can work if …
the recipient just about immediately Bookmarks this webpage … perhaps supplying a better name (though we add document.URL length and current time snapshots to the webpage document title) …
later, for that recipient using that same web browser, we’re pretty sure within that two days of server retainment, no worries … and …
after those two days, even so (and we’re waiting ourselves, for two days to retest), we’re thinking should the recipient recall their scenario via (something like the Google Chrome) …
Bookmarks -> Bookmark Manager -> Other Bookmarks -> (navigate to bottom bookmark named like ...) Dappled Light (11032 byte URL at Sun Apr 27 2025 14:07:35 GMT+1000 (Australian Eastern Standard Time)) - RJM Programming - April, 2025 ... thanks to https://stackoverflow.com/questions/20039765/how-to-apply-a-css-filter-to-a-background-image
… that the web browser Cache will help out the recipient get back their background image data on the condition they haven’t cleared their web browser cache … that is
Email and SMS can fail when “substances” are data URIs. We see it as food for thought not attended to today.
… and today, we’re back with a solution involving …
for the originator (asking for a data URI into the mix of their creation) we’re now calling our helper PHP via Ajax (with a new twist) …
var zhr=null, zform=null;
var dumappings=[], dutmpfiles=[];
var duin='', numds=0;
function nodu(inida) { // used as a wrapper before the email or SMS is sent off
var outida=inida;
for (var ia=0; ia<dumappings.length; ia++) {
while (outida.indexOf(dumappings[ia]) != -1) {
outida=outida.replace(dumappings[ia], dutmpfiles[ia]);
}
}
return outida;
}
function showStuff() {
if (zhr != null) {
if (zhr.readyState == 4) {
if (zhr.status == 200) {
if (zhr.responseText.indexOf('</p>') != -1) {
dutmpfiles.push(zhr.responseText.split('</p>')[0].split('>')[eval(-1 + zhr.responseText.split('</p>')[0].split('>').length)]);
}
zhr=null;
}
}
}
}
function ajaxit(indu) {
var urlis='//www.rjmprogramming.com.au/HTMLCSS/legend_via_map.php';
zhr = new XMLHttpRequest();
zform=new FormData();
zform.append('urlbig', indu);
dumappings.push(indu);
zform.append('subject', '');
zform.append('to', '');
zform.append('cc', '');
zform.append('bcc', '');
zform.append('url', '');
if (indu.indexOf('data:') == 0) {
zform.append('softlink', indu.split('/')[1].split(';')[0].split(',')[0]);
}
zhr.open('post', urlis, true);
zhr.onreadystatechange = showStuff;
zhr.send(zform);
}
?>
… effectively avoiding the need to ever need to use PHP file_get_contents to retrieve that /tmp/ content, which we found was quite a harrowing thing to try?!
for the receiver clicking an email or SMS link it used to be we’d map /tmp/*.txt mentions back to a data URI but now that is not needed anymore … phew!
We all benefit by building on what has been established before. We like it when “it feels like proof” trying something new, and verifying for yourself something you “were pretty sure was the case”. So it was today, for us, proving with a soft link usage that the mimetype assumed comes from the ln -s [sourceFile] [targetFile]‘s [targetFile] very last file extension rather than any reference to [sourceFile] or it’s extension, and that the way you name the [sourceFile] does not have to reflect, file extension wise, that data that is in [sourceFile] necessarily.
… as value adding propositions. To make the idea of multiple background images work we have to control …
a comma separated list of image “substances” for a CSS styling background: url([backgroundSubstance1]),url([backgroundSubstance2]) !important etcetera style of clause … to which we like to embellish via …
background-position and background-repeat … eg. background: url([backgroundSubstance1]) top left no-repeat,url([backgroundSubstance2]) bottom right no-repeat !important; … gets you so far, but to allow for …
opacity we prefix … eg. background: linear-gradient(rgba(255,255,255,0.5),rgba(255,255,255,0.5)),url([backgroundSubstance1]) top left no-repeat,linear-gradient(rgba(255,255,255,0.5),rgba(255,255,255,0.5)),url([backgroundSubstance2]) bottom right no-repeat !important; … the application of which is handled by the Javascript below, so as far as …
background-size goes we need Javascript to help out …
var firsturl='//www.rjmprogramming.com.au/dappled_light.jpg', lastmultpos='', firstmultpos='top left', lasturl='', numb=2, actnumb=1;
var prebrest=' ' + eval(-15 + eval(screen.width / numb)) + 'px ' + eval(-15 + eval(screen.height / numb)) + 'px ';
var brest=' ' + firstmultpos + ' no-repeat';
var blist='', bposlist='', bcomblist='';
Note, too, with these changes, with all the functionality the first textbox has now, in order to make this information better disseminated for mobile users, we introduced a marquee-like “Eat at Joe’s” arrangement for it …
var origpl='', iorigpos=0, two=2;
function eatatjoes() { // via setInterval(eatatjoes, 100);
var atst='';
iorigpos+=two;
if (iorigpos >= eval('' + document.getElementById('mynum').placeholder.length)) {
iorigpos=0;
document.getElementById('mynum').placeholder=origpl;
} else {
atst=origpl.substring(0,iorigpos);
document.getElementById('mynum').placeholder=origpl.substring(iorigpos) + atst;
}
}
Today, the approach is CSS “hands on”. We select an image in this “first draft”dappled_light.html and load it up at the web server, using it as a background image, for an HTML div …
From there on, our web application relies on how Javascript DOM can add HTML style element contributions into any old existing HTML element …
<div id=dstyles></div>
… dynamically to achieve dynamic display changes. Probably not needed, but makes us feel better coming back from a hashtag based URL from an email or SMS link is to add to the dynamic CSS clauses …
!important
Other than that, all pretty straightforward, and if working, can quickly allow a user to achieve a look vastly different to how they started, in a short time, and learn some CSS styling, perhaps, along the way.
Today we offer an idea for styling of the HTML blockquote element (at this WordPress blog, for example).
We use separate background images for the opening and closing quote background images we put into play, and before we go further, we must thank the great CSS-Tricks website for this idea which was modified a little for our circumstances.
Think it is good to draw attention to the blockquote because it is usually used when important information is being imparted, and because that information is coming from a source offsite.
This multiple background image idea has great application for some of the “overlay” ideas that web designers often want to put into play. As far as this WordPress blog goes, its header.php changed as per the bold code below …
<style>
.
.
.
blockquote {
display: block;
padding: 18px;
border-top: 1px solid #e1cc89;
border-bottom: 1px solid #e1cc89;
margin: 5px;
text-indent: 4px;
background: url('closequote1.gif') bottom right no-repeat,url('openquote1.gif') top left no-repeat;
background-color: #faebbc;
}
blockquote p {
display: block;
padding: 18px;
margin: 5px;
text-indent: 4px;
background: url('closequote1.gif') bottom right no-repeat,url('openquote1.gif') top left no-repeat;
background-color: #faebbc;
}
How do I love thee? Let me count the ways.
I love thee to the depth and breadth and height
My soul can reach, when feeling out of sight
For the ends of Being and ideal Grace.
I love thee to the level of everyday’s
Most quiet need, by sun and candle-light.
I love thee freely, as men strive for Right;
I love thee purely, as they turn from Praise.
I love thee with the passion put to use
In my old griefs, and with my childhood’s faith.
I love thee with a love I seemed to lose
With my lost saints – I love thee with the breath,
Smiles, tears, of all my life! – and, if God choose,
I shall but love thee better after death.
The last time we talked about the PHP web application called “Learning Programming” at this blog was with regard to some software integration that linked the “Learning Programming” web and (Android (at Google Play)) mobile application with this Blog web application with Xcode Learning Programming Blog Course Cookies Tutorial as shown below.
Today we do a bit of CSS working on the “Learning Programming” web and (Android) mobile application to add interest to the top functional area. Firstly thought of doing clipart or real photography to do a diploma border idea, but found that with the latter the mix of realia with stark web functionality was a bit jarring, and, on a first look, didn’t gel with any of the free clip art border image ideas out there, so plumped for a background image to the HTML table element involved, and realized, working with Paintbrush PNG image opacity (before it needs the CSS approach to opacity), that it would be okay to hive off that first image another one with a bit of transparent design to add a hint of educational paperwork to the project. Of course, an expert in graphic design would be throwing many more ideas at this, and implementing a great result, but am, today, showing you how multiple background images can be quite effective and refreshing … aaaaahhhhh.
So the Before vs After infomercial today had these steps, roughly:
Show Before “Learning Programming” in Firefox web browser
show you how to add a dynamic UIButton at loading (if you want to know … thanks to the great Open Source community for all the ideas emanating from this link)
also is one way to solve the UIWebView “on its lonesome” issue (when pointing at URLs without total navigational integrity (ie. they have a tags with target=’_blank’ for instance)) … ‘(but please know such a scenario is not good without also providing, at least, buttons for the equivalent functionality as the web browser’s back and forward buttons … remember, with UIWebView there is no address bar, and no multiple tabs nor windows … if your webpage has complete forward and backward navigational integrity that could suit a UIWebView “on its lonesome”)’ … mentioned in Xcode iOS Mobile Project Exporting Primer Tutorial as shown below
… but this time we tidy up some loose ends such as …
fixing a lack of functionality within the iOS mobile app’s UIWebView contents cookie processing regarding the “last” course blog posting used, by setting up our own “Clayton’s” cookies (ie. we use PHP to simulate cookies without there being cookies – which don’t always work in UIWebView without some consideration … another approach is shown with this link)
fixing an annoying feature of the work whereby with mobile apps any scrolling jumps are quite annoying, and we stop this happening for mobile platforms
adding an extra link to allow navigation to the top of the blog course posting once nearing the bottom, especially as this can represent a lot of scrolling on occasions and because once you are down the bottom it would be good to also see what you have just viewed in some way shape or form (issues like this are considerations for the UX area of knowledge)
As a general comment about Xcode iOS mobile development (but please note that the idea of step 1. above circumvents the complication … by the way, the two small red circles in the tutorial picture are me showing you where the Back and Forward buttons are (rather than the code ) … now that iOS 8 buttons have no background by default it is sometimes necessary to point them out) you must try to get efficient at the linking (or “connecting”) of “nib” file and/or “storyboard” GUI objects to your ViewController.h code and for this, we’d really like to defer to a YouTube video we mentioned in a tutorial a long time back called Wish me luck … 1 of ?) iOS Hello World on iPhone 5 simulator … since then have worked out, with some web browsers, how to lob you at the exact bit, and am hoping you get straight to that bit with this link (please have sound up to hear of role of the “control” button “while dragging”). By the way, the pink circle shows a new web page link (not the app this time) to link back to the mobile app from the web page iframe element and the orange circle shows the “Last” (Blog Course Posting) link which, in this mobile scenario, on an iPad, would use our PHP “Clayton’s” cookies system.
We test the new changes deployed on a real iPad device today, the idea of which is more than somewhat verging on great, as you can’t rely on simulators forever (by the way, with iOS 8 simulators we had problems and we needed to consult with this link … where you may notice that we ended up reverting to iOS version 7.1 simulators … thanks), though the options in this field grow, as you can imagine, because it is impossible to keep up owning all the gadgetry you’d need as a programmer to test for everything with real devices. Don’t confuse this “middle game” “quality assurance” or “unit test” concept with the concept of an “end game” deployment as an Apple App Store app (where there are quite a few extra steps to undertake). When dealing with real devices you will need:
the device … doh, chortle, doh, chortle
the Mac OS X laptop that runs Xcode
the white lead that temporarily connects your iPad or iPhone or iPod mobile device with your Mac OS X laptop that runs Xcode
the iTunes device (up arrow eject) button to safely eject the device (similar functionality as Windows icon right-click Eject options (in Windows Explorer))
Here is a link to some downloadable PHP programming source code for an iOS Web App’s UIWebView’s underlying content, that is used when the platform is a mobile one, while the pre-existant coursecookies.html is still okay for non-mobile platforms which still use real cookies:
… and there were changes needed for PHP code in wp-content/themes/twentyten/header.php (the bold parts of which are particularly relevant to the last modifications) because it establishes the header Javascript and two sections of code are involved …
var ourck=location.search.split('ck=')[1] ? location.search.split('ck=')[1].split('&')[0] : '';
var ourpp=location.search.split('pp=')[1] ? location.search.split('pp=')[1].split('&')[0] : '';
var ourpn=location.search.split('pn=')[1] ? location.search.split('pn=')[1].split('&')[0] : '';
var ourpage=location.search.split('page_id=')[1] ? location.search.split('page_id=')[1].split('&')[0] : '';
var ourp=location.search.split('p=')[1] ? location.search.split('p=')[1].split('&')[0] : '';
var ourcourseurl='';
var ourcoursetitle='';
var ua = navigator.userAgent;
var isiPad = /iPad/i.test(ua) || /iPhone OS 3_1_2/i.test(ua) || /Android/i.test(ua) || /iPhone OS 3_2_2/i.test(ua);
show you how to add a dynamic UIButton at loading (if you want to know … thanks to the great Open Source community for all the ideas emanating from this link)
also is one way to solve the UIWebView “on its lonesome” issue (when pointing at URLs without total navigational integrity (ie. they have a tags with target=’_blank’ for instance)) … ‘(but please know such a scenario is not good without also providing, at least, buttons for the equivalent functionality as the web browser’s back and forward buttons … remember, with UIWebView there is no address bar, and no multiple tabs nor windows … if your webpage has complete forward and backward navigational integrity that could suit a UIWebView “on its lonesome”)’ … mentioned in Xcode iOS Mobile Project Exporting Primer Tutorial as shown below
As a general comment about Xcode iOS mobile development (but please note that the idea of step 1. above circumvents the complication … by the way, the two small red circles in the tutorial picture are me showing you where the Back and Forward buttons are (rather than the code ) … now that iOS 8 buttons have no background by default it is sometimes necessary to point them out) you must try to get efficient at the linking (or “connecting”) of “nib” file and/or “storyboard” GUI objects to your ViewController.h code and for this, we’d really like to defer to a YouTube video we mentioned in a tutorial a long time back called Wish me luck … 1 of ?) iOS Hello World on iPhone 5 simulator … since then have worked out, with some web browsers, how to lob you at the exact bit, and am hoping you get straight to that bit with this link (please have sound up to hear of role of the “control” button “while dragging”). By the way, the green circle shows a new web page link (not the app this time) to link back to the mobile app from the web page iframe element.
We test the change’s deployment on a real iPad device today, the idea of which is somewhat verging on great, as you can’t rely on simulators forever (by the way, with iOS 8 simulators we had problems and we needed to consult with this link … where you may notice that we ended up reverting to iOS version 7.1 simulators … thanks), though the options in this field grow, as you can imagine, because it is impossible to keep up owning all the gadgetry you’d need as a programmer to test for everything with real devices. Don’t confuse this “middle game” “quality assurance” or “unit test” concept with the concept of an “end game” deployment as an Apple App Store app (where there are quite a few extra steps to undertake). When dealing with real devices you will need:
the device … doh, chortle, doh, chortle
the Mac OS X laptop that runs Xcode
the white lead that temporarily connects your iPad or iPhone or iPod mobile device with your Mac OS X laptop that runs Xcode
the iTunes device (up arrow eject) button to safely eject the device (similar functionality as Windows icon right-click Eject options (in Windows Explorer))
Here is a link to some downloadable Xcode (on a Mac laptop) Objective-C programming source code for an iOS Web App which turns this WordPress Blog into a mobile app (of more use than the one of the tutorial below … because of the addition of two UIButtons for Back and Forward UIWebView navigation (as distinct from the website navigation … ie. the buttons belong to the app, not the website, even though they look as though they could belong to the website)) which you may want to rename to AppDelegate.h, AppDelegate.m, ViewController.h, ViewController.m and main.m
What needed to change to integrate Blog Course Postings as extra functionality into the existing Learning Programming software was:
changes to the Learning Programming landing page as you can see here
changes to PHP code in this WordPress Blog’s document root’s wp-content/themes/twentyten/functions.php (in bold below … to get this into context try reading WordPress Blog Course Design Cookies Tutorial):
Today we come at an Xcode iOS Mobile App issue (ie. the “UIWebView ‘on its lonesome’ issue” … codename Uiol) from two sides:
to show you how to add a dynamic UIButton at loading (if you want to know … thanks to the great Open Source community for all the ideas emanating from this link)
also is one way to solve the UIWebView “on its lonesome” issue (when pointing at URLs without total navigational integrity (ie. they have a tags with target=’_blank’ for instance)) … ‘(but please know such a scenario is not good without also providing, at least, buttons for the equivalent functionality as the web browser’s back and forward buttons … remember, with UIWebView there is no address bar, and no multiple tabs nor windows … if your webpage has complete forward and backward navigational integrity that could suit a UIWebView “on its lonesome”)’ … mentioned in Xcode iOS Mobile Project Exporting Primer Tutorial as shown below
As a general comment about Xcode iOS mobile development (but please note that the idea of step 1. above circumvents the complication … by the way, the two small yellow circles in the tutorial picture are me showing you where the Back and Forward buttons are (rather than the code (which is still stuck on working out how to make toast in the morning before you get up, even before you thought you knew you wanted it … codename Wohtmtitmbygu_Ebutykywi)) … now that iOS 8 buttons have no background by default it is sometimes necessary to point them out) you must try to get efficient at the linking (or “connecting”) of “nib” file and/or “storyboard” GUI objects to your ViewController.h code and for this, we’d really like to defer to a YouTube video we mentioned in a tutorial a long time back called Wish me luck … 1 of ?) iOS Hello World on iPhone 5 simulator … since then have worked out, with some web browsers, how to lob you at the exact bit, and am hoping you get straight to that bit with this link (please have sound up to hear of role of the “control” button “while dragging”).
We test the change’s deployment on a real iPad device today, the idea of which is somewhat verging on great, as you can’t rely on simulators forever, though the options in this field grow, as you can imagine, because it is impossible to keep up owning all the gadgetry you’d need as a programmer to test for everything with real devices. Don’t confuse this “middle game” “quality assurance” or “unit test” concept with the concept of an “end game” deployment as an Apple App Store app (where there are quite a few extra steps to undertake). When dealing with real devices you will need:
the device … doh, chortle, doh, chortle
the Mac OS X laptop that runs Xcode
the white lead that temporarily connects your iPad or iPhone or iPod mobile device with your Mac OS X laptop that runs Xcode
the iTunes device (up arrow eject) button to safely eject the device (similar functionality as Windows icon right-click Eject options (in Windows Explorer))
Here is a link to some downloadable Xcode (on a Mac laptop) Objective-C programming source code for an iOS Web App which turns this WordPress Blog into a mobile app (of more use than the one of the tutorial below … because of the addition of two UIButtons for Back and Forward UIWebView navigation (as distinct from the website navigation … ie. the buttons belong to the app, not the website, even though they look as though they could belong to the website)) which you may want to rename to AppDelegate.h, AppDelegate.m, ViewController.h, ViewController.m and main.m
The only code that needed to change for Dynamic UIButton purposes is described via the link … ViewController.m
Xcode iOS Mobile Project Exporting Primer Tutorial
The Xcode IDE, like many IDEs, holds that special fascination for the occasions when you, the user, (or youse, the users (chortle, chortle)) can go “File->New Project” as we showed, below, with the previous Xcode iOS Utility Application Primer Tutorial. With a couple more button presses the user will feel that satisfaction of making the fastest progress they can expect to ever feel progressing on a project. Today, though, we take that a little further along and say “we’ve got this Xcode iOS Mobile Project that we would like to ‘clone’ into a new project with a few tweaks because it is so close to what we want”. So you look around the File menu for mention of the word Export, as a first instinct, and, lo and behold it isn’t there … boo hoo. So we go off and find this very useful link, from which we “cherry pick” Diago’s advice, because it is all “déjà vu” all over again for me, and think we’ve gone through this mild pain before … thanks.
Do all the workings of “nib” files and/or “storyboards” come across? … Well, I hate to give away too many surprises so if you want to find out for yourself, view the tutorial, and/or have a sneak peek ?
Today, we show how, with the Xcode IDE and a bit of work the creation of a mobile application showing the use of a UIWebView, the contents being this WordPress Blog (but please know such a scenario is not good without also providing, at least, buttons for the equivalent functionality as the web browser’s back and forward buttons … remember, with UIWebView there is no address bar, and no multiple tabs nor windows … if your webpage has complete forward and backward navigational integrity that could suit a UIWebView “on its lonesome”).
And today we show you some steps in deploying it to an iPad … say some steps, because it ignores all the first steps regarding registering with Apple as an iOS Developer and getting your iPad registered as a development device associated with your iOS Developer Account (accessible by its associated Apple ID) … your (provisioning) profile … because this had already been done with the iPad involved … but if you are into “thrills and spills” (it wasn’t quite as straightforward as shown) take a geek at the upgrade of the iPad’s iOS (operating system) to 8.0.2 and Xcode (on the laptop) to an SDK to suit iOS 8 … the “it’s a great bag of fruit, it’s a Silvertex iOS 8 suit” … very lame chortle, very lame chortle.
So, as with Android development, all this is like the “middle game” that we talked about in Android development, and put into context with Eclipse Android App Google Play Ready Primer Tutorial … with mobile development there are not so big “start games”, big to huge “middle games” and big “end games” (less big with Android “end games”).
As a general comment about Xcode iOS mobile development you must try to get efficient at the linking (or “connecting”) of “nib” file and/or “storyboard” GUI objects to your ViewController.h code and for this, we’d really like to defer to a YouTube video we mentioned in a tutorial a long time back called Wish me luck … 1 of ?) iOS Hello World on iPhone 5 simulator … since then have worked out, with some web browsers, how to lob you at the exact bit, and am hoping you get straight to that bit with this link (please have sound up to hear of role of the “control” button “while dragging”).
This deployment to real devices, of course, is great, as you can’t rely on simulators forever, though the options in this field grow, as you can imagine, because it is impossible to keep up owning all the gadgetry you’d need as a programmer to test for everything with real devices. Don’t confuse this “middle game” “quality assurance” or “unit test” concept with the concept of an “end game” deployment as an Apple App Store app (where there are quite a few extra steps to undertake). When dealing with real devices you will need:
the device … doh, chortle, doh, chortle
the Mac OS X laptop that runs Xcode
the white lead that temporarily connects your iPad or iPhone or iPod mobile device with your Mac OS X laptop that runs Xcode
the iTunes device (up arrow eject) button to safely eject the device (similar functionality as Windows icon right-click Eject options (in Windows Explorer))
The Xcode IDE, like many IDEs, holds that special fascination for the occasions when you, the user, (or youse, the users (chortle, chortle)) can go “File->New Project”. With a couple more button presses the user will feel that satisfaction of making the fastest progress they can expect to ever feel progressing on a project.
This great feeling is well worth it, as long as the user doesn’t fall into the “post FNP navel gazing” period.
Today, we show how, with the Xcode IDE and a few button presses, with no coding (yet), the user can achieve giant leaps in their Xcode iOS Utility mobile application.
IDEs are worth discussing in relation to pros and cons with respect to this:
Pros are …
speed of initial progress
the clarity you get to do with the design aspects of seeing what you have after the initial non-coding FNP phase
the main files you will ever need have been created in the right places with the correct permissions, etcetera
any makefiles required will have been created and any additional files added will be handled by the IDE as far as keeping the (underlying) makefile up to date
there is online help with IDE procedures and search engines are good with your IDE keyword
multi-device scenarios catered for
debugging facilities are great
Cons might be (my argument is that you can control lots of these with awareness) …
what to do after speed of initial progress (“post FNP navel gazing”?), and the hard slog begins (take some time between this and your next bit of work planning the first few more important bits of the “hard slog” to do)
the design has a lot of similarities to other products “out there” (plan for some things you want to do that can be done in a variety of ways and pick a way that you have never tried before, if applicable)
you may have lost that intimate awareness of where each file is and what its role is for your project (go to the Finder or Windows Explorer or other, and locate your project, and see what’s there, now, preferably)
you lack intimate understanding of how to compile your code when it comes to porting it to another environment (the next IDE along, if applicable, may help with this (we hope))
the relationship of code to GUI can be baffling (practice the GUI to code linkage points, and look around more when succeeding, and remember that the more you practice the better you get)
the diversity of choice of environment is sometimes unnecessary and confusing (this is worth putting up with, especially as the more scenarios you test, the more solid your project is)
you may debug your way to a less efficient and elegant solution (leave debugging to only deeply embedded issues or problems, rather than using it in any way like a design tool)
Think Pro 2. on its own, makes it worth while to use IDEs, as you can see what is behind you and ahead of you, and it helps you envisage the “big picture” of what you want to achieve overall.