
Gimp Drop Shadow Primer Tutorial
There’s this billboard in Town Hall Station platform 5, in Sydney …

… that I’ve always envied the graphics work of, regarding how it attracts attention. And it is not complicated. It describes a rail trip with coloured circles of colour representing the stations. These circles “come out at you”, simply, via what we later discovered in Gimp, must be a “drop shadow”.
So we set out to see if something approaching it could be achieved here, and yes, though not as good, the work of …
- open Paintbrush
- File -> New
- use filled in ellipse toolbox item to create the various coloured circles
- join them with black lines via the line item off this same toolbox
- used File -> Save As our jpeg file
- opened this same file using (the brilliant, the marvellous) Gimp (image editor)
- used Tools -> Selection Tools -> Ellipse Select and highlighted each coloured circle in turn with step below
- used Filters -> Light and Shadow -> Drop Shadow… with its default settings (though you graphic experts out there will no doubt do much better) to add shadowing around the circle
- used Export As -> our jpeg file … to result in
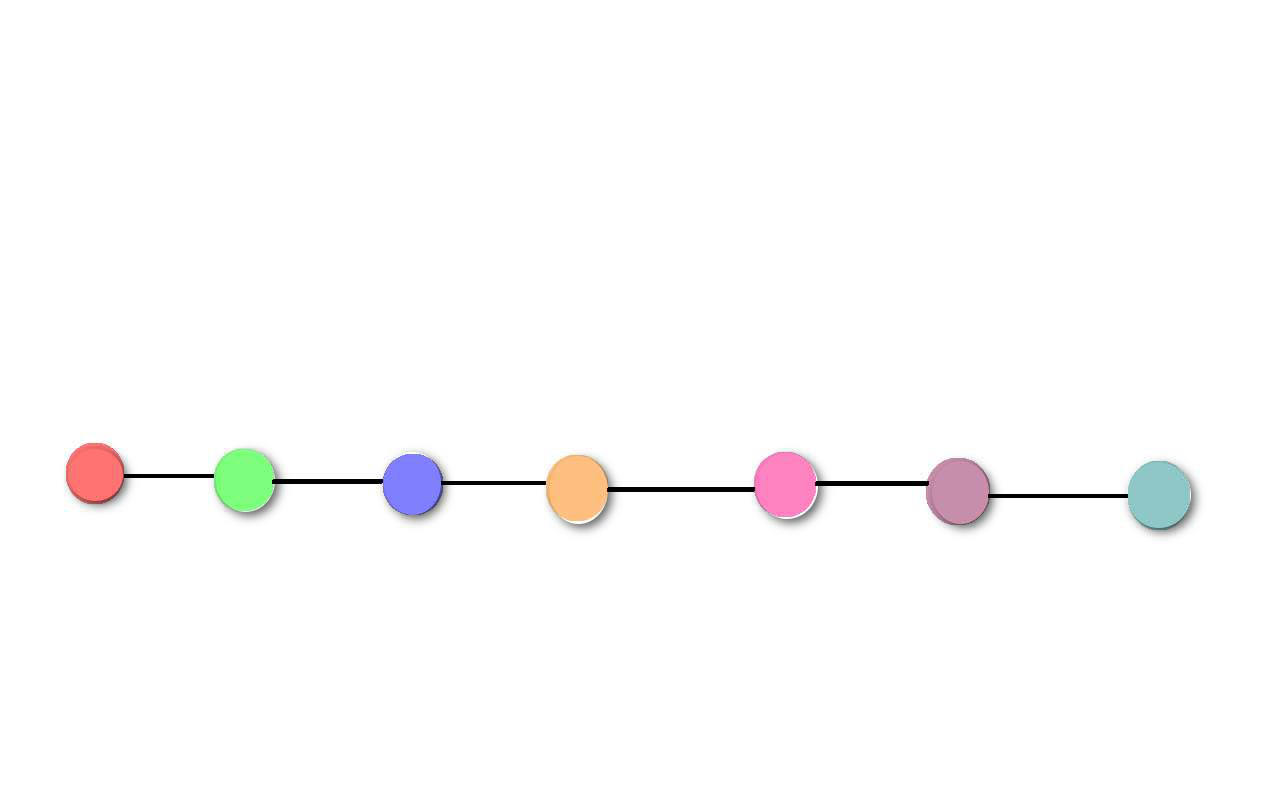
… and we don’t half mind the end result, as it stands out in that 3D way we saw at the train station … don’t you think?
If this was interesting you may be interested in this too.

