
Mac Redaction Ideas Primer Tutorial
Redaction …
redaction
/rɪˈdakʃ(ə)n/Learn to pronounce
noun
the process of editing text for publication.
“what was left after the redaction would be virtually useless”
the censoring or obscuring of part of a text for legal or security purposes.
a version of a text, such as a new edition or an abridged version.
plural noun: redactions
“the author himself never chose to establish a definitive redaction”
… is often needed when you make a presentation involving an example using personal data. Like with blinds (like 2 or 3 or 4 below) or see-through bricks (like 4 below) in a shower or frosted glass (like 3 below) there are various forms of redaction (or “obfuscation”) …
- complete “cut out”
- totally opaque block out
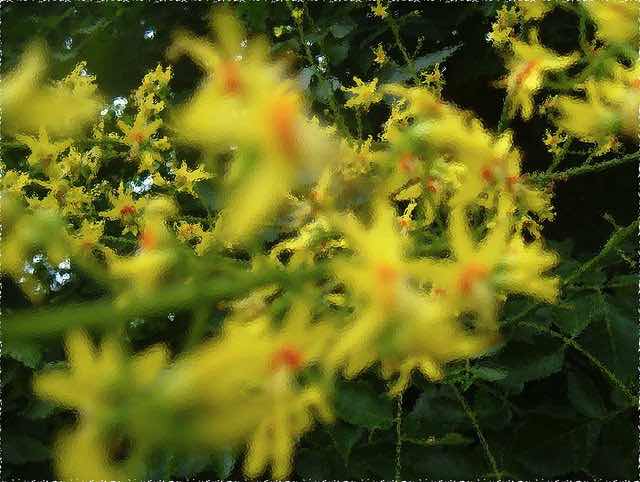
- blur to a level that shapes can be made out but text is hard or impossible to read and imagery is blurry or moving so as to lack detail and focus
- blur to a level that just shows that something used to be there but there is no way to read any text or make out any imagery
- obfuscate that changes detail and focus
… and we were interested in terms of mainly using macOS (or Mac OS X) on a MacBook Pro putting presentations together, some of the redaction techniques we use here on a fairly regular basis …
| MacOS Desktop Application | Form of Redaction | Selection Steps in Application | Other Steps in Application | |
|---|---|---|---|---|
| Paintbrush | 1 | Window -> Toolbox Rectangle Dashed icon click Drag top left to bottom right |
Edit -> Cut | |
| 2 | Window -> Toolbox Rectangle Dashed icon click Drag top left to bottom right |
Edit -> Copy | Edit -> Paste Drag into “block out” position |
|
| Preview | 1 | Tools -> Rectangular Selection Drag top left to bottom right |
Edit -> Cut | |
| 2 | Tools -> Rectangular Selection Drag top left to bottom right |
Edit -> Copy | Edit -> Paste Drag into “block out” position |
|
| 2 | Tools -> Annotate -> Rectangle
Drag to resize and reposition into “block out” position |
|||
| 2 | Tools -> Annotate -> Oval
Drag to resize and reposition into “block out” position |
|||
| 2 | Tools -> Annotate -> Polygon
Drag to resize and reposition into “block out” position |
|||
| 2 | Tools -> Annotate -> Star
Drag to resize and reposition into “block out” position |
|||
| 5 | Tools -> Annotate -> Text
Drag to resize and reposition into “align, or block out” position as well as text definition resizing |
|||
| 5 | Tools -> Annotate -> Line
Drag to resize and reposition into “align, or block out” position |
|||
| 5 | Tools -> Annotate -> Arrow
Drag to resize and reposition into “align, or block out” position |
|||
| 5 | Tools -> Annotate -> Speech Bubble
Drag to resize and reposition into “enhance, align, or block out” position as well as the arrow repositioning functionality (as shown in today’s tutorial picture) |
|||
| 5 | Tools -> Annotate -> Loupe
Drag to resize and reposition into “magnifying” position (as shown in today’s tutorial picture) |
|||
| Gimp | 1 | Tools -> Selection Tools -> Rectangle Select Drag top left to bottom right |
Edit -> Cut | |
| 2 | Tools -> Selection Tools -> Rectangle Select Drag top left to bottom right Edit -> Copy |
Edit -> Paste Drag into “block out” position |
||
| 3 | Tools -> Selection Tools -> Rectangle Select Drag top left to bottom right |
Filters -> Blur -> Gaussian Blur… Leave Defaults Click OK |
||
| 4 | Tools -> Selection Tools -> Rectangle Select Drag top left to bottom right |
Filters -> Blur -> Gaussian Blur… Increase Size X and Size Y to appropriate level of blurring Click OK (as shown in today’s tutorial picture) |
||
| 3 | Tools -> Selection Tools -> Rectangle Select Drag top left to bottom right |
Filters -> Blur -> Linear Motion… Leave Defaults Click OK |
||
| 4 | Tools -> Selection Tools -> Rectangle Select Drag top left to bottom right |
Filters -> Blur -> Linear Motion… Increase Length and/or Angle to appropriate level of motion feeling blurriness (as shown in today’s tutorial picture) Click OK |
Paintbrush and Gimp are primarily image editors, and Preview can be an image editor or image and text combination editor or PDF creator and/or editor (“out of the box” for macOS or Mac OS X).
We hope this is of interest to you budding “procedural explainers” out there?!
If this was interesting you may be interested in this too.

