Our “quest” for speed continues, man person. This WordPress Blog (from WordPress.org (not WordPress.com)) is now using the PHP mod_deflate module to zip up the traffic going out on the web, in exchange for a higher CPU load for our web server here at the www.rjmprogramming.com.au domain.
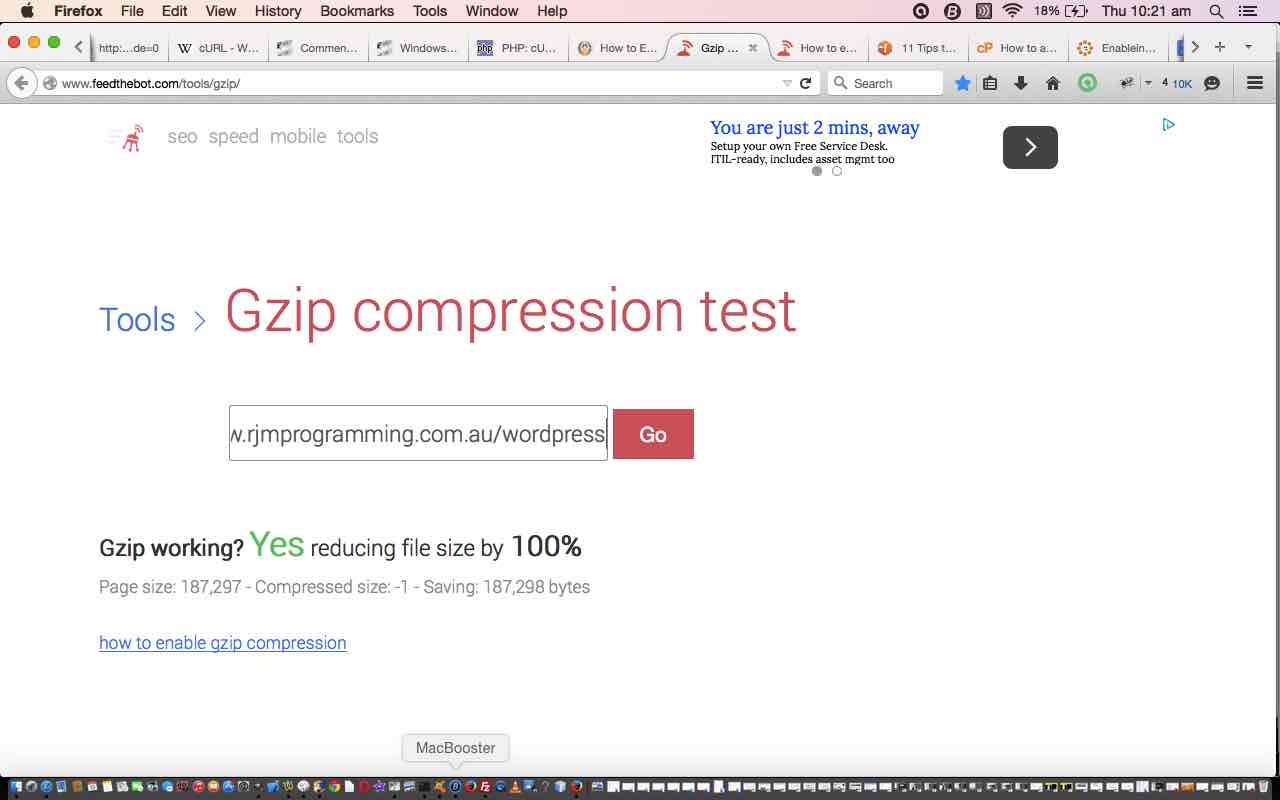
And how do we know? We put it through the sanity check gzip checker website here.
And what methods can implement this functionality? …
- fix http.conf as the configuration file of an Apache/PHP/MySql web server … for advice here read here
- fix the document root .htaccess file … for advice here read here
- as applicable fix the .htaccess file at the root directory of the website of interest
- add (the bold bit)
<?php// at top of the root directory index.php of the PHP website of interest … read more about this from WordPress here
ob_start('ob_gzhandler');
// rest of code ...
// ...
// ... end of rest of code
?>
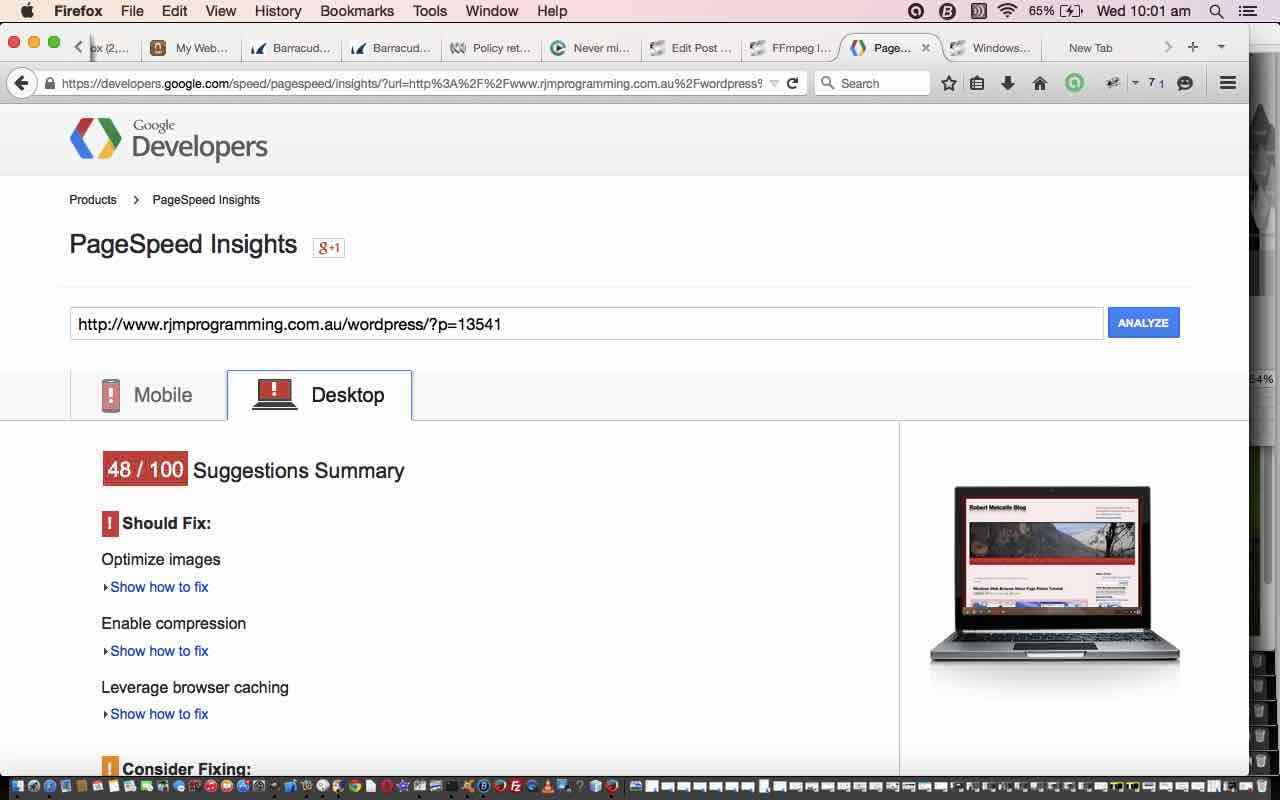
We’ve decided to use that last method, and you can see how simple this is here. This tutorial also shows the improvement reflected with a speed test at Google Page Speed. Our “quest” continues. To see where we have come from, take a look at EasyApache in cPanel Primer Tutorial as shown below. Hope to see you again soon.
Previous relevant EasyApache in cPanel Primer Tutorial is shown below.
This is not a Monty Python skit (though?) and there is a thought process to say that the previous relevant Google Page Speed Image Optimization Follow Up Tutorial as shown below is relevant to “EasyApache on cPanel Primer Tutorial” … but I’m hoping that if you run an Apache/PHP/MySql domain you may be more advanced than we were here, seeking a “gzip” solution to speeding our website up.
These days (actually for some time) a “gzip” solution is now referred to as a “deflate” solution, and requires, on an Apache/PHP/MySql CentOS web hosting arrangement, the installation into your Apache of the module “mod_deflate” … it is FAR from deflating chortle, chortle.
Your first question regarding this, for yourself, might be … “How can I tell if gzip and/or mod_deflate is already making things faster on a URL of interest?” … use this testing website (thanks man peepholes people). If the answer is no, as it was for this WordPress blog, please read on.
So what is cPanel?
So what is CentOS? So what is WHM? So what is vps? We had a tutorial called Web Server Primer Tutorial where you can look up more.
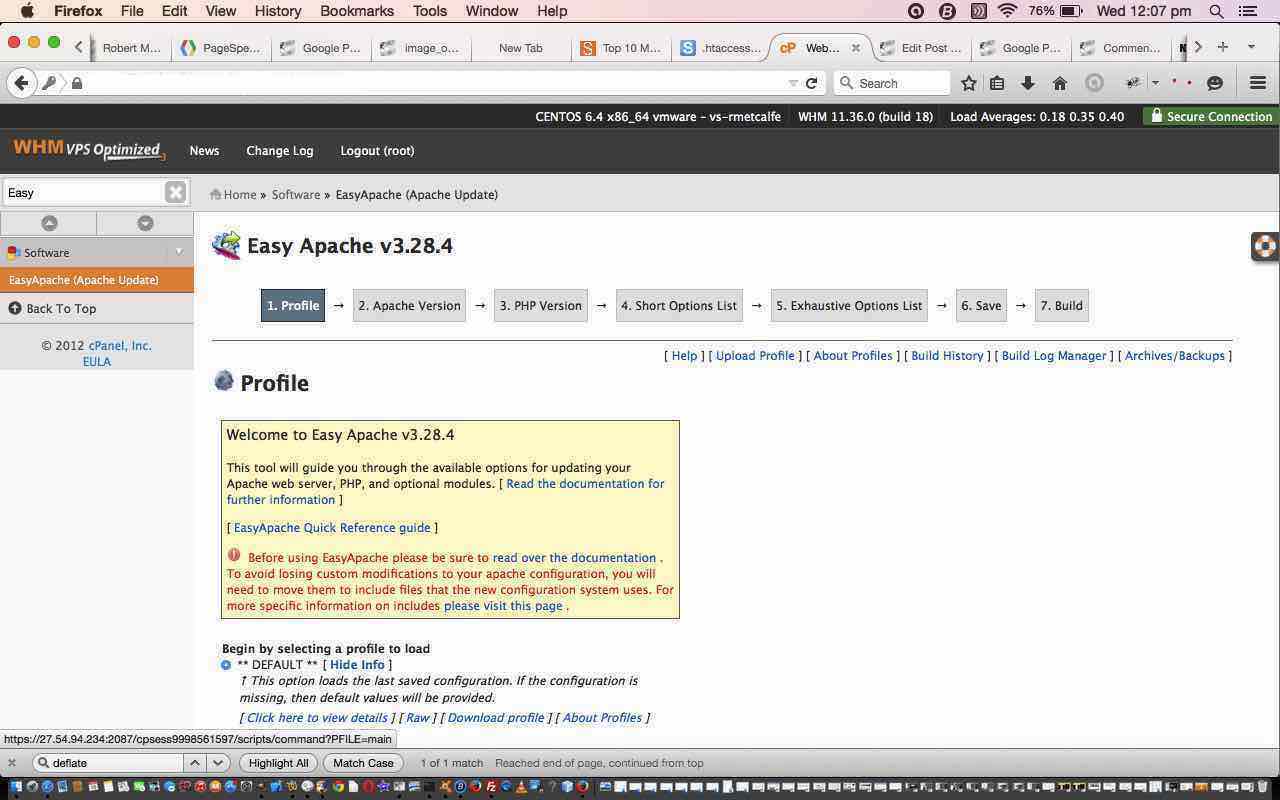
So what is EasyApache (in cPanel)?
Finished reading … okay, so EasyApache is a means by which, on our Linux web server we can rebuild Apache and PHP (we go to PHP 5.4 from PHP 5.3 … and there are some repercussions to talk about another time) and MySql, and with the rebuild we make sure “mod_deflate” is selected this time.
If you are undertaking this, may I say it is good to, before you start …
- backup the webserver … (though my first run did have an issue (see “cPanel gurus” below) and it reverted to a working Apache correctly, and, by the by, doesn’t stop your website working as it builds (for about 30 minutes))
- “cPanel gurus” … know that if the whole thing sounds trepidatious, there is a great support website for cPanel with great experts at the ready, and if there is an issue, at least with my CentOS WHM vps arrangement any issue hooks into cPanel support (with an email) should you want some advice, and perhaps give feedback
Enjoy today’s tutorial.
Tomorrow we show making the “gzip” solution happen via “mod_deflate” for WordPress PHP website in a generic approach applicable to many other PHP website scenarios.
Previous relevant Google Page Speed Image Optimization Follow Up Tutorial is shown below.
Do you remember a few days back talking about the Google Page Speed functionality with FFmpeg Image Optimization Primer Tutorial, as shown below, and also with Google PageSpeed and Firebug Mobile Friendly Primer Tutorial earlier on? We talked about image optimization … well, today, we are going to do some more … it is one of those jobs you could probably keep visiting … and practice helps, methinks. Why is image optimization important? It helps you win SEO “brownie points” with the search engines.
On the WordPress blog you are reading at the moment there is no doubt that some image optimization could be done, so we do this today, concentrating on content above the fold, using a desktop Mac application Paintbrush (and saving as a jpeg with about 25% quality as per this example), though we could have used Pixillion or Gimp (see Gimp Batch Image Manipulation Primer Tutorial) to do this job. The Paintbrush method is used because it is not every file I want to change whereas the other methods suit a “do-all-folder” approach.
You’ll see with the tutorial lots of (s)ftp transferring using the Firefox web browser with its brilliant FireFTP add-on, and you’ll see reduced file sizes and that the Google PageSpeed results improve as a result.
You may be surprised what tomorrow brings, consolidating the thoughts of today, to continue on our “quest” to speed up this WordPress blog. Hope you can join us then.
Previous relevant FFmpeg Image Optimization Primer Tutorial is shown below.
The Linux FFmpeg command is so useful, and so modest. In its “man ffmpeg” it just describes itself as a video converter, but it does (eg. scaling) images as well …. guess the modesty could be that it thinks of one image as a very short video … subliminal advertising perhaps?! We found it invaluable in the “end game” part of the creation of our “Make Your Own Charts” iOS (iPad) mobile application, and you can read more about this here.
Do you remember a few days back talking about Google PageSpeed and Firebug Mobile Friendly Primer Tutorial when we said? …
The Google PageSpeed Insight tools not only measure a webpage’s speed but can also give a report on the Mobile (or Desktop, for that matter) friendliness of that webpage, giving a score out of 100.
… well, today, we turn our attention to the Google PageSpeed talent for showing you how to speed up your webpages, and so, get in the better books with the search engines, and your users, probably. The use of Google PageSpeed on the Landing Page clone pointed out the speed savings that could be achieved by some image optimization (preferably lossless compression) and there is a pretty obvious one here … let’s make these images 105px wide (at least for when they just load “above the fold”).
So, in relation to WordPress Recent Post Landing Page Tutorial as shown below, that’s where we get a new … recent-posts-2.php … and the changes to code … here.
In that code you’ll see the major PHP “exec” code line of change as …
exec("ffmpeg -i " . dirname(__FILE__) . "/" . $narray[$thisij] . ".jpg -vf scale=105:-1 " . dirname(__FILE__) . "/" . $narray[$thisij] . ".jpeg");
That leaves a good zero.html arrangement.
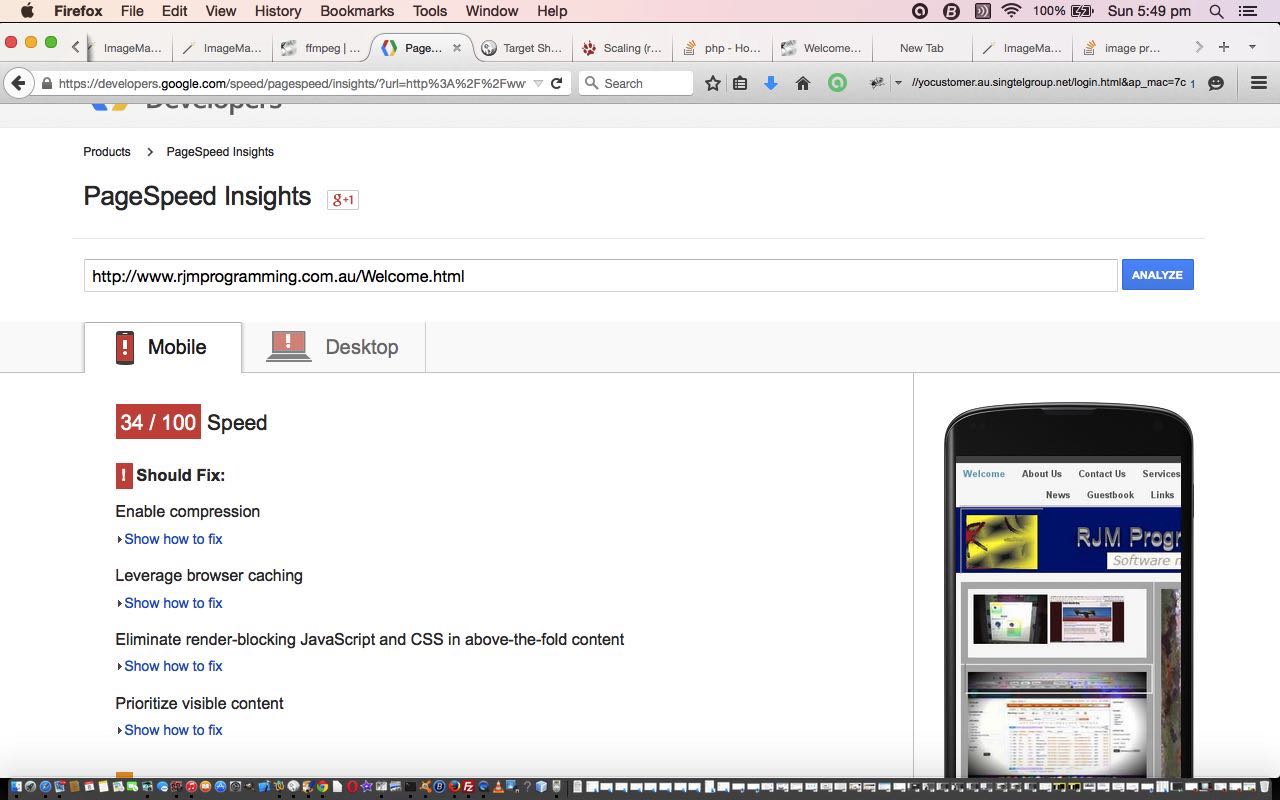
You’ll see that this is only a minor improvement from 33 to 34 score with Google PageSpeed, but has moved the Optimizing Images out of the critical section. Obviously there is such a lot to do in this area, as an ongoing project.
Did you know?
There are quite a few things to like about the Jpeg image file format, and one of the most pleasing one to implement is its peculiarity that a file extension of .jpg is totally equivalent to a file extension of .jpeg as far as the understanding of web browsers, and their rendering rules, goes. This gives a lot of scope to programmers to be able to have unusual arrangements with Jpeg files with their dual extension possibilities (the same data can have two operating system “guises”) … here we use the ability to have two different image sizes and Javascript DOM can handle the onmouseover event nonetheless by reverting to the bigger (size) version when a zooming operation is required, but none of this impacts the “above the fold” initial loading with the smaller (size) version.
Jpeg allows percentage file filtering when saving in various image editors … does one have to go on and on and on and on … or do you give up now?!
Previous relevant WordPress Recent Post Landing Page Tutorial is shown below.
A few days back we decided to revisit (WordPress Recent Post Image Follow Up Tutorial) in order to (software) integrate it with the www.rjmprogramming.com.au domain’s Landing Page. We did this for two reasons. It was probably a good visual cue for users, who may be more inclined to click an icon, than a link, these days (… am not sure yet …) and because support for Flash is becoming too difficult with the Flash we had going on the Landing Page.
As such we decided to replace the contents within the iWeb position:absolute div (that iWeb loves to use) that had Flash with new home-grown HTML iframe webpage that shows those latest 8 recent posts as referred to below.
The change did pan out to involve the “few times a day code”. Do you remember, below …
Why would this job have “a few times a day” functionality? … Well, the images change when a blog posting goes live, and at this blog this happens once a day, so there is no need to slow functionality down getting these images together more often than during that time the new blog posting is scheduled. So this “a few times a day” functionality uses (the web server Linux) crontab/curl … what a team … and we wrote recent-posts-2.php to be the PHP run with a curl … chortle, chortle.
… well, all that still applies, but what if we were to intervene in that code to write out HTML that suits that proposed iframe we talked about, above.
So that’s where we get … recent-posts-2.php … and the changes to code … here.
That leaves a good zero.html arrangement that is dynamic with those “few times a day” arrangements we already had in place, and which you can read more about below, as you wish. Alas, one speaks too soon, as there is something else needed for zero.html to be user-friendly enough for mobile usage … the scrolling is not as “truncaty” (is this a word?) on mobile devices as on non-mobile devices and we have decided here to just show the two most recent icons where the platform is mobile … and how was this done? After reading this brilliant advice … thanks … we did some Javascript onload functionality (in zero.html) as below …
<script type='text/javascript'> var one_o_five=600; function ol() { if (navigator.userAgent.match(/Android|BlackBerry|iPhone|iPad|iPod|Opera Mini|IEMobile/i)) { one_o_five=105; for (var j=3; j<=8; j++) { document.getElementById(j).style.display='none'; } } } </script>
All that is left is to wipe out the iWeb div Landing Page functionality that was Flash and put in, instead …
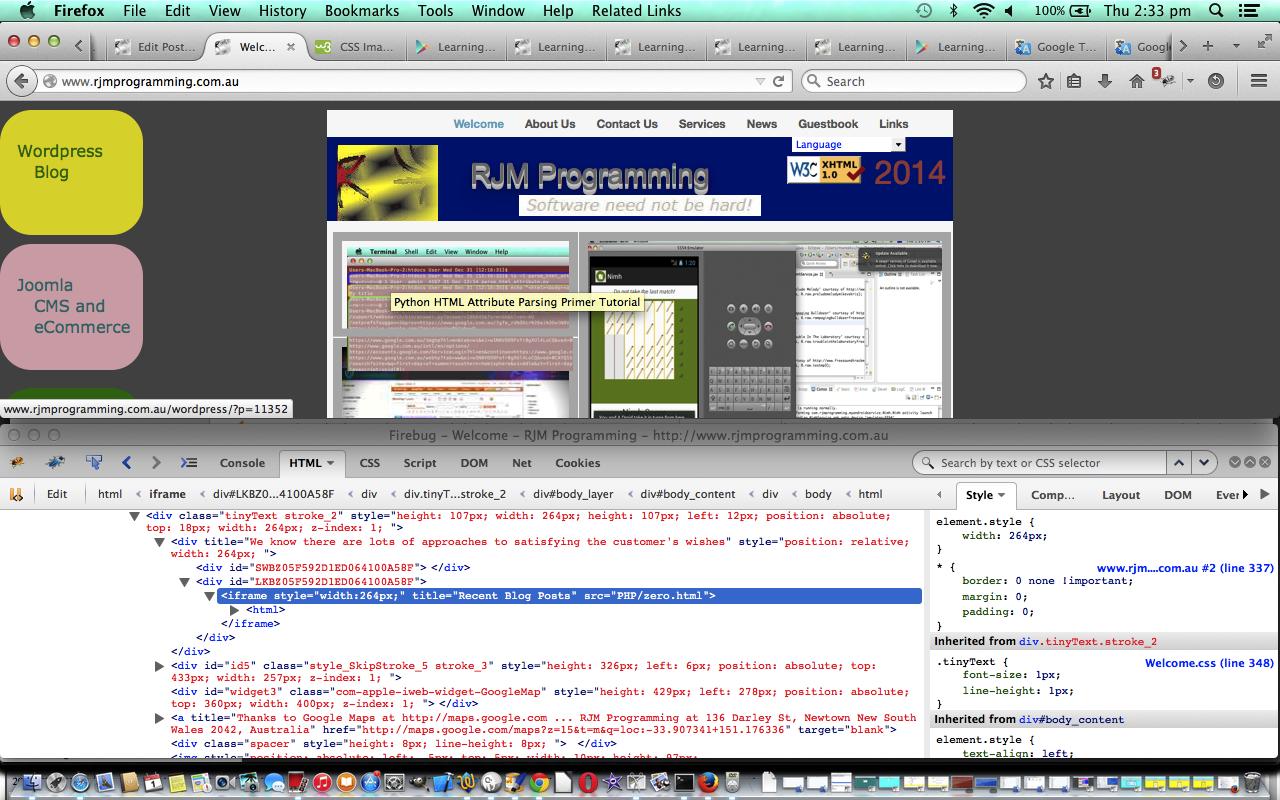
<iframe style="width:264px;" title="Recent Blog Posts" src="PHP/zero.html"></iframe>
… all okay? You can see it at the www.rjmprogramming.com.au Landing Page a little bit down at the left hand edge of (usual) functionality.
Previous relevant WordPress Recent Post Image Follow Up Tutorial is shown below.
A couple of days back (WordPress Recent Post Image Primer Tutorial) we did some functionality work on this WordPress Blog’s Recent Posts menu, and left it more functional for sure and very much “okay” … but is “okay” okay? … well, OK, it might be “okay” for a while, but think we seek more functionality:
- think quite often users expect that an image on a website will have some underlying functionality, so think that would be an improvement
- would like to include online contextual Ajax help for these newly included images
To move forward from where we were regarding these improvements we could proceed on 3 logic fronts methinks:
- use the ul->li hierarchy to do one thing with the new images and other blog posting specific things for all the links … this may be possible, but it didn’t work (after some time) so …
- change the logic so that those new CSS created background-url images are turned into real images … but we prefer to try …
- add a real image superimposed over the new background-url images with a higher z-index but totally transparent (via techniques of Gimp Transparency Primer Tutorial) and add event logic to these, separate to the link event logics … this worked, and simplified code ideas as well
Our old favourite WordPress blog PHP header.php changed as in bold below:
function rptwo() {

  var tworp=document.getElementById('recent-posts-2');

  if (tworp != null) {

    if (tworp.innerHTML.indexOf('<u' + 'l>') != -1) {

      tworp.innerHTML = tworp.innerHTML.replace('<u' + 'l>', '<u' + 'l class="iconlist">');


      var eight=new Array("one", "two", "three", "four", "five", "six", "seven", "eight");

      var ieight;

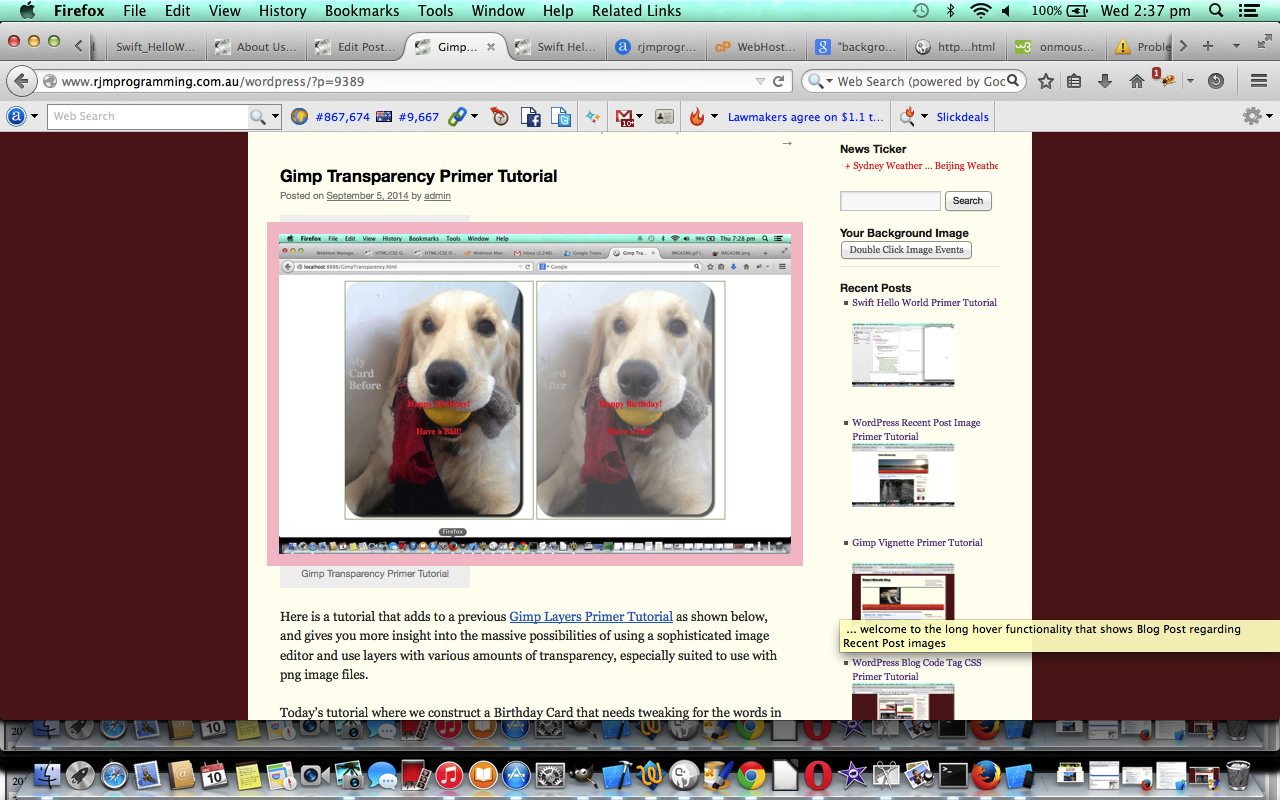
      tworp.innerHTML = tworp.innerHTML.replace(/</a>/g, "</a><img class='iiconlist' src='http://www.rjmprogramming.com.au/wordpress/transparent.png' style='z-index:3;margin-left:0px;margin-top:0px;opacity:0.2;width:140px;height:100px;box-shadow:rgba(0,0,255,0.2) 2px 2px 2px 2px inset;' onmouseover='getRpnow();' onmouseout='yehbut();' ontouchstart='getRpnow();' ontouchend='yehbut();' title=' ... welcome to the long hover functionality that shows Blog Post regarding Recent Post images'>");


      for (ieight=0; ieight<eight.length; ieight++) {

        tworp.innerHTML = tworp.innerHTML.replace("<li>", "<li class='" + eight[ieight] + "'>");


         tworp.innerHTML = tworp.innerHTML.replace("<img class=", "<img onclick="clickaid('a" + eight[ieight] + "');" class=").replace("<img title=" ", "<img onclick="clickaid('a" + eight[ieight] + "');" title="");


      }

    }

  }

}
Our contextual help Javascript source code can be downloaded by wajax.js which changed as per wajax.js for these changes today.
Hope you enjoy today’s tutorial.
Previous relevant WordPress Recent Post Image Primer Tutorial is shown below.
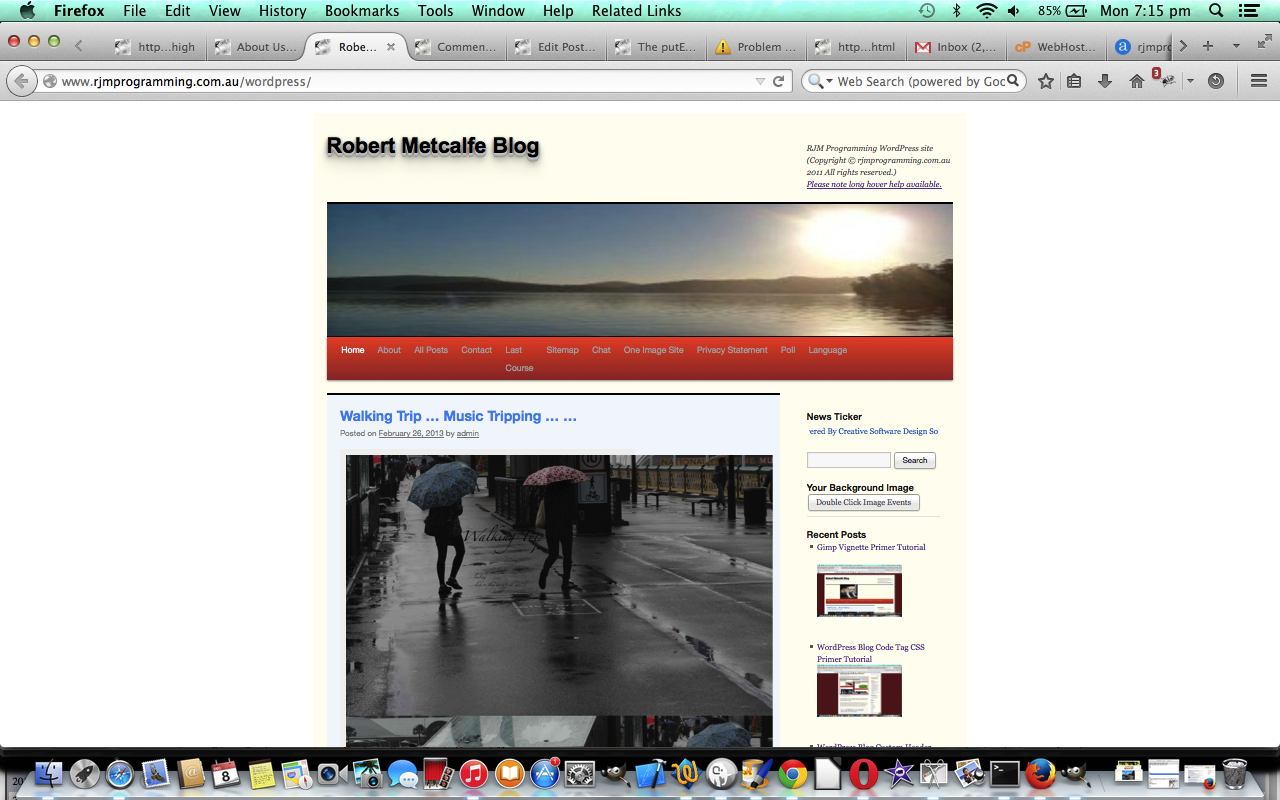
Sometimes CSS meets Javascript meets “a few times a day” functionality, to get a job done, in this case a CSS styling job on this WordPress blog (continuing on with tutorials like WordPress Blog Code Tag CSS Primer Tutorial as shown below). The job is to put small images below the links in the Recent Posts menu on this WordPress blog. Figure this would help … and it is good to have a reason … it would add images or pictures to content below the field of vision … this makes the blog more user-friendly we think … but, again, as with many styling issues, this is subjective.
Why would this job have “a few times a day” functionality? … Well, the images change when a blog posting goes live, and at this blog this happens once a day, so there is no need to slow functionality down getting these images together more often than during that time the new blog posting is scheduled. So this “a few times a day” functionality uses (the web server Linux) crontab/curl … what a team … and we wrote recent-posts-2.php to be the PHP run with a curl … chortle, chortle.
Then our old favourite WordPress PHP header.php gets modified as with the bold code below for CSS (part 1 change of 2) …
<style>

.mypclass { color:rgb(185,127,206); }

#mypid { color:rgb(185,127,206); }

.mypclass2 { background-color:rgb(185,127,206); color:'black'; }

.mypclass22 { background-color:rgb(185,127,206); color:'black'; }

#mypid2 {  background-color:rgb(185,127,206); color:'black';  }
#ahomeis {
color: #ffffff;
font: 24pt Arial;
text-shadow: 0 1px 0 #ccc, 0 2px 0 #c9c9c9, 0 3px 0 #bbb, 0 4px 0 #b9b9b9, 0 5px 0 #aaa, 0 6px 1px rgba(0, 0, 0, 0.1), 0 0 5px rgba(0, 0, 0, 0.1), 0 1px 3px rgba(0, 0, 0, 0.3), 0 3px 5px rgba(0, 0, 0, 0.2), 0 5px 10px rgba(0, 0, 0, 0.25), 0 10px 10px rgba(0, 0, 0, 0.2), 0 20px 20px rgba(0, 0, 0, 0.15);
}
code {
width:90%;
background-color:#F9F9F9;
margin-top: 10px;
margin-bottom: 10px;
padding:20px 20px;
border:1px dashed blue;
display: inline-block;
text-overflow: ellipsis;
white-space: pre-wrap; /* css-3 */
white-space: -moz-pre-wrap; /* Mozilla, since 1999 */
white-space: -pre-wrap; /* Opera 4-6 */
white-space: -o-pre-wrap; /* Opera 7 */
word-wrap: break-word; /* Internet Explorer 5.5+ */
}
.iconlist
{
list-style: none;
margin: 0;
padding: 0;
}
li.one {
background-image: url('http://www.rjmprogramming.com.au/PHP/one.jpg');
background-position: left;
background-repeat: no-repeat;
background-size: 128px 80px;
height: 150px;
text-indent: 0px;
}
li.two {
background-image: url('http://www.rjmprogramming.com.au/PHP/two.jpg');
background-position: left;
background-repeat: no-repeat;
background-size: 128px 80px;
height: 150px;
text-indent: 0px;
}
li.three {
background-image: url('http://www.rjmprogramming.com.au/PHP/three.jpg');
background-position: left;
background-repeat: no-repeat;
background-size: 128px 80px;
height: 150px;
text-indent: 0px;
}
li.four {
background-image: url('http://www.rjmprogramming.com.au/PHP/four.jpg');
background-position: left;
background-repeat: no-repeat;
background-size: 128px 80px;
height: 150px;
text-indent: 0px;
}
li.five {
background-image: url('http://www.rjmprogramming.com.au/PHP/five.jpg');
background-position: left;
background-repeat: no-repeat;
background-size: 128px 80px;
height: 150px;
text-indent: 0px;
}
li.six {
background-image: url('http://www.rjmprogramming.com.au/PHP/six.jpg');
background-position: left;
background-repeat: no-repeat;
background-size: 128px 80px;
height: 150px;
text-indent: 0px;
}
li.seven {
background-image: url('http://www.rjmprogramming.com.au/PHP/seven.jpg');
background-position: left;
background-repeat: no-repeat;
background-size: 128px 80px;
height: 150px;
text-indent: 0px;
}
li.eight {
background-image: url('http://www.rjmprogramming.com.au/PHP/eight.jpg');
background-position: left;
background-repeat: no-repeat;
background-size: 128px 80px;
height: 150px;
text-indent: 0px;
}
</style>
… and then our old favourite WordPress PHP header.php gets modified as with the bold code below for Javascript (part 2 change of 2) …
function rptwo() {

  var tworp=document.getElementById('recent-posts-2');

  if (tworp != null) {

    if (tworp.innerHTML.indexOf('<u' + 'l>') != -1) {

      tworp.innerHTML = tworp.innerHTML.replace('<u' + 'l>', '<u' + 'l class="iconlist">');

      var eight=new Array("one", "two", "three", "four", "five", "six", "seven", "eight");

      var ieight;

      for (ieight=0; ieight<eight.length; ieight++) {

        tworp.innerHTML = tworp.innerHTML.replace("<li>", "<li class='" + eight[ieight] + "'>");

      }

    }

  }

}


function courseCookies() {


  rptwo();  // Recent Post images


  winit();  // Ajax functionality 26/11/2014 ... slow hover ... not for mobile
… and if no Course Design functionality call at the <body onload='rptwo();'>
A live run is where you are now but you can see it again with this.
Hope this helps you out in some way shape or form.
Previous relevant WordPress Blog Code Tag CSS Primer Tutorial is shown below.
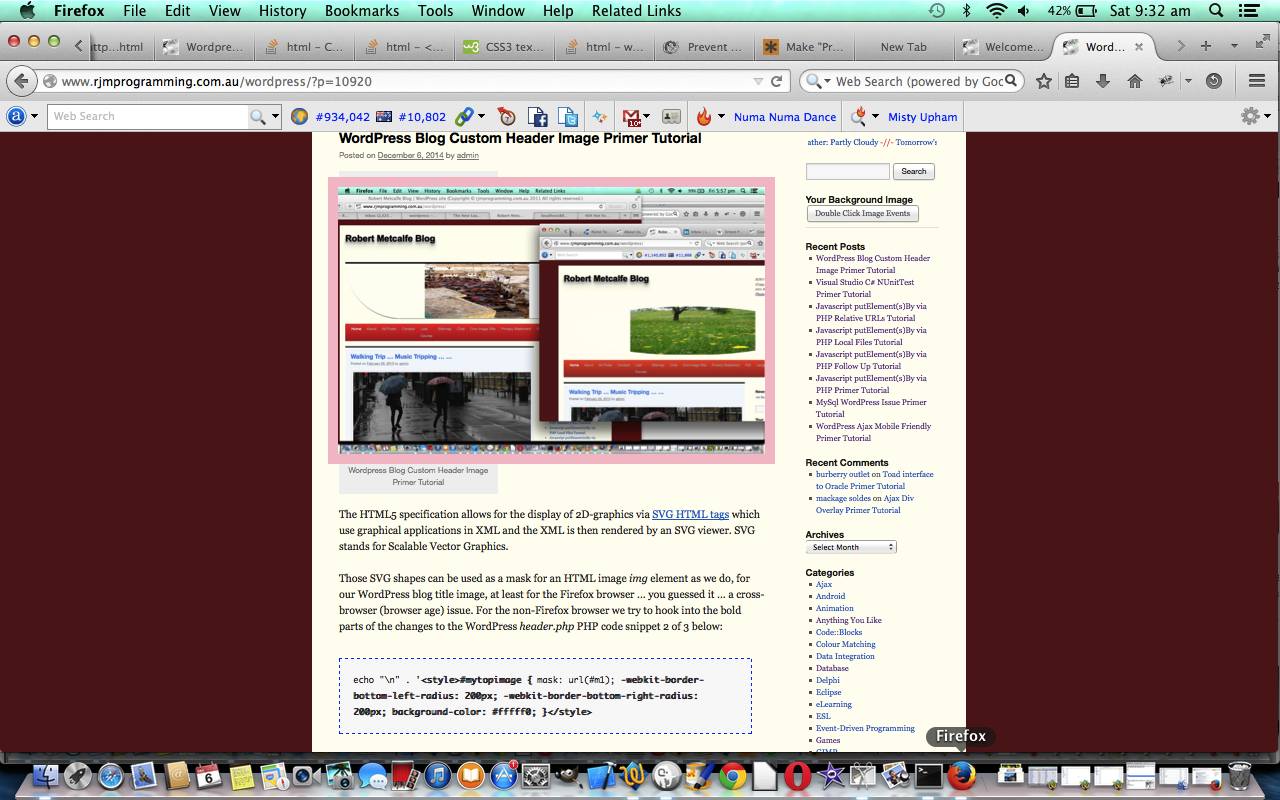
Explanations of software code are so many and varied these days because there are so many platforms and programming languages to get your head around, that it would be advantageous, (lazy me finally admits), that as you scan down a blog posting in that fast scan we do as we surf the net, something stands out recognizably as “a piece of code”, apart from the default WordPress theme TwentyTen styling of the <code> tag used in our blog here (use <blockquote> for non-code quotes … by the by, all this is subjective).
Today we settle on a CSS <code> tag styling definition that mixes a few ideas:
- it is important “code” line breaks where the writer of the “code” said it should
- … conflictingly (is this a word?) sometimes, you want to see everything, so allow line breaking if the line overshoots at the right hand side
- use a background colour to make the “code” text stand out differently
- use an unusual dashed border to catch the user’s scanning eye
- don’t scare the living daylights (out of the living day lights … chortle, chortle) … make the border a non-jittery colour … like … blue
So let’s see what made this happen (for itself) with our old favourite header.php (what would we do without it!) in bold:
<style>

.mypclass { color:rgb(185,127,206); }

#mypid { color:rgb(185,127,206); }

.mypclass2 { background-color:rgb(185,127,206); color:'black'; }

.mypclass22 { background-color:rgb(185,127,206); color:'black'; }

#mypid2 {  background-color:rgb(185,127,206); color:'black';  }
#ahomeis {
color: #ffffff;
font: 24pt Arial;
text-shadow: 0 1px 0 #ccc, 0 2px 0 #c9c9c9, 0 3px 0 #bbb, 0 4px 0 #b9b9b9, 0 5px 0 #aaa, 0 6px 1px rgba(0, 0, 0, 0.1), 0 0 5px rgba(0, 0, 0, 0.1), 0 1px 3px rgba(0, 0, 0, 0.3), 0 3px 5px rgba(0, 0, 0, 0.2), 0 5px 10px rgba(0, 0, 0, 0.25), 0 10px 10px rgba(0, 0, 0, 0.2), 0 20px 20px rgba(0, 0, 0, 0.15);
}
code {
width:90%;
background-color:#F9F9F9;
margin-top: 10px;
margin-bottom: 10px;
padding:20px 20px;
border:1px dashed blue;
display: inline-block;
text-overflow: ellipsis;
white-space: pre-wrap; /* css-3 */
white-space: -moz-pre-wrap; /* Mozilla, since 1999 */
white-space: -pre-wrap; /* Opera 4-6 */
white-space: -o-pre-wrap; /* Opera 7 */
word-wrap: break-word; /* Internet Explorer 5.5+ */
}
</style>
All the following links helped, so, thanks Code Tags CSS like Wikipedia, CSS3 PR Text, Word Wrap Break Not Breaking – The Code Tag, David Walsh Code CSS, Make Pre Text Wrap.
Finally, as far as Ajax contextual help goes, the recent wajax.js changed as per the bold code below, last talked about with WordPress Ajax Mobile Friendly Primer Tutorial:
function getCode(evt) {

   bpost = 10939;

   if ((wisiPad || wisTouch)) {

   if (mtimer) clearInterval(mtimer);

   tickcnt = 0;

   mtimer = setInterval(mchecker, 1000);

   } else {

   setTimeout(xget, 4000);

   }

}


function winit() {

      var allPs;

      zhr = null;

      zok = 1;

      if ((wisiPad || wisTouch) || 1 == 1) {

        var mybased = document.getElementById('site-description');

        if (mybased.innerHTML.indexOf("Long ") == -1) {

        if ((wisiPad || wisTouch)) {

        mybased.innerHTML = mybased.innerHTML.replace(")", ") <br><a onclick=' alert(wadvice); ' href='#' title='Long touch contextual help'>Long touch help available.</a>");

        } else {

        mybased.innerHTML = mybased.innerHTML.replace(")", ") <br><a onclick=' alert(wadvice.replace("touch on","hover over")); ' href='#' title='Long hover contextual help'>Long hover help available.</a>");

        }

        }

      }


      if (navigator.userAgent.toLowerCase().indexOf("ie") != (0 - 1)) {

       allPs = document.getElementsByTagName('code');

      } else {

       allPs= document.getElementsByTagName('code');

      }

      for (var j=0; j < allPs.length; j++) {

           if ((wisiPad || wisTouch)) {

           allPs[j].ontouchstart = getCode;

           allPs[j].ontouchend = yehBut;

           } else {

           allPs[j].onmouseover = getCode; // 10939

           if (allPs[j].title.indexOf(" ...") == -1) {

             allPs[j].title = allPs[j].title + " ... welcome to the long hover functionality that shows Blog Post regarding Code Tag CSS";

           }

           allPs[j].onmouseout = yehBut;

           }

      }
… to become wajax.js
If this was interesting you may be interested in this too.
If this was interesting you may be interested in this too.
If this was interesting you may be interested in this too.
If this was interesting you may be interested in this too.
If this was interesting you may be interested in this too.
If this was interesting you may be interested in this too.
If this was interesting you may be interested in this too.
If this was interesting you may be interested in this too.

