PDF being the generic “online” printing format of choice for so many online users, it has to cater for many a varied original data style that it is often “exported” from, or “printed” from. This is where “document processing” often rubs up against “publishing” applications. Often with “document processing” we do not worry about what is on a “left page” and what is on a “right page” but with “publishing” this may be a concern. To meet the diverse requirements for PDF functionality, as with Fpdf functionality, most PDF creation software products will contain a fundamental method like Fpdf’s …
AddPage([string orientation [, mixed size [, int rotation]]])
… as a must to create any PDF document, a requirement that fooled me for a good two hours in the early days of learning about Fpdf!
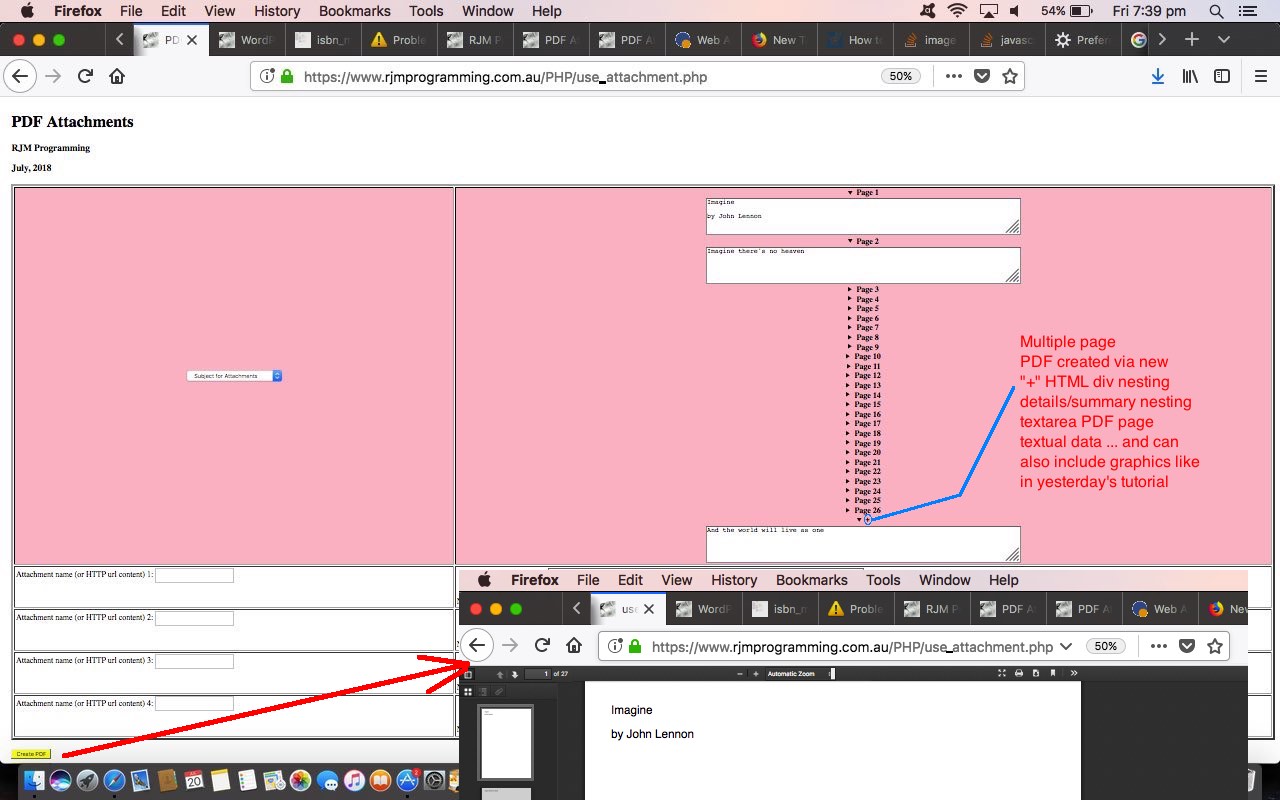
The method “AddPage” feels like a “publishing” idea, and in sympathy with this, today’s work to improve on yesterday’s PDF Attachments Canvas Tutorial web application is to add one character (the “+” character) “a” link that sets up a linked list of HTML div element scenario to allow for PDF document creations with more than one page. Actually the nesting goes div -> details/summary (with that “a” link) -> textarea maintained by that “a” link’s onclick event Javascript logic …
function andthen() {

  document.getElementById('sumsubject' + eval(-1 + curpage)).innerHTML='Page ' + eval(-1 + curpage);

}


function addpage(pwhat,swhat) {

 swhat.innerHTML='';

 curpage++;

 if (document.getElementById('subject').title.indexOf('data:image/') == 0) {

 document.getElementById('dsubject' + curpage).innerHTML=dtemplate.replace(/1/g, '' + curpage) + '<input type=hidden name=subject2' + eval(0 + curpage) + '.' + document.getElementById('subject').title.split('data:image/')[1].split(';')[0] + ' value=' + String.fromCharCode(39) + document.getElementById('subject').title.replace(/\+/g,'@!@') + String.fromCharCode(39) + '></input><div id=dsubject' + eval(curpage + 1) + '></div>';

 } else {

 document.getElementById('dsubject' + curpage).innerHTML=dtemplate.replace(/1/g, '' + curpage) + '<div id=dsubject' + eval(curpage + 1) + '></div>';

 }

 setTimeout(andthen,500); //document.getElementById('sumsubject' + eval(-1 + curpage)).innerHTML='Page ' + eval(-1 + curpage);

 document.getElementById('detsubject' + eval(-1 + curpage)).setAttribute('open',false);

 document.getElementById('subject').title='';

 if (document.getElementById('scurp')) {

   document.getElementById('scurp').innerHTML='' + curpage;

 }

}
… the “dtemplate” global variable of which is derived at document.body onload event Javascript logic …
function atstart() {

 dtemplate=document.getElementById('dsubject1').outerHTML.replace('name=' + String.fromCharCode(34) + 'subject' + String.fromCharCode(34),'name=' + String.fromCharCode(34) + 'subject1' + String.fromCharCode(34)).replace('id=' + String.fromCharCode(34) + 'subject' + String.fromCharCode(34),'id=' + String.fromCharCode(34) + 'subject1' + String.fromCharCode(34));

}
… working off the web applications initial HTML element code snippets …
<body onload='atstart();'>

...

...

...

<table style='width:100%;' border=5>

<tr style=background-color:pink;><th><select onchange='bigdeal(this);'><option value=''>Subject for Attachments</option><option value=canvas>Canvas Design</option></select></th>

<th id=thtop><div id=dsubject1><details id=detsubject1 open><summary id=sumsubject1><a id=asubject1 style=text-decoration:none;cursor:pointer; onclick=addpage(1,this); title='Add onto Page 1'>+</a></summary><textarea title='' id=\"subject\" name=\"subject\" cols=80 rows=5></textarea></details></div><div id=dsubject2></div></th>

</tr><tr><td id=td1>Attachment name (or HTTP url content) 1: <input onblur='pd(this);' type=text id=i1 value=''></input><div id=d1></div></td><td>Non HTTP URL Content 1: <textarea onchange='pd(this);' id=content1 cols=80 rows=5></textarea></td></tr>

<tr><td id=td2>Attachment name (or HTTP url content) 2: <input onblur='pd(this);' type=text id=i2 value=''></input><div id=d2></div></td><td>Non HTTP URL Content 2: <textarea onchange='pd(this);' id=content2 cols=80 rows=5></textarea></td></tr>

<tr><td id=td3>Attachment name (or HTTP url content) 3: <input onblur='pd(this);' type=text id=i3 value=''></input><div id=d3></div></td><td>Non HTTP URL Content 3: <textarea onchange='pd(this);' id=content3 cols=80 rows=5></textarea></td></tr>

<tr><td id=td4>Attachment name (or HTTP url content) 4: <input onblur='pd(this);' type=text id=i4 value=''></input><div id=d4></div></td><td>Non HTTP URL Content 4: <textarea onchange='pd(this);' id=content4 cols=80 rows=5></textarea></td></tr>

</table>
Again, today’s PHP use_attachment.php‘s live run is worth your retry, and you can see how it changed for AddPage functionality here.
Have a look below at an end result (“we baked ahead of time” … tee hee) … the contents made up from the lyrics of John Lennon’s “Imagine” song classic …
There will probably be, for you, depending on how you are viewing this blog posting, the chance to turn that HTML iframe PDF content above into a slideshow, take it to the shower, turn on the tap, and sing out!
Previous relevant PDF Attachments Canvas Tutorial is shown below.
Do you remember the series of blog postings ending with Contact Us Feedback Animated GIF Tutorial and how it used an HTML(5) canvas element’s toDataURL() method to do lots of its functionality? Well, we’re here to tell you that great synergies exist between …
- Fpdf work (continuing on from yesterday’s PDF Attachments Primer Tutorial) … and …
- canvas element functionality
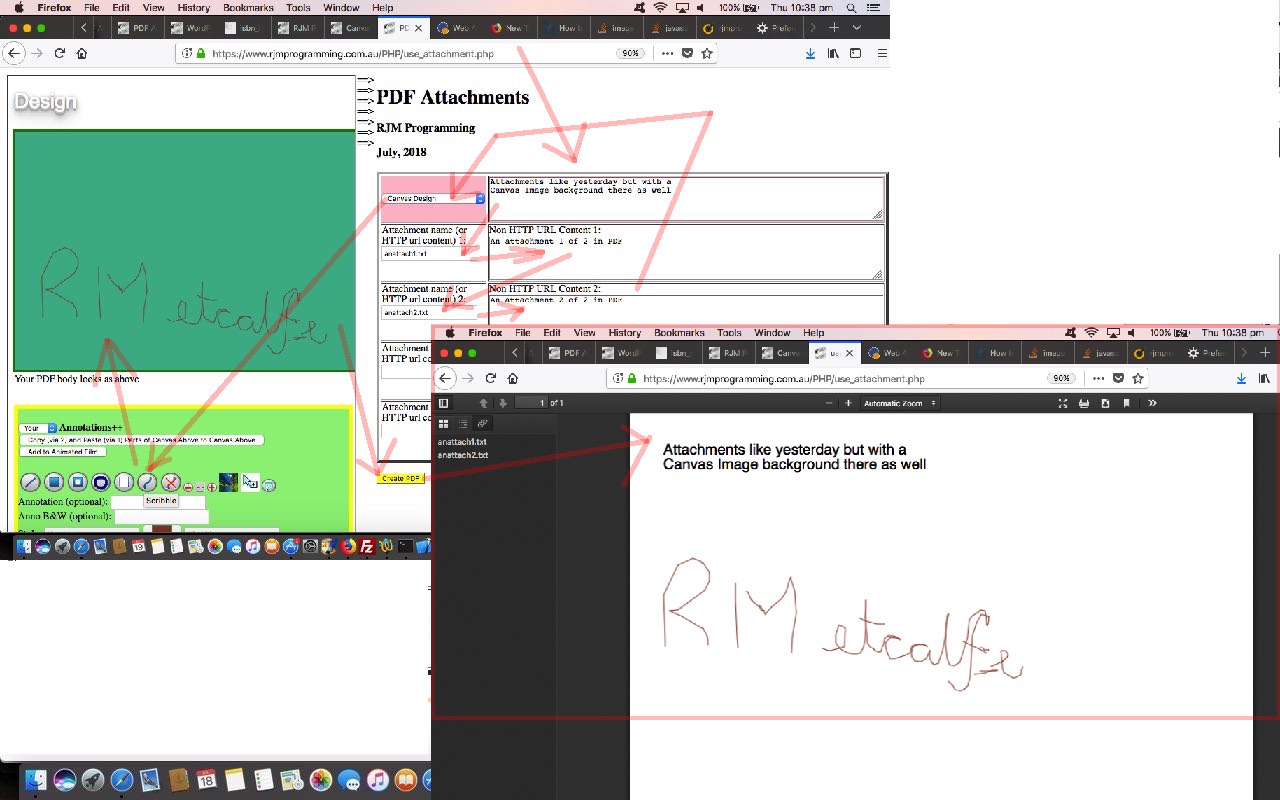
… though, today, we’re just starting with a “dip with the toes” into those synergies, just using the canvas contents as a whole, representing it as an image, and “slapping” it over to a PDF file. What we hope to achieve into the future, if we succeed, is to get inside the canvas element methods and one for one of those that are suitable, use an Fpdf method to create the PDF parts more granularly, but that is for another day.
In the meantime, we turn a hardcoding “Subject” into a dropdown element, the second option of which opens that Feedback web application in an HTML iframe element, and we make use of the knowledge in the Feedback application that a parent.document exists and some specified parent.document element IDs we nominate exist, to decide to change the look of the Feedback web application under these conditions to suit our PDF purposes, but keep all that suitable canvas “smarts” like the “scribble” we show you in today’s tutorial picture.
Today’s supervisory PHP use_attachment.php‘s live run is worth your retry, and you can see how it changed here.
It now supervises the HTML Feedback web application called feedback.htm which changed for these purposes this way.
Previous relevant PDF Attachments Primer Tutorial is shown below.
Were you around the last time we talked about the excellent PHP library of PDF functionality called Fpdf starting at Textarea Pointing PDF Tutorial? Then, we used it in relation to another output format in which to output the data collected by our “posse” of HTML textarea elements.
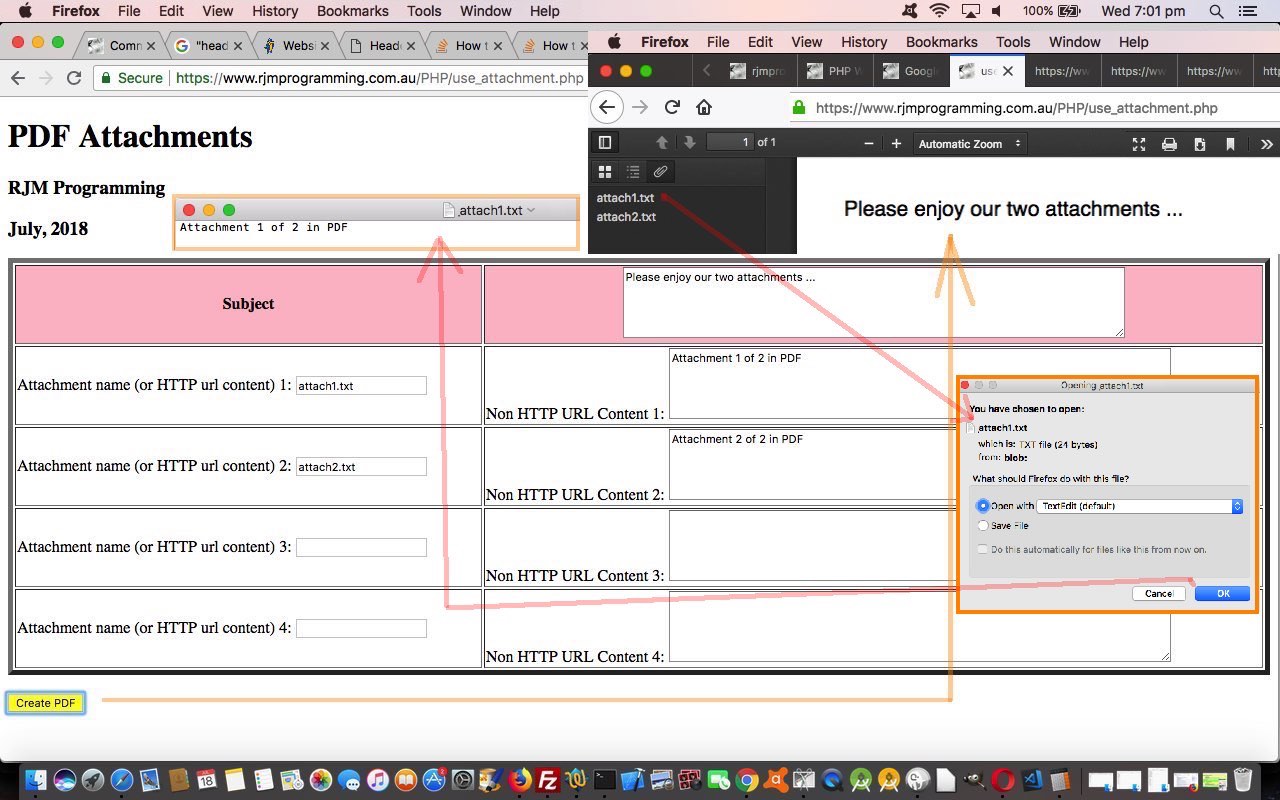
Going a bit further with Fpdf today, and thanking the excellent advice of this webpage (and the one that got us there at this lead), we want to extend the concept of “attachments” we normally find ourselves raving on about to do with how stupendously useful they are in emails, by showing some attachments stored in PDF format. The “P” in “PDF” stands for portable, and PDF being the major “printout” format “online” on the net, this concept may be of some use, we figure.
Today’s PHP use_attachment.php‘s live run follows a familiar pattern for mode of use we like around here, in that …
- the same PHP codebase is used …
- to when not “argumented” (ie. no ? and & URL parts nor $_POST[] data) we present a form …
- method=POST action=./use_attachment.php (ie. here’s looking at you kid) … so that when that form’s submit button is clicked …
- that same codebase checks for $_POST[] data (and $_GET[] too) for “argumented” information derived from the textbox data of that submitted form above is used to create the output data (that being, today, a PDF file with/without attachments)
What use_attachment.php “requires” is the attachment.php as just slightly modified from this webpage, thanks again. Feel free to try this out for yourself.
Previous relevant Textarea Pointing PDF Tutorial is shown below.
Yesterday’s Textarea Pointing Email Tutorial was a start to our “sharing” functionality “push” with our new Textarea Pointing project. That work involved …
- (new window) with menu
- (new window) without menu
- email with HTML attachment … and today we add to that …
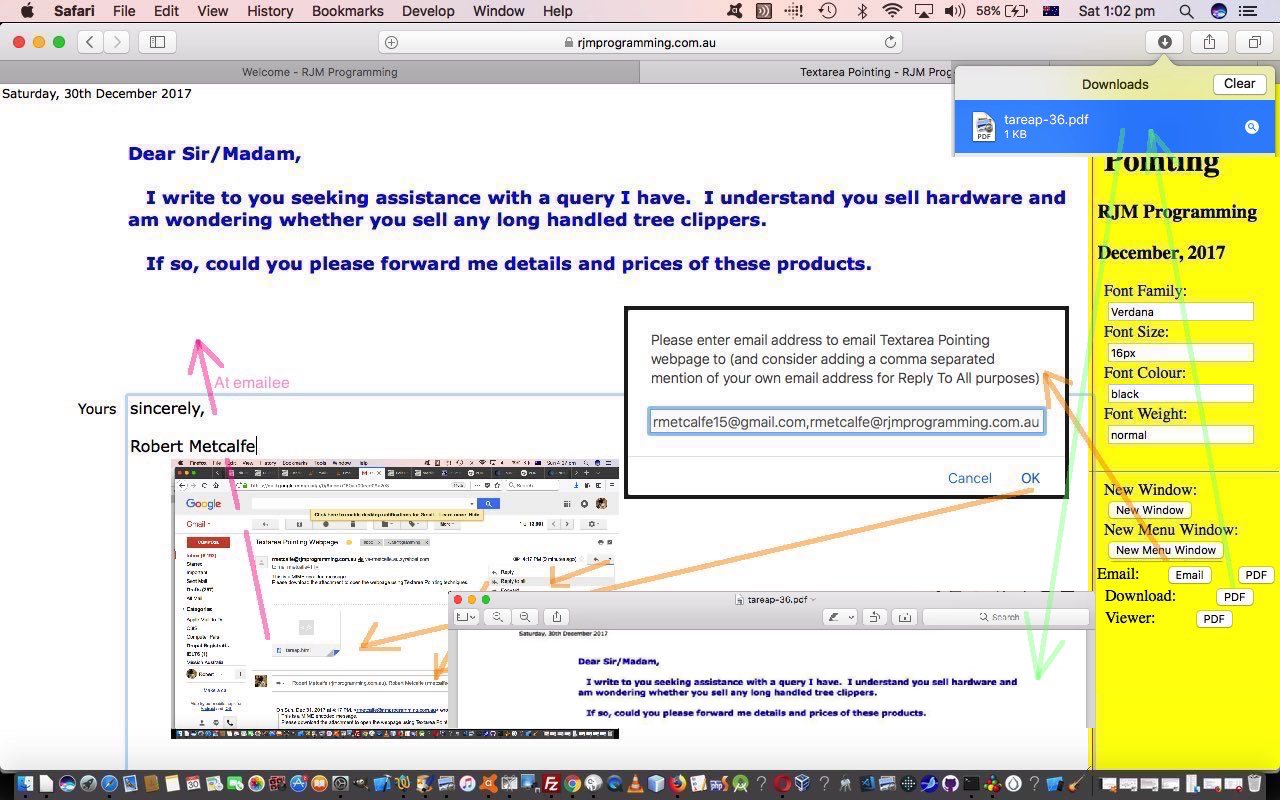
- email with PDF attachment … as well as …
- PDF download to client device
- PDF display via default client PDF viewer
… that required, again, Linux diff PDF Tutorial live run‘s prediff.php PHP code integration in this changed way. This time, though, rather than $outputpdf->Cell($x, $y, $line_of_text); being the best Fpdf means of displaying of the PDF text, we found …
$outputpdf->Text($x, $y, $line_of_text);
… to be more applicable to programming like for the way vinyl records work with their stylus, in other words, at a given …
- HTML textarea element (x,y) position … we gather …
- HTML textarea element font information stored in the alt attribute … to place text …
- to be able to …
$outputpdf->SetFont($fontFamily, $fontStyle, $fontSize);
$outputpdf->SetTextColor($fontColR, $fontColG, $fontColB);
$outputpdf->Text($x, $y, $line_of_text);
… as the “work of the code” needed to transition from our “user capture with character data” (in the “textarea”s) to a graphical system (or “widget”, you might like to think of this as). It just so happens that the first (graphical) “widget” design of interest is the creation of PDF, as it is a good conduit between “character data” and a “graphical look”. A “widget” feeling thing being what it is though, expect more integrations to come, as time goes on!
Today’s live run‘s textarea_pointing.htm code changed this way.
Previous relevant Textarea Pointing Email Tutorial is shown below.
Yesterday’s Textarea Pointing Primer Tutorial was a little too localised in its application in our books. Not if a web application is not of generic use, but this one could be of generic use, in our pamphlettes books.
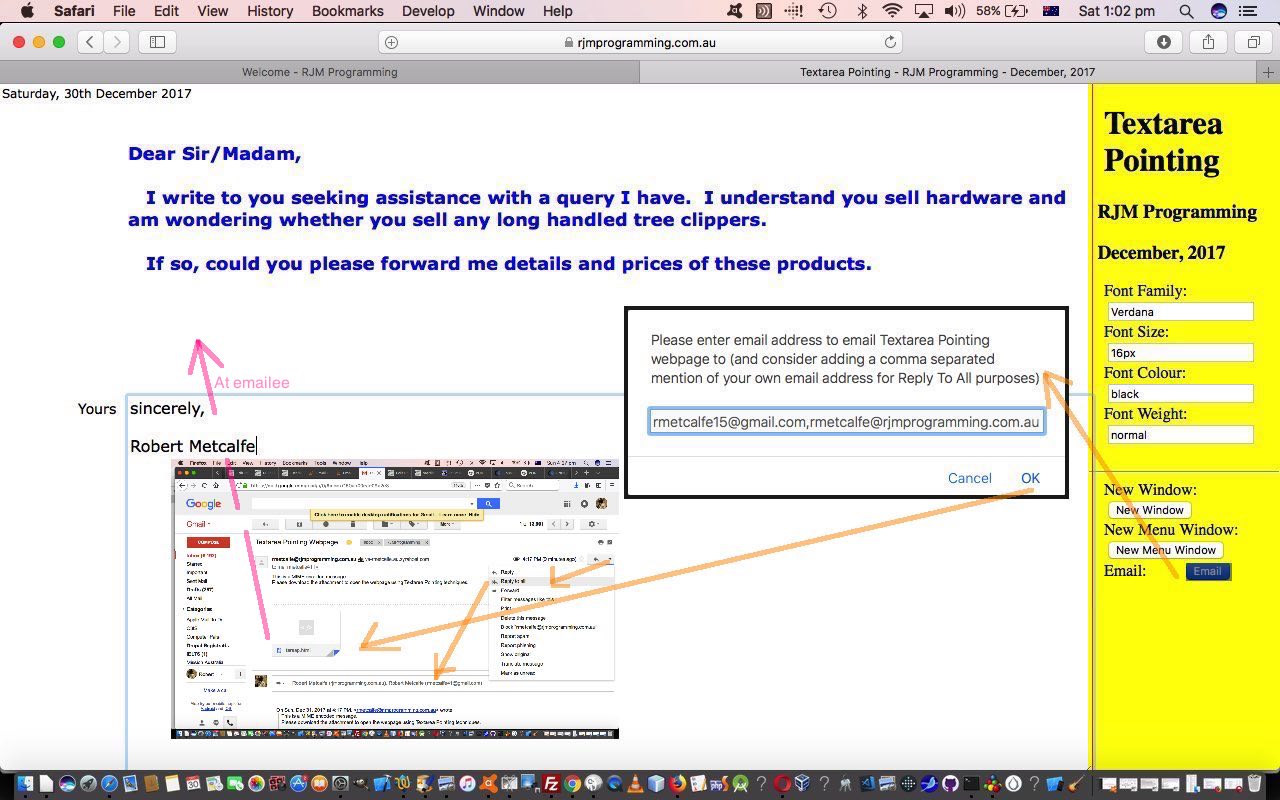
Our favourite “sharing” idea is email, by far, as today, as far as that goes, we are going to offer email “services” via a “client pre-emptive iframe” determination of whether where you have placed today’s live run‘s textarea_pointing.htm code (changed this way) has, relative to it, an existant ../PHP/Geographicals/prediff.php PHP code source (that we left to go on our Textarea Pointing project) of Linux diff PDF Tutorial (live run‘s prediff.php PHP code’s last changes were used to cater for the Textarea Pointing HTML email attachment requirement).
We like to use a “client pre-emptive iframe” technique initial check for whether the HTML finds prediff.php because the email functionality is optional after all. If prediff.php is not found, then the Email button is never shown, simple as that. But the other two displays of the HTML in new popup windows …
- with menu
- without menu … as well as …
- email with HTML attachment
… complete the scope of the new “Sharing” functionalities today, and this year, on this!
So … Happy New Year!
Previous relevant Textarea Pointing Primer Tutorial is shown below.
Completely new idea today, so hoping this does not put some of you “episodic” users off. We’ll get back to incomplete recent “threads” at a later date. This is because we had pause for thought, due to yesterday’s PDF textual data positioning work, regarding one of our favourite HTML fundamental element types of interest (that we are always comparing) …
To quote HTML Textarea and Div Talents Primer Tutorial (as it was addressing the textarea HTML element) …
It’s crucial for getting HTML or non-caretted Text (that is internally turned into HTML behind the scenes) … via those wonderful tabs … off the user and onto the MySql database, and then out to the client user as part of a webpage. Out at that webpage, though, we’ve no doubt this content is embedded in an HTML div element, the other “talent” here.
But their strengths and weaknesses go like this, at least to us, in the limited HTML text view of things …
Text Functionality Issue HTML Element Type Strength Weakness (where a “Yes” is like … “Oh No!”) Display Monocolour Text Textarea Yes Div Yes Display Editable Text Textarea Yes Div Yes Display Multicolour Text Textarea Yes Div Yes
Nothing there above gives much encouragement about the HTML textarea‘s “positioning” talents. But what if we were to create a “posse”, or perhaps a “phalanx”, of “textarea”s to bank up with “bits and pieces” of the positioning “issue” (under the auspices of an HTML form element, for later accountability)?
What do we mean by “issue” here? Well, something like a letter, as with the end product of a scanning process involving a hardcopy letter, is that much more useful if what we end up with is the “characters” that go to make up that letter (or report, or essay), not some graphic (or totally visual) encapsulation of it, which can be what happens when you involve as your HTML “capture” element the “canvas” element. No, we want that “posse” of “textarea”s be that “character” source, which later, we can present as an overall graphic at a later date, for sharing purposes for instance, and maintain the “letter” (or report or essay) data continuously as the user edits.
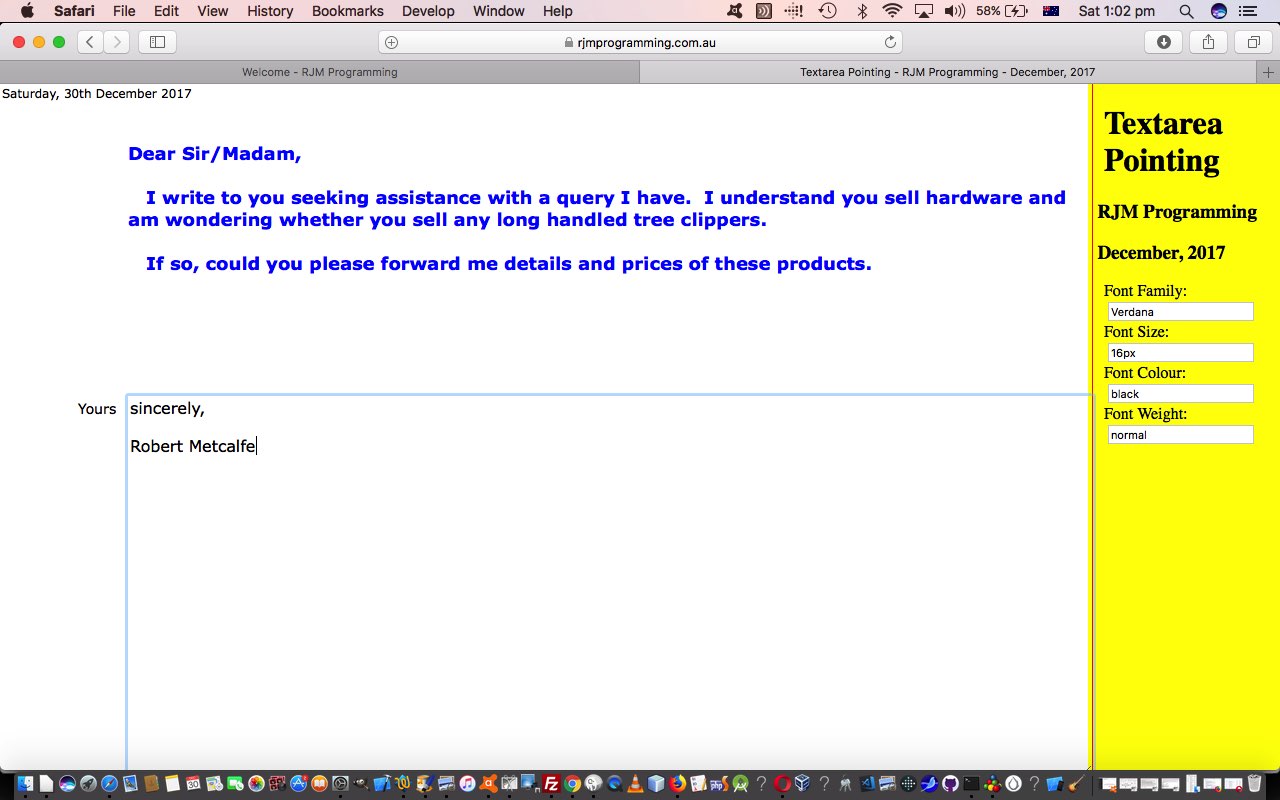
How to do? We click/touch with a base “textarea” and that is enough to arrange for an “overlay” “textarea” (via CSS position:absolute and z-index properties, some background-color:transparent styling, along with div id=dscript (innerHTML) appended dynamic CSS styling making use of CSS calc‘ing <style> .mboard2 { width: calc(85% – 56px); } </style> type syntax (where the 56px would have been derived via the onclick event logic, the 85% is to allow for a 15% width menu at the right, and the 2 in mboard2 refers to the second textarea in question)) to follow (ironically an HTML div element is by far the best “container” in a (Javascript DOM controlled) linked list fashion for this, rather than appending to the HTML form element’s innerHTML (which seems to wipe out previous textarea values)), like a linked list of “textarea”s. Along the way we allow for font information to be collected and kept as well (for now, via the textarea‘s alt attribute), to add to the chances for variety with our overall “letter” (or report or essay) reporting end product.
Which leaves us to talk about the “textarea pointing” live run‘s underlying HTML and Javascript and CSS textarea_pointing.html code for your perusal.
If this was interesting you may be interested in this too.
If this was interesting you may be interested in this too.
If this was interesting you may be interested in this too.
If this was interesting you may be interested in this too.
If this was interesting you may be interested in this too.
If this was interesting you may be interested in this too.

