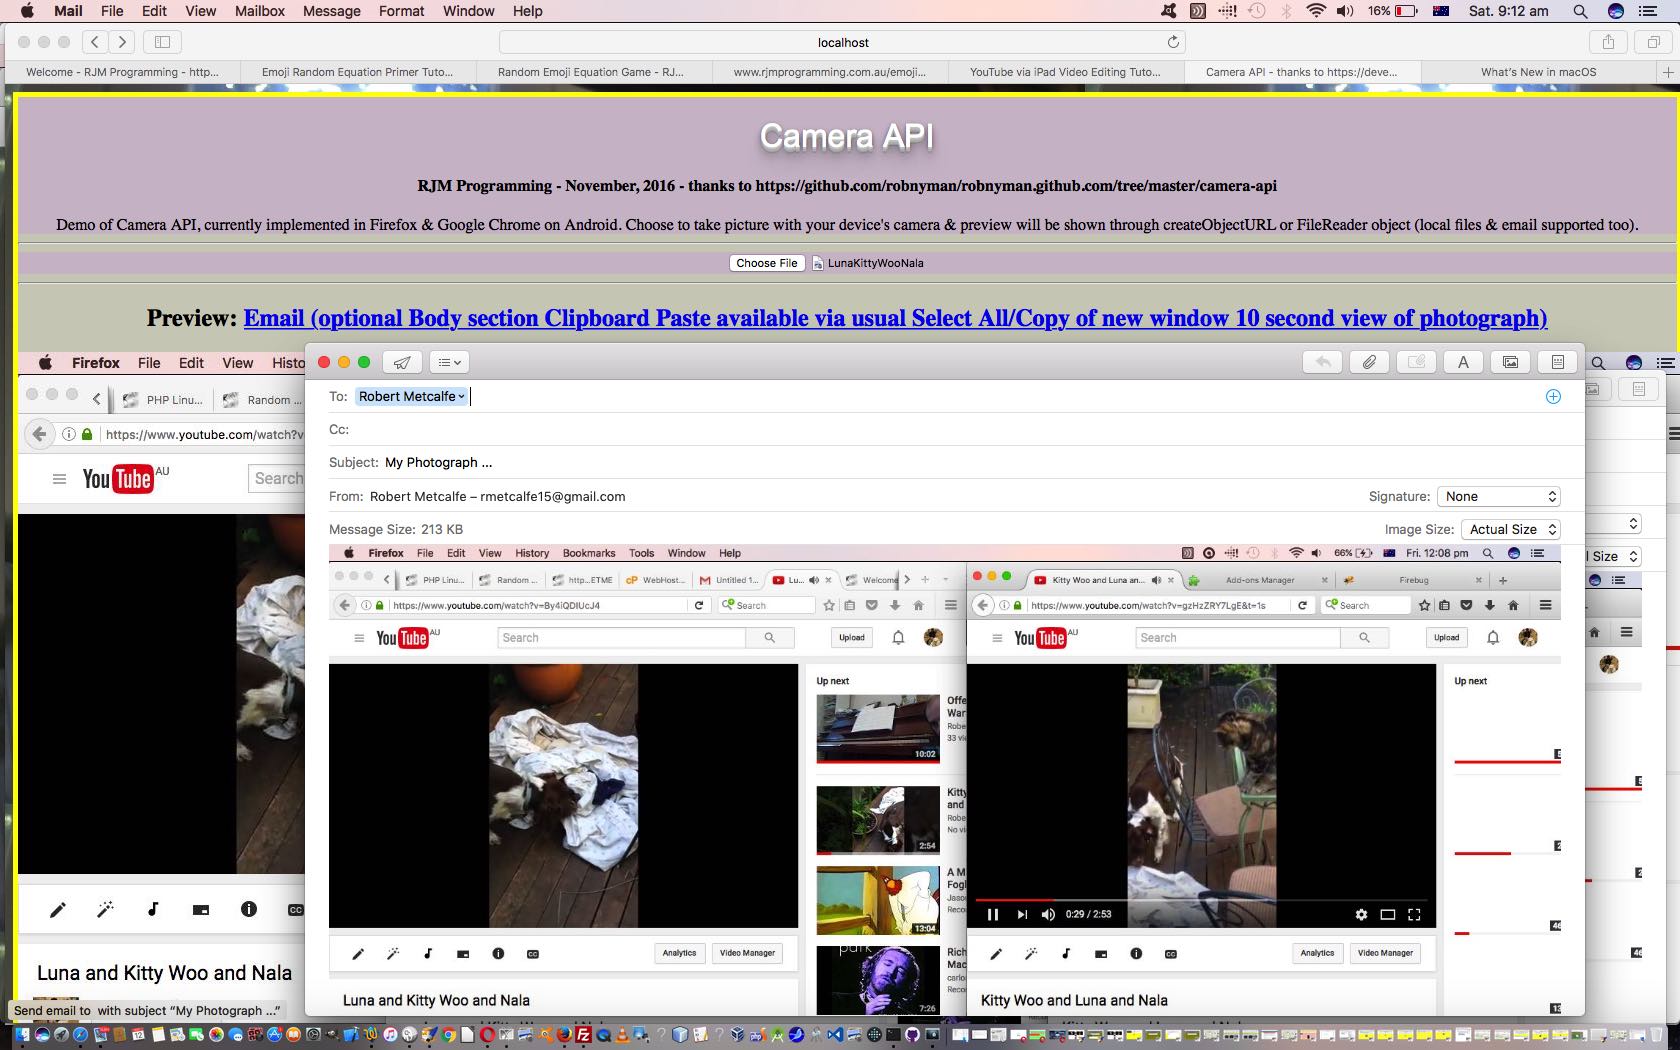
Please feel free to demand a refund for today’s blog posting whose title is just rearranged title words of yesterday’s Image Capture Ajax FormData Multiple Upload Tutorial but there is a real development here, and it concerns what happens when you execute this web application on a mobile platform.
On a mobile platform, the “capture” attribute of the input element “kicks in”, if you will. So, you may sagely ask, “how does this fit with the ‘multiple’ attribute?”. Excellent question! It doesn’t really, the way we worked it as of yesterday, but today we make amends.
Add one more concept, and we think we can have a pretty good “standing order” type of web application. That “concept” is to add in HTTP Cookie functionality for “intersessional memory” (should the user click the “Remember Me?” checkbox) covering …
- email “to” address
- a “no camera” checkbox to force mobile platforms to represent the menu where images can be either …
- browsed for … or …
- taken there and then … ie. making full use of the “capture” attribute of the HTML input element
- zipfile name
- send when [number] or above ie. if ([number] is) 2 then only upload after the “capture” or “browse picking” of at least 2 images … this is the setting that allows “capture” to live with “multiple” (with or without “zipping”)
- email “subject”
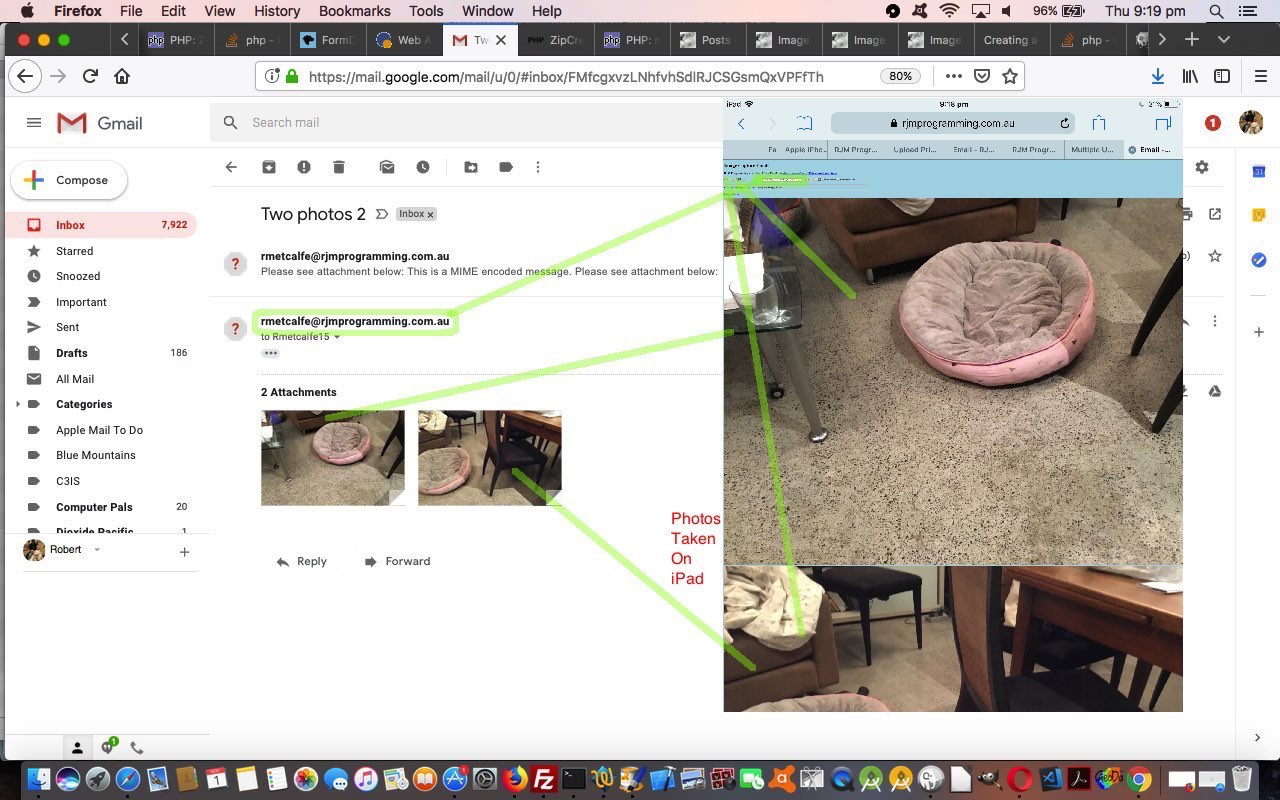
Perhaps you take 2 photos of a particular view each day and send them to a particular email friend with your iPad. Fill out the above once, click the “Remember Me?” to just, from then on, execute the web application, and press the button twice to take two photos twice, and there you are with a behind the scenes emailing of those photos to your friend. That is the sort of functionality we think of as a “standing order”.
Why not try today’s changed HTML imagecapture.htm‘s live run link?
Previous relevant Image Capture Ajax FormData Multiple Upload Tutorial is shown below.
Regular readers at this blog would appreciate the idea that lately we have had a big emphasis on groups of images. There were (the recent) …
- Gimp Guillotine Follow Up Memory Tutorial series which talked about splicing image files from others, and onto other displays of groups of images, including zipping functionality
- One Image Your Own Slideshow Dynamic CSS Filters and Transforms Tutorial took a group of Javascript animated image data and overlayed a layer of HTML iframe functionality to filter and transform that image display … and really recently …
- PHP Exif Image Zip Mystery Game Hints Tutorial pieced together a group of images with geodata (metadata) information into a Mystery Trips Guessing Game … and so …
… we get to our first revisit of Image Capture ideas in yesterday’s Image Capture Ajax FormData Upload Primer Tutorial featuring Ajax FormData functionality, allowing for a …
- one image file at a time …
- image display
- canvas [context].drawImage() display
- upload as email attachment “upload”
… and now, in “onions of the 4th dimension” feel, today, our extensions of functionality allow for “groups of images” (in a new context view) …
- one or more image file(s) at a time …
- image display(s)
- canvas [context].drawImage() display(s)
- upload as email attachment(s) “upload(s)”
… all possible because of the multiple attribute as per …
<input type="file" name="image" accept="image/*" multiple capture>
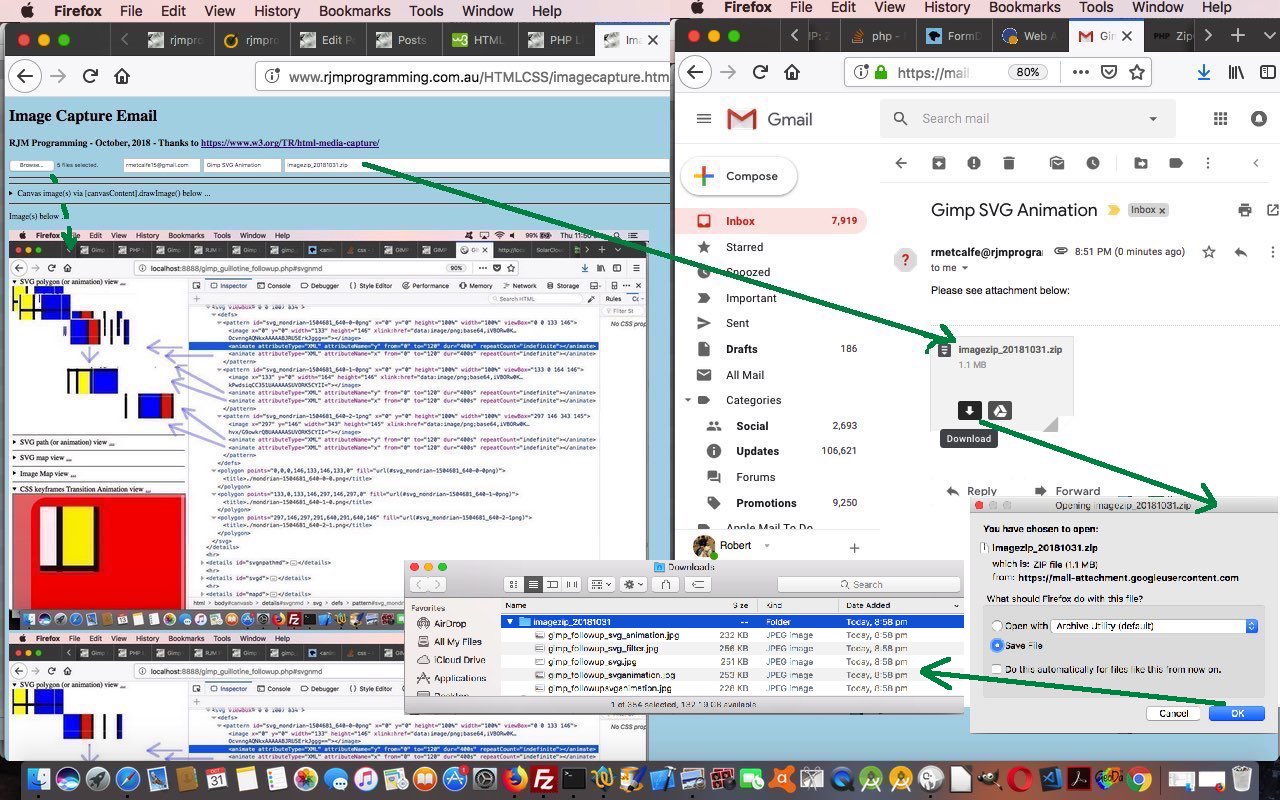
… that truly manifests itself, in practice, for the user of today’s changed HTML imagecapture.htm‘s live run when they browse for image files, where they can pick more than one image in any one browsing session. In broad brush terms that change in Javascript “client” land means what was (once) a File Object now should be handled in terms of it now being a File Array of Objects. In bold we show how that changed the code of yesterday …
var cfile=[], tops=[], awidth=0, atop=0, c=null, ctx=null, kk=0;

function bp() {

var input = document.querySelector('input[type=file]'); // see Example 4


input.onchange = function () {

  var file = input.files[0];

  cfile = file;


  for (var ii=0; ii<file.length; ii++) {

  if (ii == 0) { drawOnCanvas(file); }   // see Example 6

  if (ii == 0) { upload(file); }

  if (eval(1 + eval('' + ii)) == file.length) { whenokdrawOnCanvas();  }   // displayAsImage(file); // see Example 7

  }

};


var cdate = new Date();

cdatestr=cdate.getFullYear() + ("0" + eval(1 + cdate.getMonth())).slice(-2) + ("0" + cdate.getDate()).slice(-2);

document.getElementById('zipname').placeholder+=' ... imagezip_' + cdatestr + '.zip';


}


function whenokdrawOnCanvas() {

    if (kk == cfile.length) {

     c = document.querySelector('canvas'), // see Example 4

     ctx = c.getContext('2d'),

  c.width = awidth;

  c.height = Math.abs(atop);

  if (atop < 0) {
      atop = -atop;
  }
     for (var jk=0; jk<kk; jk++) {
     drawOnCanvas(cfile[jk], tops[jk]);
     }
    } else {
     setTimeout(whenokdrawOnCanvas);
    }
}


function drawOnCanvas(file, xtop) {

  var reader = new FileReader();


  reader.onload = function (e) {

    var dataURL = e.target.result, img = new Image();

    //    c = document.querySelector('canvas'), // see Example 4

    //    ctx = c.getContext('2d'),


    img.onload = function() {

      //c.width = img.width;

      //c.height = img.height;

      ctx.drawImage(img, 0, xtop); // 0

    };


    img.src = dataURL;

  };


  reader.readAsDataURL(file);

}
… and …
function upload(file) {

  var form = new FormData(),

      xhr = new XMLHttpRequest();


  if (document.getElementById('to').value.indexOf('@') != -1) {

   form.append('to', document.getElementById('to').value);

   if (document.getElementById('subject').value != '') {

    form.append('subject', document.getElementById('subject').value);

   } else {

    form.append('subject', 'Image in email');

   }

   form.append('filename', file[0].name);

  }

  form.append('image', file[0]);

  if (document.getElementById('zipname').value != '') { // new zipfile email attachment input element

   form.append('zipname', document.getElementById('zipname').value);

  }

  if (file.length > 1) {

  for (var iii=1; iii<file.length; iii++) {

   if (document.getElementById('to').value.indexOf('@') != -1) {

    form.append('filename' + iii, file[iii].name);

   }

   form.append('image' + iii, file[iii]);

  }

  }


  xhr.open('post', 'mailto.php', true);

  xhr.send(form);

}
… combines with new (static) HTML/Javascript …
<input onblur="if (this.value.indexOf('@') != -1 && this.value != '@') { document.getElementById('zipname').style.display='inline-block'; } " id="to" name="to" type="text" style="inline-block;" placeholder="Optionally email to" value=""> <input id="subject" name="subject" type="text" style="inline-block;" placeholder="Optional email subject" value=""> <input onclick="if (this.value == '' && this.placeholder.indexOf(' ... ') != -1) { this.value=this.placeholder.split(' ... ')[1]; } " style="display:none;width:30%;" id="zipname" name="zipname" type="text" placeholder="Optional zipfile email attachment name" value="">
… so that where the changes manifest themselves for the supervised and changed PHP mailto.php are that we now have to allow for …
- zipping up (possibly) multiple image(s) into the one zipfile email attachment … or …
- allow for multiple image file email attachments
Below, you can compare new multiple mode (left) to old single choice mode (right) …
| New live run | Old live run |
|---|---|
Previous relevant Image Capture Ajax FormData Upload Primer Tutorial is shown below.
Were you around and interested in the media capture and upload concepts presented when we discussed this topic with HTML5 Camera API Audio Video Tutorial? Back then, central to the workings of this blog posting’s web application is a perfectly readable, and “obvious” piece of HTML we can show you below …
<form style='display:none;' id='myform' method='POST' enctype='application/x-www-urlencoded' action='//www.rjmprogramming.com.au/HTMLCSS/camera_api.php' target='myiframetwo'>

<input id='mydurl' name='mydurl' type='hidden' value=''></input>

<input id='mymobile' name='mymobile' type='hidden' value=''></input>

<input id='mode' name='mode' value='y'></input>

<input id='fclick' type='submit' value='Email'></input>

</form>

<iframe style='display:none;' id='myiframetwo' name='myiframetwo' src='//www.rjmprogramming.com.au/HTMLCSS/camera_api.php'></iframe>
… and then later some HTML input element to enable image capture was dynamically added …
<input onclick="document.getElementById('aemail').style.display='inline';" type="file" id="take_photograph" accept="image/*">
… the file contents ending up in that mydurl input type=hidden field and back to this same PHP code for “upload” (where there are lots of steps to the “upload” process before it ends up as a web server file, and lots of other uses can be made for that media data ahead of that “total” “upload” … as you see with today’s work as well).
All fairly conventional HTML navigational fare here, and useful, and good.
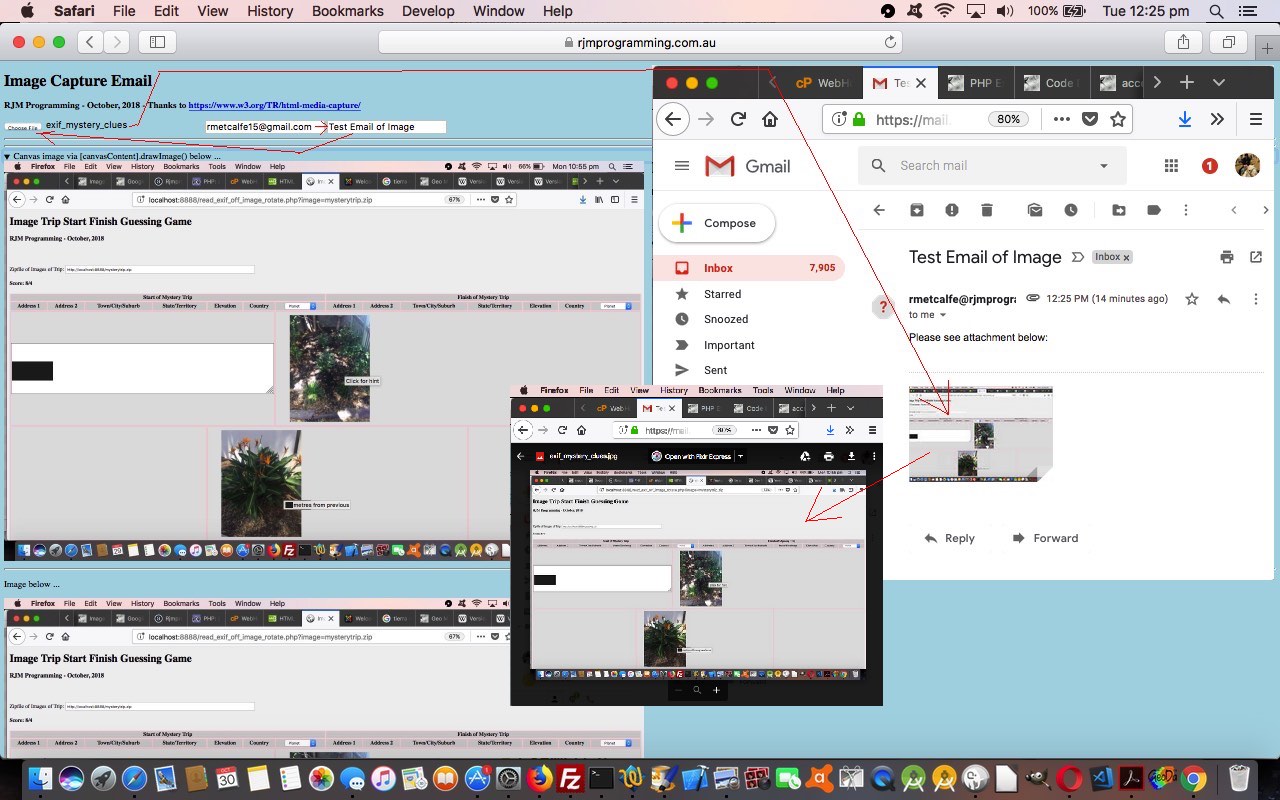
But … and didn’t you just know there’d be a “but” … today we start down the line of Image Media Capture Uploading that only needs the “hard” (first draft simple) HTML (of today’s new imagecapture.html‘s live run) …
<input type="file" name="image" accept="image/*" capture>
… and then, thanks to the inspiration from https://www.w3.org/TR/html-media-capture/ our code involves …
- document.body onload (<body onload=’bp();’ style=’background-color:lightblue;’>) logic …
function bp() {

var input = document.querySelector('input[type=file]'); // see Example 4


input.onchange = function () {

  var file = input.files[0];


  upload(file);

  drawOnCanvas(file);   // see Example 6

  displayAsImage(file); // see Example 7

};

}
- to link to the Javascript Ajax upload(file) function, featuring the FormData object code …
function upload(file) {

  var form = new FormData(),

      xhr = new XMLHttpRequest();


  if (document.getElementById('to').value.indexOf('@') != -1) {

   form.append('to', document.getElementById('to').value);

   if (document.getElementById('subject').value != '') {

    form.append('subject', document.getElementById('subject').value);

   } else {

    form.append('subject', 'Image in email');

   }

   form.append('filename', file.name);

  }

  form.append('image', file);

  xhr.open('post', 'mailto.php', true);

  xhr.send(form);

}
- as the link to the serverside (new) PHP uploader functionality of mailto.php
You may want to say “so what”. It’s true that this approach is still based on an HTML form, just that it is dynamically created. Yes, that’s true, but it is also true that the onset of mobile applications spurred that increasing use of Ajax techniques of “navigational messaging”, so to start using these techniques means more that you are “going with the flow”, and be able to adapt to these more modern approaches to these media uploading ideas.
Previous relevant HTML5 Camera API Audio Video Tutorial is shown below.
Yesterday we started down the line of examining the Camera API in HTML5 with HTML5 Camera API Primer Tutorial as shown below.
There we thought of the “Camera” being a camera of “Images”, but most modern smart phones or tablets have a Camera app that can capture …
- Video
- Audio
- Image
… media sources.
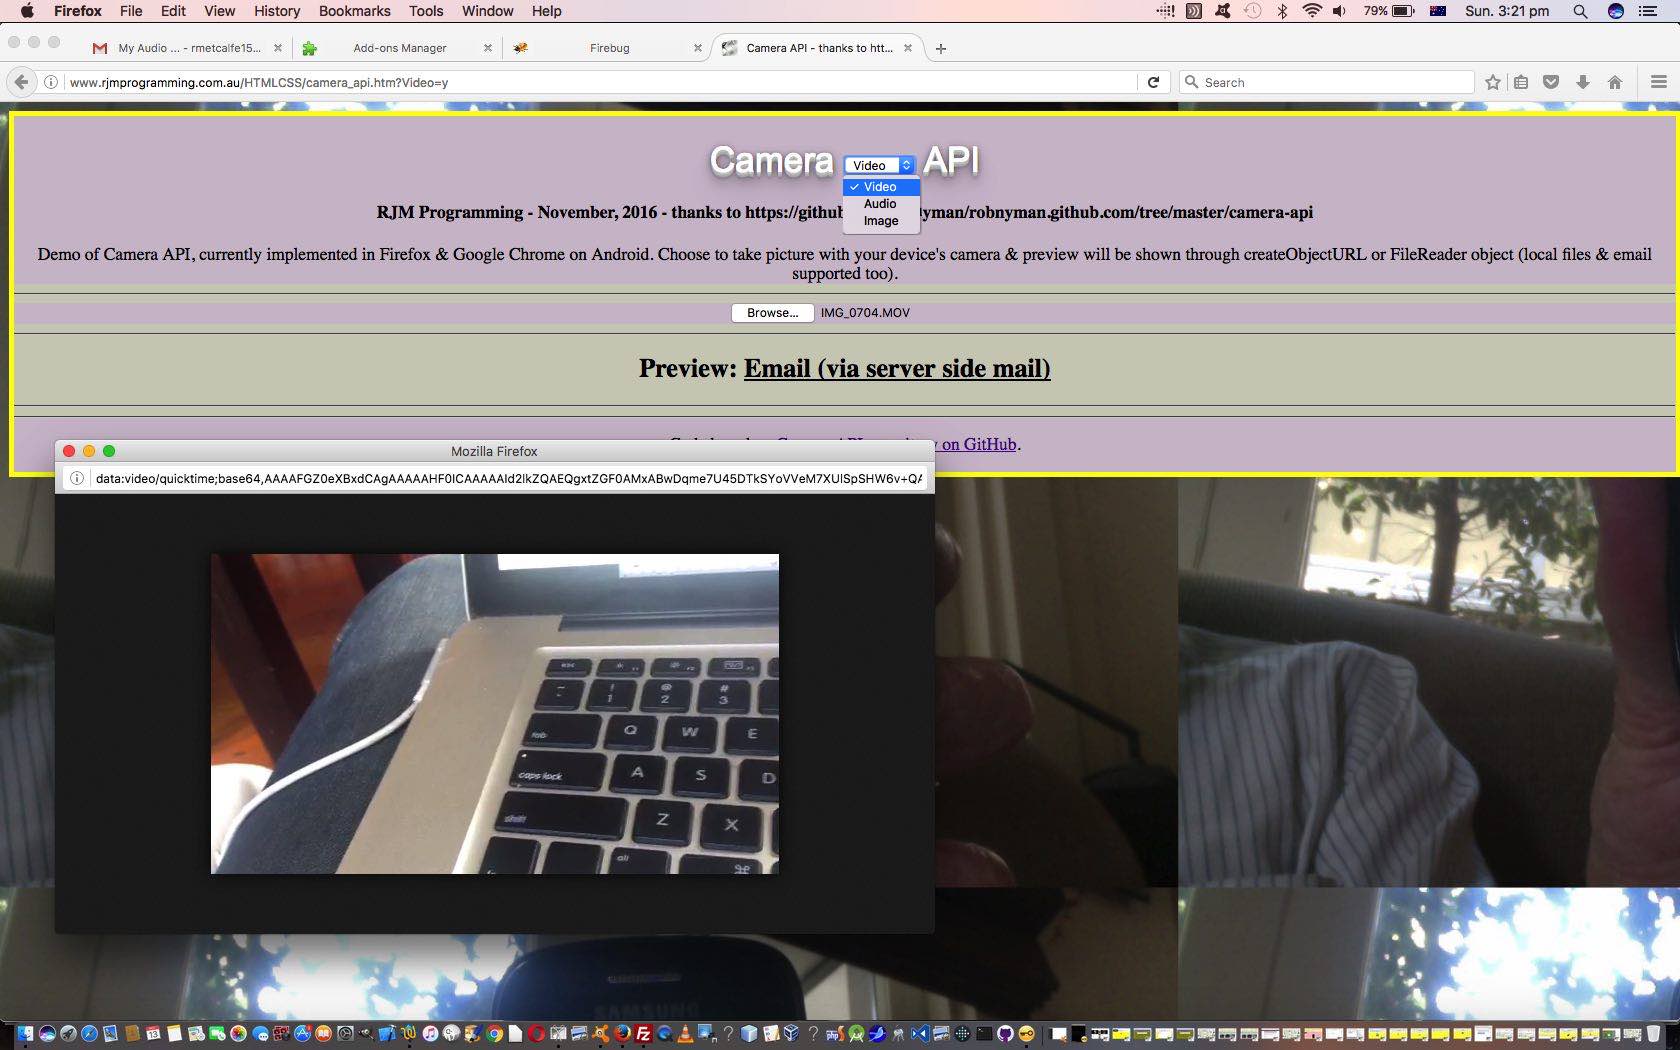
These two new media sources “Audio” and “Video” above need the intervention of a PHP server side emailer functionality in order to send out HTML emails with data URI “src=” HTML elements for these two types of media data.
How do we work this for the user using this web application? We allow the “media sources” above be part of an HTML “select” dropdown and separate the choices in the predominantly Javascript DOM “client feeling” code via the use of “document.URL” logic control (of Javascript DOM document.write() method) as per this …
<script type='text/javascript'>

  if (document.URL.toLowerCase().indexOf('video') != -1) {

     // Video specific logic ... eg. ...

    document.write('<input onclick="document.getElementById(' + "'" + 'aemail' + "'" + ').style.display=' + "'" + 'inline' + "'" + ';" type="file" id="take_photograph" accept="video/*">');

  } else if (document.URL.toLowerCase().indexOf('audio') != -1) {

     // Audio specific logic ... eg. ...

    document.write('<input onclick="document.getElementById(' + "'" + 'aemail' + "'" + ').style.display=' + "'" + 'inline' + "'" + ';" type="file" id="take_photograph" accept="audio/*">');

  } else {

     // Image specific logic ... eg. ...

    document.write('<input onclick="document.getElementById(' + "'" + 'aemail' + "'" + ').style.display=' + "'" + 'inline' + "'" + ';" type="file" id="take_photograph" accept="image/*">');

  }

</script>
… skeletal HTML code design approach. This approach is only an easy thing to implement when it is driven in its logic by something that exists intact before the document.body onload event, that being document.URL that equates to the web browser address bar URL.
So this led us to the HTML parent web application you could call camera_api.htm that you can try with this live run link, and that changed in this way to be able to process those newly introduced Audio and Video media sources that get emailed via our new PHP server side emailer camera_api.php but bear in mind that long running Audio and/or Video media captures are not welcome. Otherwise, please feel free to try out this web application working with your Camera app.
Previous relevant HTML5 Camera API Primer Tutorial is shown below.
Okay, so more HTML5 awaits, and we start down the track today with some research and development regarding the Camera API, and point you towards a few unbelievably great resources that have been put before us …
- robnyman/robnyman.github.com … we got onto, via …
- Camera API introduction … via HTML5 – Web developer guides | MDN … and got helped with blob to data URI conversion ideas from Convert Image to Data URI with JavaScript
… and this led us to this proof of concept web application you could call camera_api.html that you can try with this live run link. The fly in the ointment, however, is browser and platform compatibility here. The web application …
- asks the user for permission to use the camera to take photographs with the device’s camera … and/or
- asks the user to point to a local (photograph) file … and then we …
- interface either of these photographic data source and funnel it through email (client) functionality, optionally
Browser and platform wise, that first bit of functionality above is only supported, notionally, on Firefox and Google Chrome web browsers on Android, though we also found it worked on an (iOS) iPad. Most browsers and platforms work with the latter two features above.
So what are the Javascript syntax highlights of making the first two of the list above … ie. the Camera API (in HTML5) … to work. You need …
- capturing the data via the device camera, via
<input onclick="document.getElementById('aemail').style.display='inline';" type="file" id="take_photograph" accept="image/*">
- use of as createObjectURL method as per
var imgURL = window.URL.createObjectURL(file);
- or alternatively, the use of the FileReader object as per
var fileReader = new FileReader();
Try it out yourself to get this web application into context.
If this was interesting you may be interested in this too.
If this was interesting you may be interested in this too.
If this was interesting you may be interested in this too.
If this was interesting you may be interested in this too.
If this was interesting you may be interested in this too.

