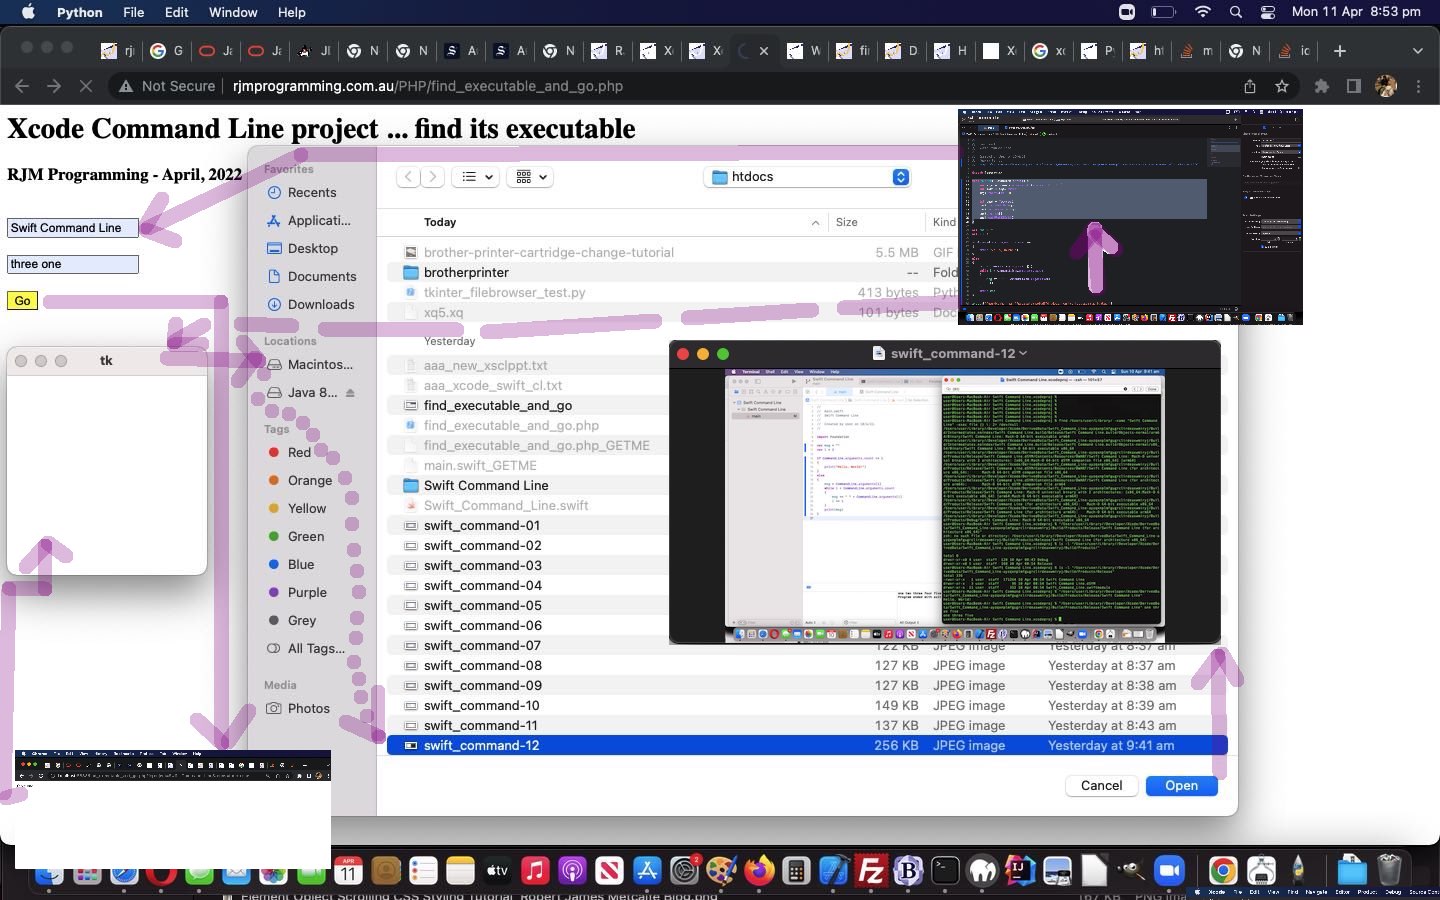
If offered the chance to go from an online (public domain) website (webpage), to ending up at an underlying computer GUI (graphical user interface) desktop application interaction, who wouldn’t say …
Yes, please
? Well …
- …
- …
- …
- …
- …
- …
- …
- …
- …
- …
- …
… you thought we were being rhetorical?! Okay, “maybe you had to be there”, but, as a programmer, we liked this (macOS) project, with our “spreading wide the net” way of thinking, it involved a lot of (software language) components to it, those being …
- “surfing the net” PHP public domain webpage form … navigating to …
- “surfing the net” to a macOS MAMP local Apache/PHP/MySql web server PHP webpage (“Intranet style”) … executing a …
- Swift macOS command line executable (compiled in macOS Xcode IDE) … which now calls a …
- Python script … using a …
- TkInter GUI module (you can read the background to, with, Python TkInter CGI Tutorial) … whose GUI is “made front and center” via …
- Swift executable and/or macOS MAMP local Apache/PHP/MySql web server “command line” mode of use or “surfing the net” via “open” mode of use PHP call of AppleScript (thanks to this useful link) …
/usr/bin/osascript -e 'tell app "Finder" to set frontmost of process "Python" to true'
… leaving it so that … - the GUI aspects of Python TkInter are left to present to the user a multi-selectable File Browsing dialog box whose selections can be opened via the default applications of interest (or “associations”) to the file extensions selected
… involving, onto yesterday’s Xcode Command Line Project Executable Tutorial‘s progress …
- minimal change to main.swift Swift (thanks to this useful link) code, which you could use as the Swift code basis in an Xcode Command Line project’s “main.swift” file …
//

//  main.swift

//  Swift Command Line

//

//  Created by User on 10/4/22.

//  Thanks to ...

//  https://stackoverflow.com/questions/27046728/how-do-you-use-posix-spawn-to-replace-the-deprecated-system-to-launch-opendiff


import Foundation


func system(_ command: String) {

    var args = command.components(separatedBy: " ")

    let path = args.first

    args.remove(at: 0)


    do {

        let task = try Process()

        task.launchPath = path

        task.arguments = args

        task.launch()

        task.waitUntilExit()

    }

    catch {

        // Couldn't create audio player object, log the error

    }

}


func systemtwo(_ commandtwo: String) {

    var argstwo = commandtwo.components(separatedBy: " ")

    let pathtwo = argstwo.first

    argstwo.remove(at: 0)


    do {

        let tasktwo = try Process()

        tasktwo.launchPath = pathtwo

        tasktwo.arguments = argstwo

        tasktwo.launch()

        // tasktwo.waitUntilExit()

    }

    catch {

        // Couldn't create audio player object, log the error

    }

}


var msg = ""


var phpidea = "/usr/bin/php /Applications/MAMP/htdocs/find_executable_and_go.php WhYfOrArTtHoU"

var i = 2


if CommandLine.arguments.count <= 1

{

    print("Hello, World!")

}

else

{

    msg = CommandLine.arguments[1]

    while i < CommandLine.arguments.count

    {

        msg += " " + CommandLine.arguments[i]

        i += 1

    }

    print(msg)

}


systemtwo(phpidea)

system("/usr/bin/python /Applications/MAMP/htdocs/tkinter_filebrowser_test.py")
- a changed find_executable_and_go.php PHP code web application (linked here) which we, again, want you to download to (the Document Root of) a macOS MAMP local Apache/PHP/MySql web server environment, “Intranet style”, as mentioned in macOS Swift code above …
system("/usr/bin/python /Applications/MAMP/htdocs/tkinter_filebrowser_test.py")
- a changed tkinter_filebrowser_test.py Python TkInter (GUI) code, which we’d also want you to download to (the Document Root of) a macOS MAMP local Apache/PHP/MySql web server environment
… for you to try for yourself.
Previous relevant Xcode Command Line Project Executable Tutorial is shown below.
Yesterday’s Xcode Swift Command Line Project Primer Tutorial combines with our recent macOS find related work, so that, today, we’ve written a small PHP “helper” web application, which “fishes out” that Xcode macOS executable, and executes it for you, that we want you to download to (the Document Root of) a macOS MAMP local Apache/PHP/MySql web server environment, “Intranet style”, as has also been a theme of our work recently.
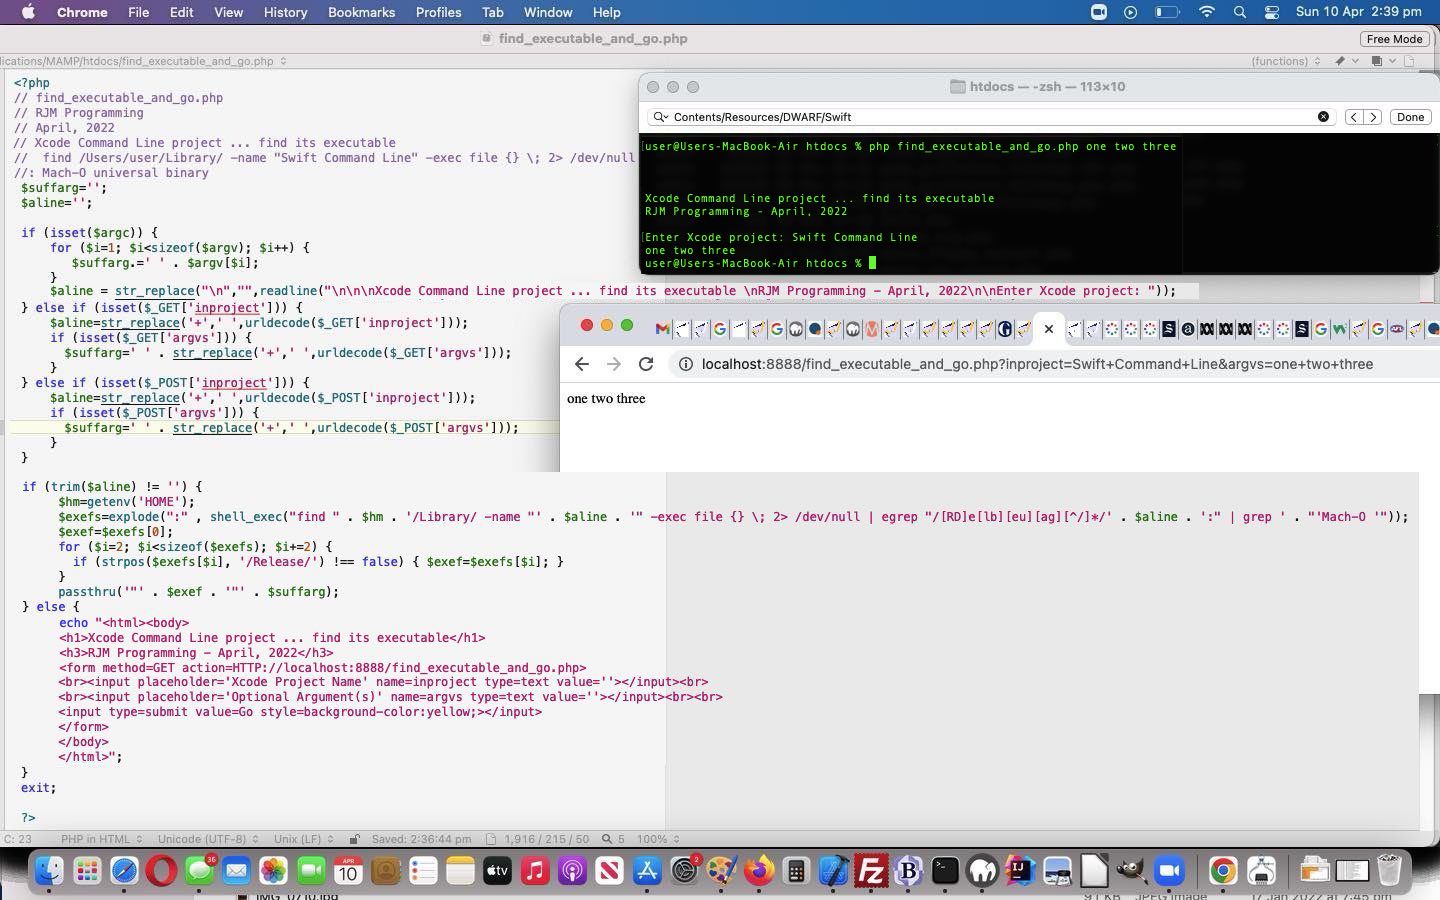
What are the modes of use of this PHP “helper” web application? Well, any of …
- surfing the web … via web browser URL like …
HTTP://localhost:8888/find_executable_and_go.php?inproject=Swift%20Command%20Line&argvs=one+two+three
… or fill out a form at find_executable_and_go.php‘s live run link - curl … via macOS command like …
curl "HTTP://localhost:8888/find_executable_and_go.php?inproject=Swift%20Command%20Line&argvs=one+two+three" - PHP on command line … via macOS command like …
php find_executable_and_go.php one two three
… and fill out the Xcode project name
… or, after your downloading to macOS (where you’ve installed, and are using, Xcode), the ideas below could work …
Previous relevant Xcode Swift Command Line Project Primer Tutorial is shown below.
The macOS Xcode IDE (Integrated Development Language) is a great place to create many and various types of executable software. The language Swift is Apple’s language of choice, within Xcode, for …
- iOS mobile apps … and today we build a simple …
- macOS command line app
… which we allow to process your command line arguments. Then “we fish out” where Xcode has stored the resultant Swift command line executable, and execute that “binary”.
All told, we …
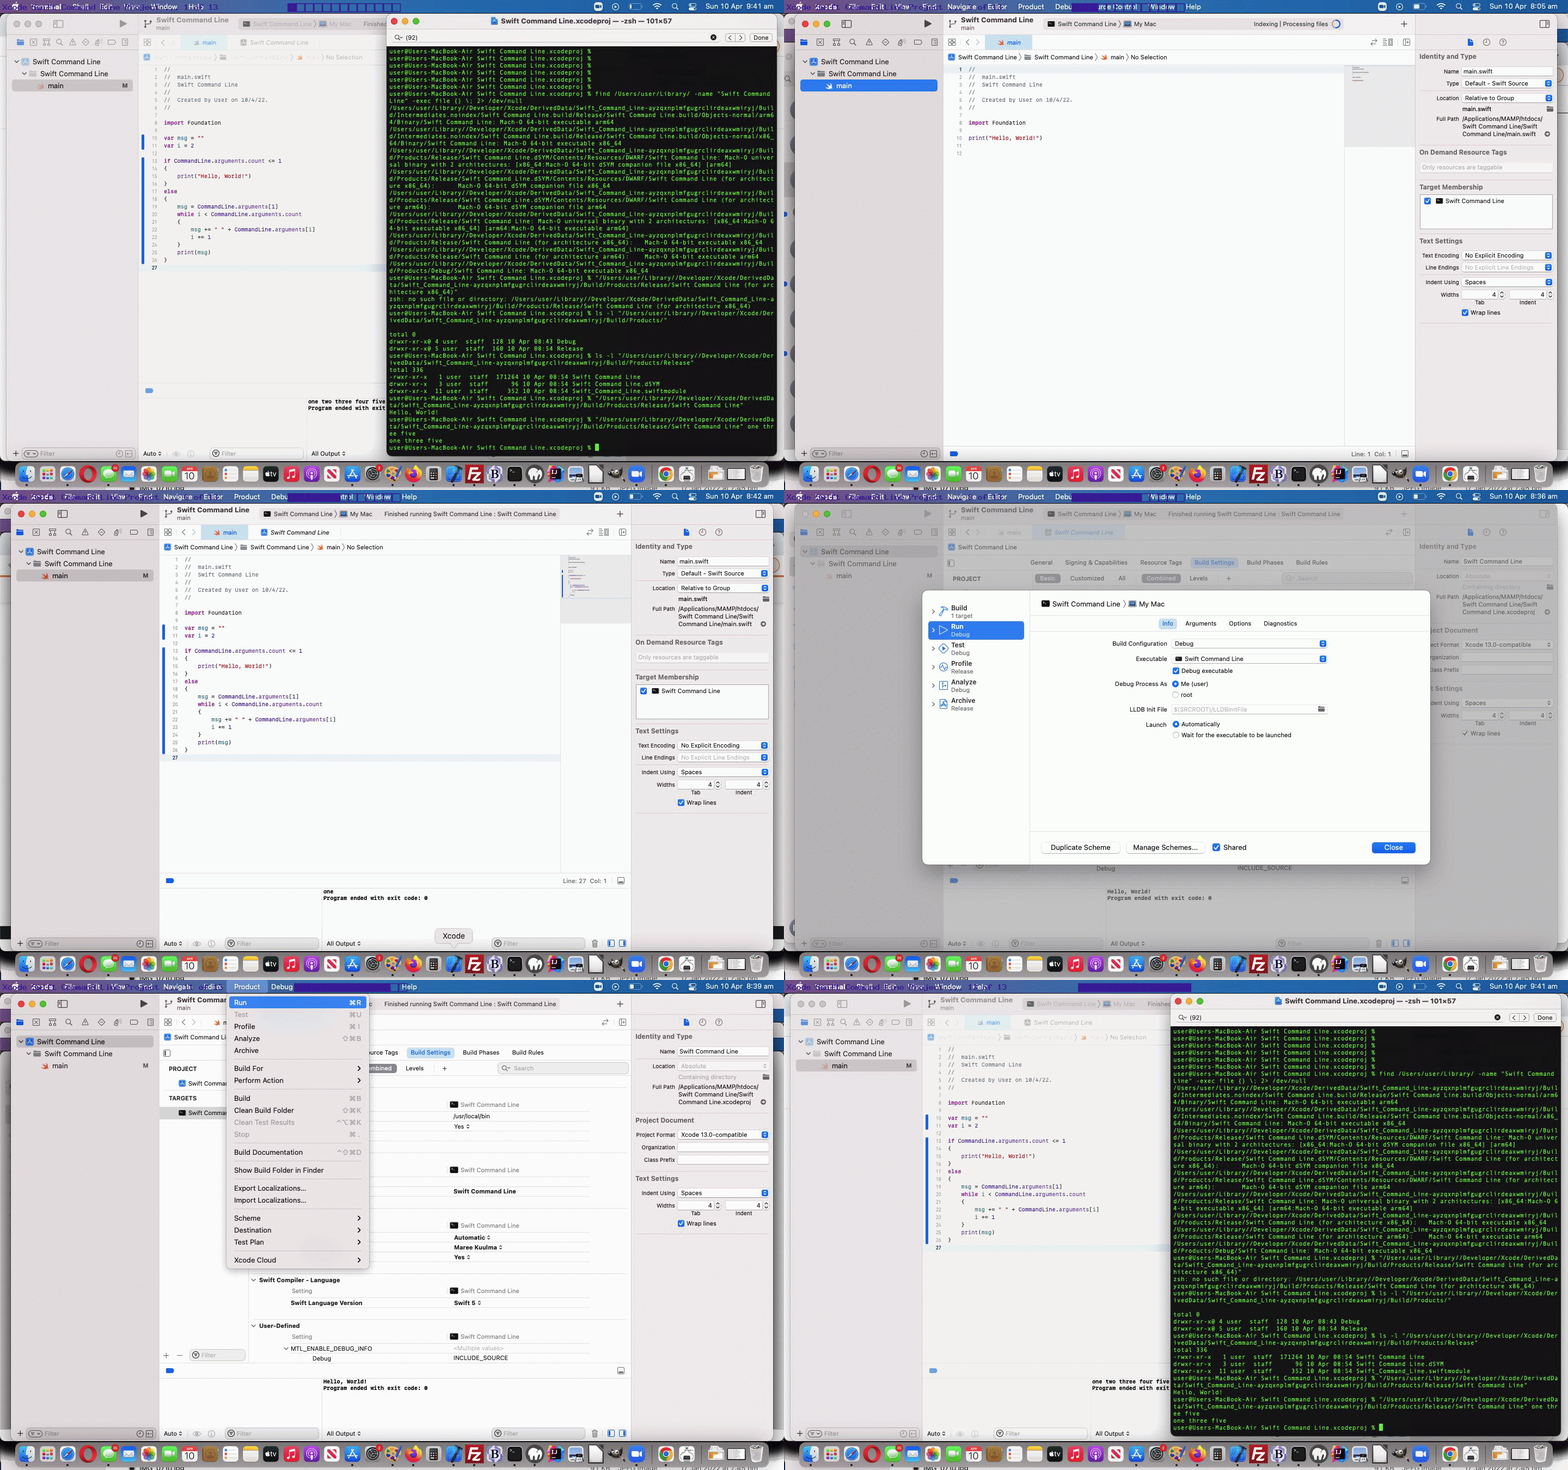
- open Xcode via clicking its macOS icon
- click “Create a new Xcode project” button
- choose Application -> “Command Line Tool” then click “Next” button
- Project Name: “Swift Command Line”
- Language: “Swift” then click “Next” button
- in Project Navigator menu click “main” to see the default Swift code
- we end up making our code be like main.swift …
//

//  main.swift

//  Swift Command Line

//

//  Created by User on 10/4/22.

//


import Foundation


var msg = ""

var i = 2


if CommandLine.arguments.count <= 1
{
    print("Hello, World!")
}
else
{
    msg = CommandLine.arguments[1]
    while i < CommandLine.arguments.count
    {
        msg += " " + CommandLine.arguments[i]
        i += 1
    }
    print(msg)
}
... via good help from this link, thanks - to execute in Xcode's Console we choose the menu option Product -> "Run" and see the results down the bottom to left in Xcode's Console with "Hello, World!" output because there are no command line arguments as the default condition
- to execute within Xcode with command line arguments ...
- we choose the menu option Swift Command Line -> "Edit Schema..."
- we choose the menu option Info -> Build Configuration -> "Release"
- we click "Arguments" tab
- we click "Arguments Passed on Launch" tab's "+" button ... and ...
- type in "one two three four five" as our user specific command line arguments
- click "Close" button
- we choose the menu option Product -> "Run" and see the results down the bottom to right in Xcode's Console with "one two three four five"
... and then (with thanks to advice of this link) we ...
- open Terminal via clicking its macOS icon
- type in the command (where, for us, /Users/user can equate to $HOME if you'd prefer) ...
find /Users/user/Library/ -name "Swift Command Line" -exec file {} \; 2> /dev/null
... leading us to conclude that ... - typing in ...
"/Users/user/Library//Developer/Xcode/DerivedData/Swift_Command_Line-ayzqxnplmfgugrclirdeaxwmiryj/Build/Products/Release/Swift Command Line"
... would result in the output "Hello, World!" (as it did) ... and ... - typing in ...
"/Users/user/Library//Developer/Xcode/DerivedData/Swift_Command_Line-ayzqxnplmfgugrclirdeaxwmiryj/Build/Products/Release/Swift Command Line" one three five
... would result in the output "one three five" (as it did)
We hope this is of interest to beginners in Swift and Xcode IDE software development in macOS operating system.
If this was interesting you may be interested in this too.
If this was interesting you may be interested in this too.
If this was interesting you may be interested in this too.


