

Ansible Inventory Primer Tutorial
The last time we talked about Ansible (with Ansible Playbook TLS Tutorial is shown below) we advised to read about the subject “Inventory”. Well, today, we dip our toes into this big subject matter, and thank very much “Ansible Up and Running” by Lorin Hochstein, specifically, the start of chapter 3.
And in that chapter 3 the book starts to consider deployment scenarios involving lots of servers and server types you might want to classify as …
- production … live, real system
- staging … to test on host (ie. server) that software team get shared access to)
- vagrant … local server testing
… and groups can be established for functionality types like …
- web server
- task queue … for execution of long-running jobs
- (sorry to go) etcetera etcetera etcetera (but there are a lot of things that can go here, as you can imagine)
So we programmers will probably spend our time in the reverse order to server types way above, but the modern way of things may be getting them thinking about …
- how their work fits into the big picture, and what the interdependencies are
- what supports (or feeds into) the parts they’re working on, and whether to test software fully, they’ll need these surrounding functionalities that may require that staging server testing environment
… either way, Ansible can aid with understanding and project management and testing regimes and project architecture (understanding), even for those programmers not in the “big picture” meeting loop.
Inventory files (in ini text format) are the means by which Ansible define your hosts. Square bracket entries define groups (eg. [production]).
The first entries in your Ansible project hosts Inventory File (we’ve called our file
So here’s what we did between nothing and getting something sensible from (for example) …
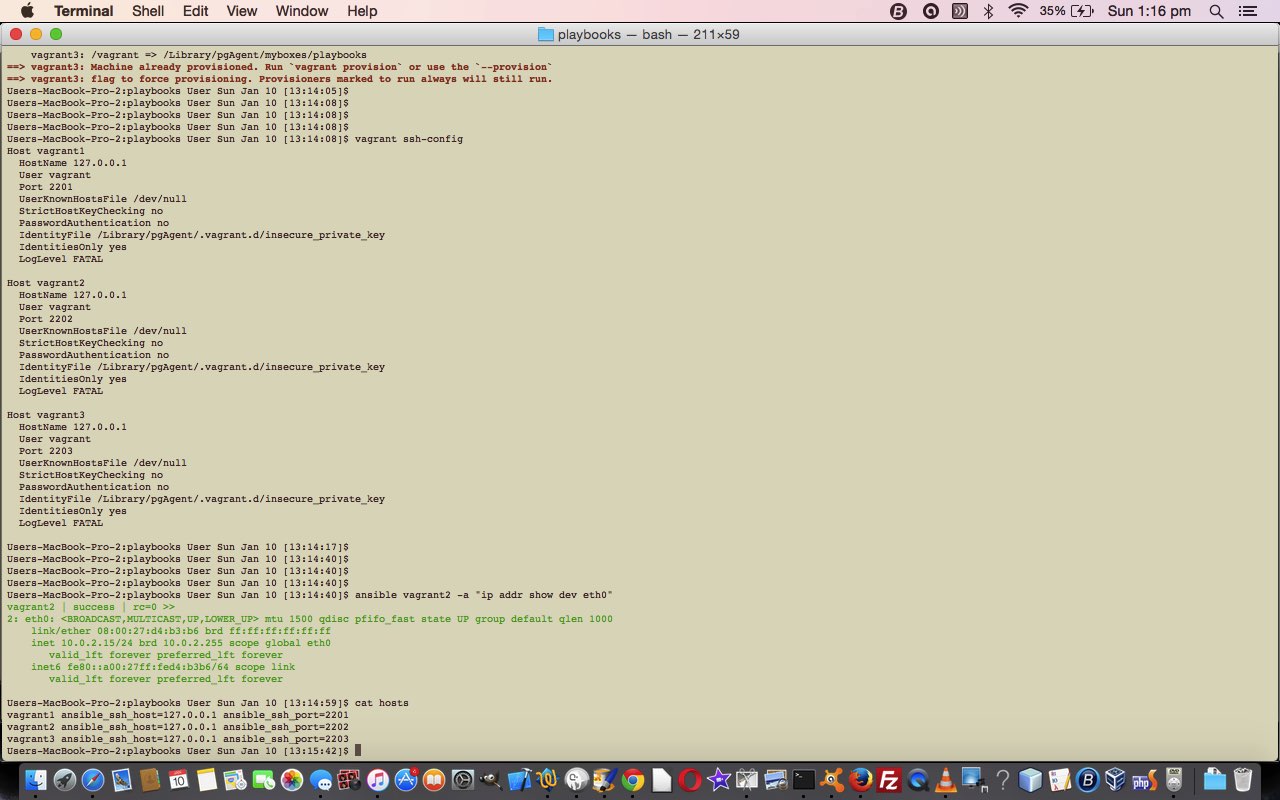
$ ansible vagrant2 -a "ip addr show dev eth0"
$ cd $HOME

$ mkdir myboxes

$ mkdir myboxes/playbooks

$ # ... and so we go to the new place for future "vagrant up" scenarios

$ cd myboxes/playbooks
$ # Create a 64 bit ubuntu (Oracle) VirtualBox server

$ vagrant init -f ubuntu/trusty64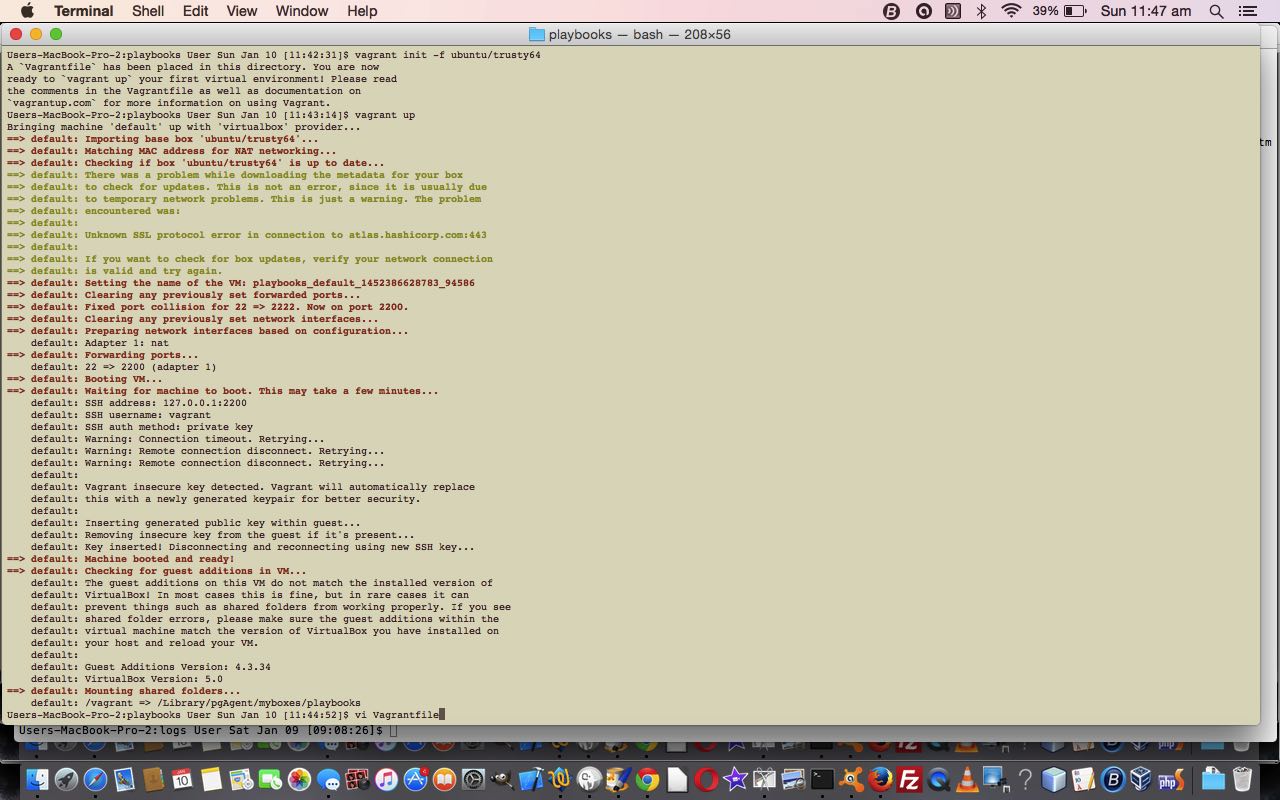
$ vi Vagrantfile # note use of "config.ssh.inert_key = false" allowing for the one SSH key file (to worry about, in ansible.cfg) ... and so ...$ vi ansible.cfg # note the reference to the single SSH key file called ~/.vagrant.d/insecure_private_key ... and see that we've kept hosts as our Inventory File name rather than inventory (as per the book's good advice)
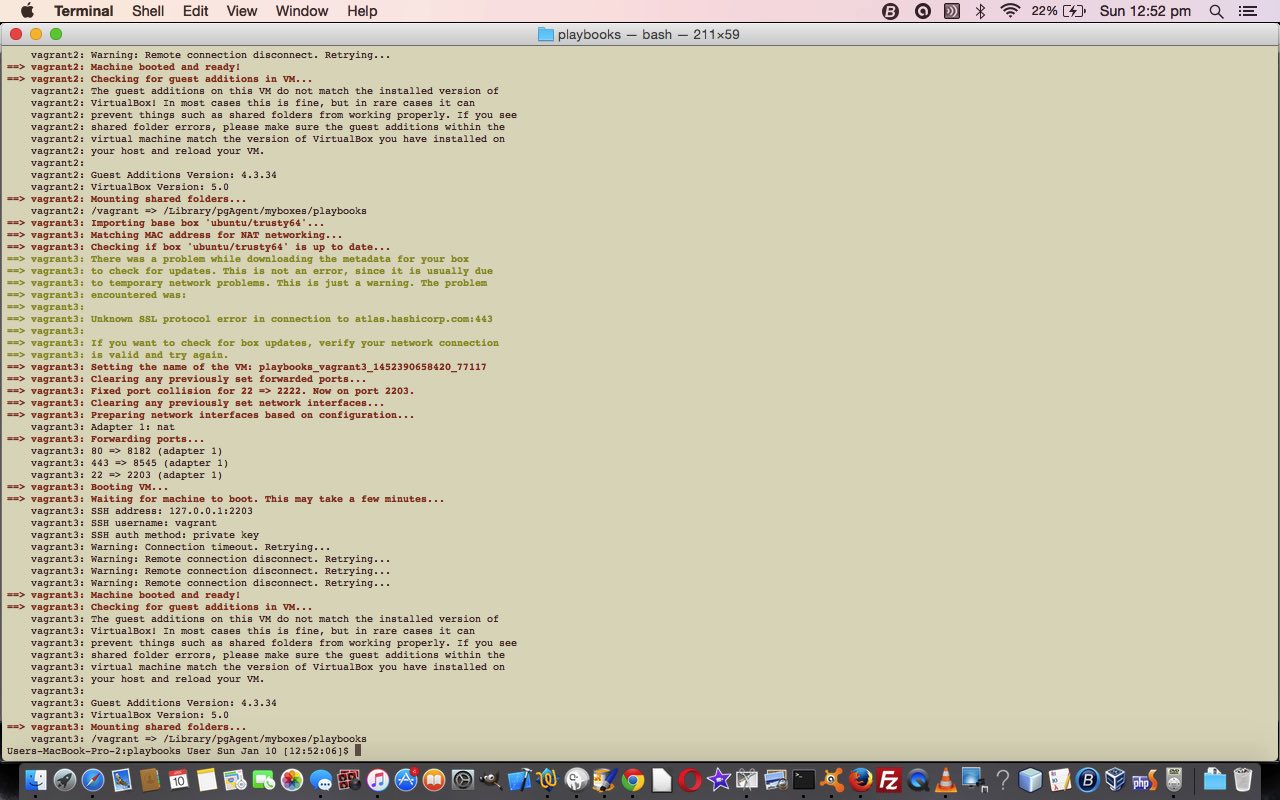
$ vagrant up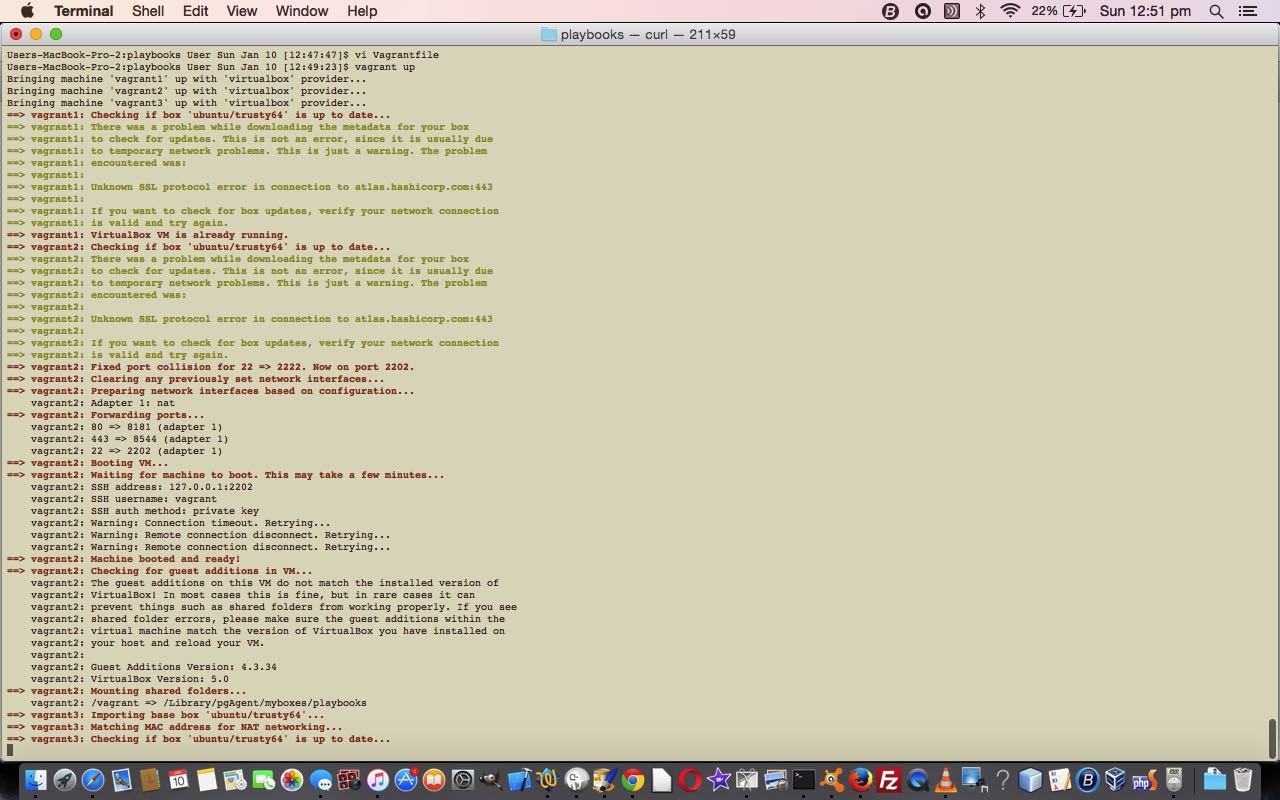


… like to take a pause at a good “vagrant up” scenario …
$ vagrant ssh-config # informs you what ports to use (and we've got 2201, 2202, 2203 going, whereas the book uses 2222, 2200, 2201)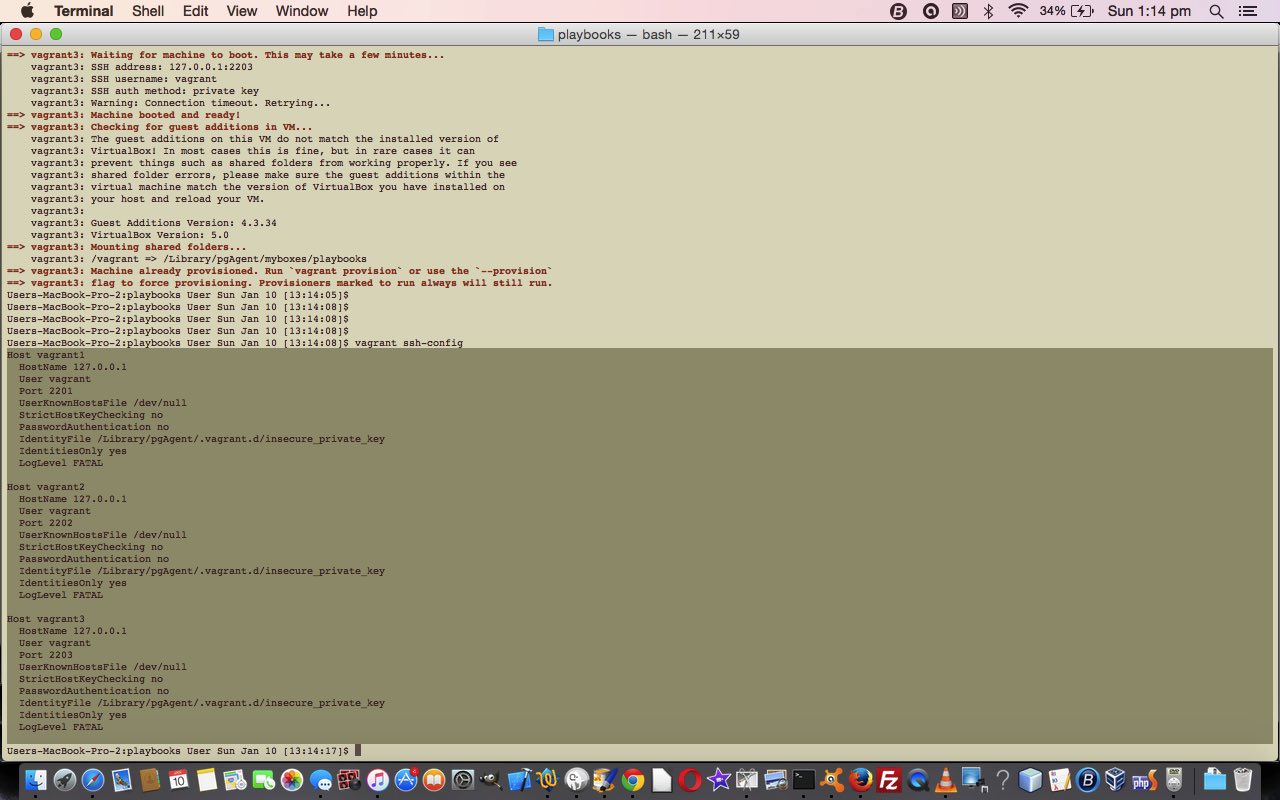

… voila … multiple servers …
$ vi hosts  # first pass

$ cat hosts  # first pass

vagrant1 ansible_ssh_host=127.0.0.1 ansible_ssh_port=2201

vagrant2 ansible_ssh_host=127.0.0.1 ansible_ssh_port=2202

vagrant3 ansible_ssh_host=127.0.0.1 ansible_ssh_port=2203

$ ansible vagrant2 -a "ip addr show dev eth0"

The rest of today’s tutorial builds on that first pass of “$ vi hosts” (and please note at this stage you could start using the more apt filename “inventory” if you like) to address this scenario (as comments (that start with #) up the top of the Inventory File) … huge thanks to “Ansible Up and Running” by Lorin Hochstein …
# We’re deploying a Django App (written in Python) …
# Services are – Django web app run by Gunicorn HTTP server, nginx web server, Celery task queue for long-running jobs
# – RabbitMQ message queue is backend for Celery, Postgres database
# We have three server environment groups … production (real), staging (testing), vagrant (local testing) and we have two functional groupings … web server, task queue (for long running jobs)
# Production deployment – run web app on several hosts for good performance, run task queues on several hosts for good performance
# – put Gunicorn, Celery, RabbitMQ, Postgres on separate servers, two Postgres hosts are primary one and replica
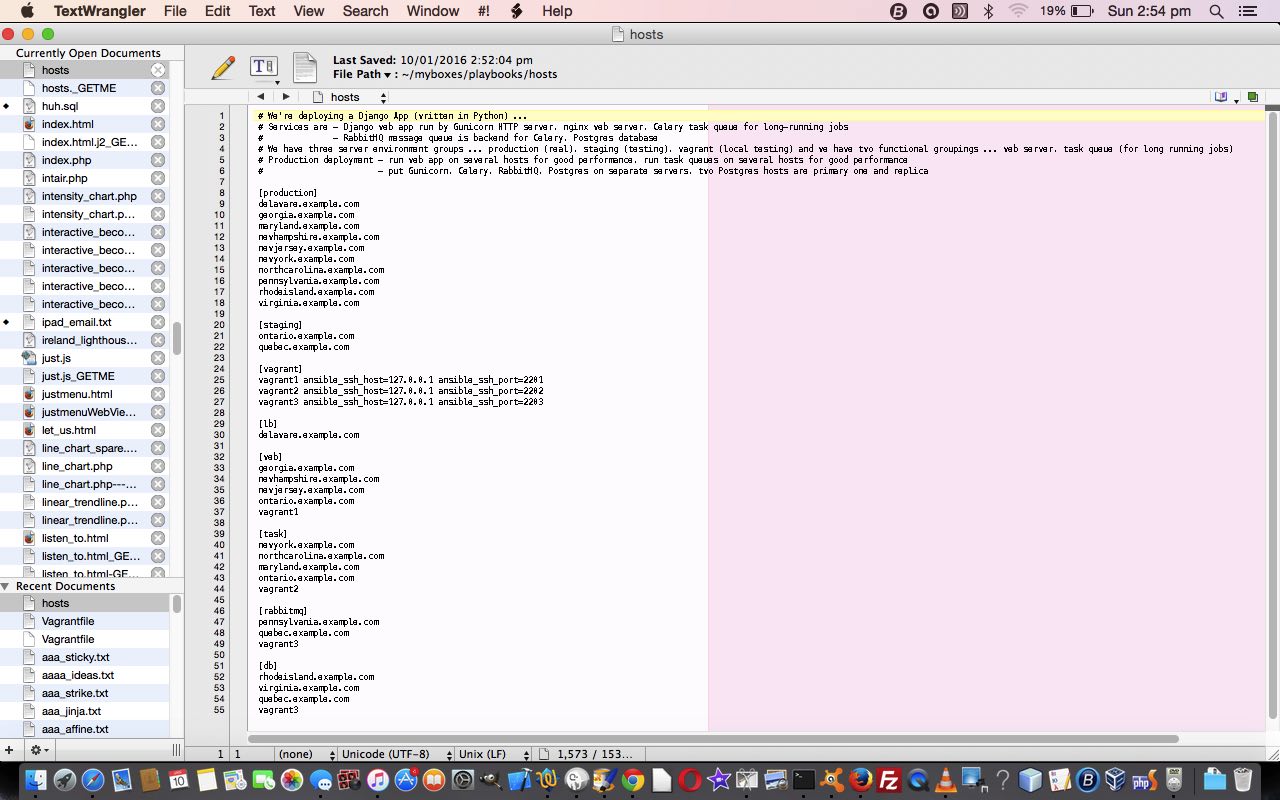
$ vi hosts # second pass makes it an Inventory File
$ cat hosts # second pass makes it an Inventory File
[production]
delaware.example.com
georgia.example.com
maryland.example.com
newhampshire.example.com
newjersey.example.com
newyork.example.com
northcarolina.example.com
pennsylvania.example.com
rhodeisland.example.com
virginia.example.com[staging]
ontario.example.com
quebec.example.com[vagrant]
vagrant1 ansible_ssh_host=127.0.0.1 ansible_ssh_port=2201
vagrant2 ansible_ssh_host=127.0.0.1 ansible_ssh_port=2202
vagrant3 ansible_ssh_host=127.0.0.1 ansible_ssh_port=2203[lb]
delaware.example.com[web]
georgia.example.com
newhampshire.example.com
newjersey.example.com
ontario.example.com
vagrant1[task]
newyork.example.com
northcarolina.example.com
maryland.example.com
ontario.example.com
vagrant2[rabbitmq]
pennsylvania.example.com
quebec.example.com
vagrant3[db]
rhodeisland.example.com
virginia.example.com
quebec.example.com
vagrant3
… and add in some “variables” concepts …
$ vi hosts  # third pass adding variables to Inventory File

$ cat hosts  # third pass adding variables to Inventory File


… and reference the [production] variables (via [production:vars] group) off a separate group_vars/production configuration file using YAML dictionaries …
db:

  name: widget_production

  user: widgetuser

  password: nbxgfngfdbnbvcngc

  primary:

    host: rhodeisland.example.com

    port: 5432

  replica:

    host: virginia.example.com

    port: 5432

rabbitmq:

  host: pennsylvania.example.com

  port: 5672

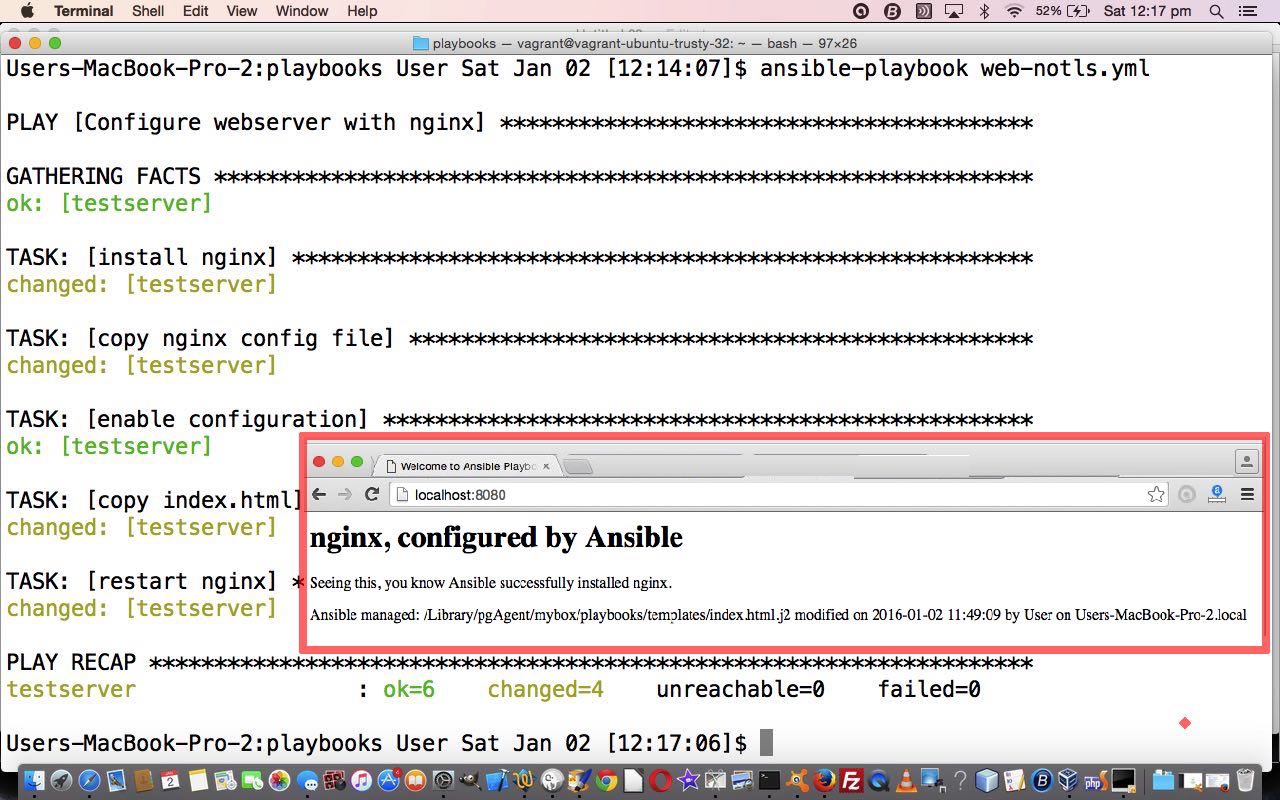
… as shown by the bold references in the hosts Inventory File (we “get to” today) to end up with our hosts Inventory File at which point we’ll break off with our explorations of Ansible with you going off to research “Dynamic Inventory” (from the second half of chapter 3 of “Ansible Up and Running by Lorin Hochstein … no doubt?!). Before we go, just wanted to say, that although we don’t “make things happen” today with our “early days” scenario, we did check Inventory File syntax by shaping to run a playbook … we shaped to run one via … “$ ansible-playbook web_notls.yml” # from that playbook of the previous tutorials below.
# We're deploying a Django App (written in Python) ...

# Services are - Django web app run by Gunicorn HTTP server, nginx web server, Celery task queue for long-running jobs

#              - RabbitMQ message queue is backend for Celery, Postgres database

# We have three server environment groups ... production (real), staging (testing), vagrant (local testing) and we have two functional groupings ... web server, task queue (for long running jobs)

# Production deployment - run web app on several hosts for good performance, run task queues on several hosts for good performance

#                       - put Gunicorn, Celery, RabbitMQ, Postgres on separate servers, two Postgres hosts are primary one and replica


[production]

delaware.example.com

georgia.example.com

maryland.example.com

newhampshire.example.com

newjersey.example.com

newyork.example.com

northcarolina.example.com

pennsylvania.example.com

rhodeisland.example.com

virginia.example.com


[staging]

ontario.example.com

quebec.example.com


[vagrant]

vagrant1 ansible_ssh_host=127.0.0.1 ansible_ssh_port=2201

vagrant2 ansible_ssh_host=127.0.0.1 ansible_ssh_port=2202

vagrant3 ansible_ssh_host=127.0.0.1 ansible_ssh_port=2203


[lb]

delaware.example.com


[web]

georgia.example.com

newhampshire.example.com

newjersey.example.com

ontario.example.com

vagrant1


[task]

newyork.example.com

northcarolina.example.com

maryland.example.com

ontario.example.com

vagrant2


[rabbitmq]

pennsylvania.example.com

quebec.example.com

vagrant3


[db]

rhodeisland.example.com

virginia.example.com

quebec.example.com

vagrant3


# Variables


[all:vars]

ntp_server=ntp.ubuntu.com


[production:vars]

db_primary_host={{ db.primary.host }}

db_primary_port={{ db.primary.port }}

db_replica_host={{ db.replica.host }}

db_name={{ db.name }}

db_user={{ db.user }}

db_password={{ db.password }}

rabbitmq_host={{ rabbitmq.host }}

rabbitmq_port={{ rabbitmq.port }}


[staging:vars]

db_primary_host=quebec.example.com

db_name=widget_staging

db_user=widgetuser

db_password=hbfgdgfgfdhgfdj

rabbitmq_host=quebec.example.com

rabbitmq_port=5672


[vagrant:vars]

db_primary_host=vagrant3

db_primary_port=5432

db_replica_host=virginia.example.com

db_name=widget_vagrant

db_user=widgetuser

db_password=password

rabbitmq_host=vagrant3

rabbitmq_port=5672

Previous relevant Ansible Playbook TLS Tutorial is shown below.

Ansible Playbook TLS Tutorial
Yesterday saw this blog’s first Ansible Playbook to create an nginx web server on a VirtualBox virtual machine referenced by HTTP://localhost:8080 but, did you notice, that https://localhost:8443 came up with, in Firefox, at least …
Secure Connection Failed
The connection to localhost:8443 was interrupted while the page was loading.
The page you are trying to view cannot be shown because the authenticity of the received data could not be verified.
Please contact the website owners to inform them of this problem.
? … And that’s because we didn’t cater for Transport Layer Security, or TLS. So we’ve got lots to cover as we continue on with Ansible Playbooks …
- more about YAML vs JSON format
- what is a Playbook file made up of?
- incorporation TLS functionality so that yesterday’s Ansible Playbook Primer Tutorial is built upon to arrive at a Playbook allowing https://localhost:8443 to not come up with the error above
… and this constitutes a ramble along through the actions advised in the latter half of Chapter 2 (“Playbooks: A Beginning”) of “Ansible Up and Running” by Lorin Hochstein, our highly recommended guide for today’s “excursion” and the book from which any quotes below were from. So please fasten your seatbelts and we’ll be off.
- more about YAML vs JSON format
- First off, did you know
a valid JSON file is also a valid YAML file.
?
- YAML files ideally start with three dashes … as so —
- YAML comments start with #
manperson - YAML string syntax often requires no quote not double quote delimitation
-
YAML lists are like arrays in JSON and Ruby or lists in Python.
… and they are delimited with hyphens ( – )
-
YAML dictionaries are like objects in JSON, dictionaries in Python, or hashes in Ruby.
… for example
address: 747 Smith Street
city: Smithville
state: North Smithsonian - YAML line continuations can happen via the greater than ( > ) symbol usage
- First off, did you know
- what is a Playbook file made up of?
- A Playbook is made up of a set of Plays.
- A play must have a set of hosts that are configured
- A play must have a list of tasks to be executed on the aforesaid mentioned hosts
-
Think of a play as the thing that connects hosts to tasks.
- Tasks optionally have a name (that you saw in square brackets during the ansible-playbook web-notls.yml during Ansible Playbook Primer Tutorial
- Tasks have to have a key to a module name followed by arguments … as in apt: name=nginx update_cache=yes … and these arguments can be a YAML dictionary … and an older accepted syntax incorporating the keyword action can be action: apt name=nginx update_cache=yes
-
Modules are scripts that come packaged with Ansible and perform some kind of action on a host.
… and what follows are explanations for the five used yesterday …
- apt installs/removes packages
- copy copies files from local to host
- file sets file attributes
- service starts/stops/restarts service
- template generates file from template and copies to host
- incorporate TLS functionality so that yesterday’s Ansible Playbook Primer Tutorial is built upon to arrive at a Playbook allowing https://localhost:8443 to not come up with the error above
- here’s the new Playbook we create for TLS functionality you could call web-tls.yml (built upon yesterday’s work in this way) … that involves two new concepts …
- variables
- handlers
#!/usr/bin/env ansible-playbook
- name: Configure webserver with nginx and tls
hosts: webservers
sudo: True
vars:
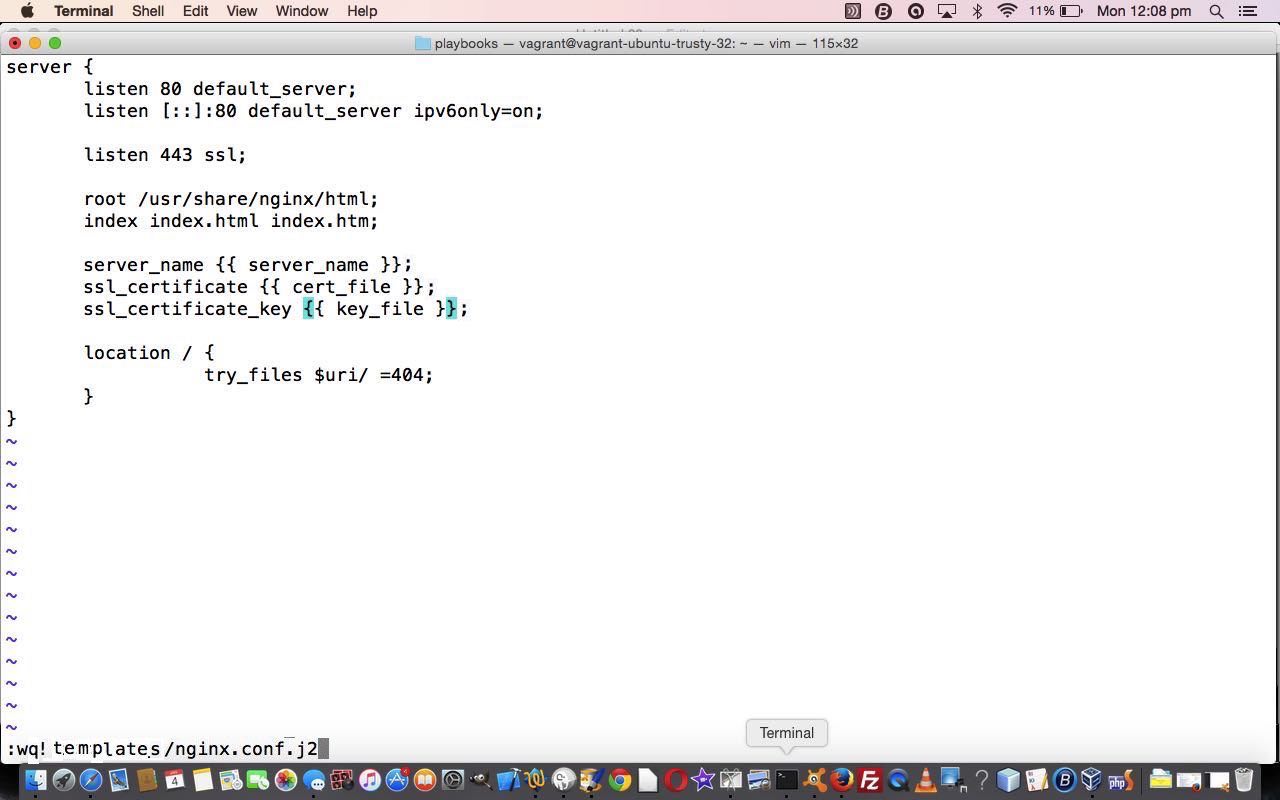
key_file: /etc/nginx/ssl/nginx.key
cert_file: /etc/nginx/ssl/nginx.crt
conf_file: /etc/nginx/sites-available/default
server_name: localhost
tasks:
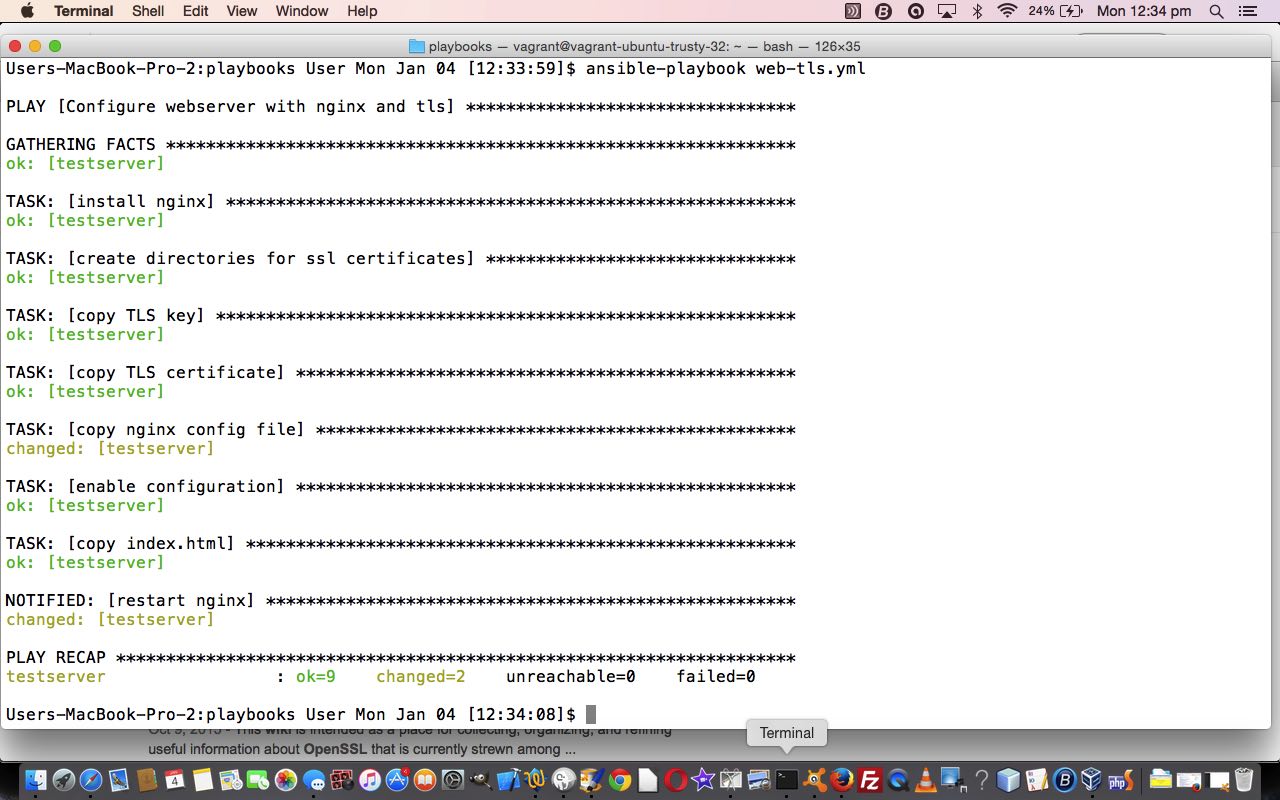
- name: install nginx
apt: name=nginx update_cache=yes cache_valid_time=3600
- name: create directories for ssl certificates
file: path=/etc/nginx/ssl state=directory
- name: copy TLS key
copy: src=files/nginx.key dest={{ key_file }} owner=root mode=0600
notify: restart nginx
- name: copy TLS certificate
copy: src=files/nginx.crt dest={{ cert_file }}
notify: restart nginx
- name: copy nginx config file
template: src=templates/nginx.conf.j2 dest={{ conf_file }}
notify: restart nginx
- name: enable configuration
file: dest=/etc/nginx/sites-enabled/default src={{ conf_file }} state=link
notify: restart nginx
- name: copy index.html
template: src=templates/index.html.j2 dest=/usr/share/nginx/html/index.html
mode=0644
handlers:
- name: restart nginx
service: name=nginx state=restarted
- we manually generate TLS certificate (being in $HOME/mybox/playbooks like for yesterday’s work)
$ mkdir files  # unnecessary (because of yesterday's work) but does no damage

$ openssl req -x509 -nodes -days 3650 -newkey rsa:2048     -subj /CN=localhost     -keyout files/nginx.key -out files/nginx.crt

$ vi files/nginx.conf # at end (of vi) we !wq templates/nginx.conf.j2 (built upon yesterday's work in this way) as a Jinja2 template
$ vagrant reload

$ ansible-playbook web-tls.yml
-
Handlers only run after all the tasks are run, and they only run once, even if they are notified multiple times.

- here’s the new Playbook we create for TLS functionality you could call web-tls.yml (built upon yesterday’s work in this way) … that involves two new concepts …


To avoid the “Untrusted Connection” webpage you’d need to get the certificate issued by a proper authority rather than being self-signed, as for our example today. To read on we’d recommend reading about Ansible Inventory.
Previous relevant Ansible Playbook Primer Tutorial is shown below.

Ansible Playbook Primer Tutorial
As a programmer, as time goes on, I get the creeping feeling that more is being asked of our job description. Pretty sure am not alone, and hope world employment is not going to be too hard hit by similar such “pushes”. Thinking on it, though, what would we expect to happen if robotics seriously became more “real”? Don’t think it takes a Nostrodamus futurist to have predicted: ‘Programmers would be drawn more into the “modelling” of systems and “deployment”.’
So what is great for a project’s “bottom line” would be …
- a programmer doesn’t lose their expertise in programming and unit testing, as their primary “length of time” focus … yet …
- being as the programmer is there “in amongst it” can they help model the (customer) system, help model it, and program in that modelled environment prior to redeployment, even if they are not directly responsible for any of the “out of office” parts of setting this modelling up (ie. things are like “in the old days” for the programmer geographically speaking (or more convenient, actually), but the modelling means it is like they are in two places at the same time, but not interfering in the operations of that second (customer) environment)? … oh and yes, that “modelling” is simple enough not to spend days upon days attending to it … and yes, one last thing, that on the next similar such project, the knowledge from the previous one’s workings is incorporated almost seamlessly into the next?
… and, trying not to overstate all this too much, but deployment with software tools such as Ansible makes all the above possible for (programmer) people whose strength is not exactly “deployment” or “configuration management”.
The reason to try to not overstate all this is that Ansible is based on very simple principles … “Ansible is masterless and it uses SSH as its primary communication layer.”.
Today, as with WordPress 4.1.1’s Ansible Playbook Primer Tutorial, we’re picking up from where we left off with the last advice from Ansible Hello World Primer Tutorial from two days ago (we studied Vagrant Primer Tutorial yesterday) …
In the meantime, research into Ansible Playbooks would be a great idea.
Specifically we’re going to meander along through the actions advised in Chapter 2 (“Playbooks: A Beginning”) of “Ansible Up and Running” by Lorin Hochstein … just in case you haven’t done this yourself.
Ansible Hello World Primer Tutorial left us with a Vagrantfile … 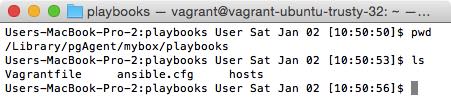 … that becomes
  … to expose ports 80 and 443 in order to access them, and that requests to ports 8080 and 8443, respectively, are forwarded to 80 and 443 on the Vagrant (Oracle VM VirtualBox) machine … so that …
vagrant reload
… you could call Vagrantfile … looks like …  … so now we are going to create a playbook that runs an nginx web server via Ansible playbook (YAML) code (we are going to call web-notls.yml) as below …
#!/usr/bin/env ansible-playbook

name: Configure webserver with nginx

hosts: webservers

sudo: True

tasks:

  - name: install nginx

    apt: name=nginx update_cache=yes


  - name: copy nginx config file

    copy: src=files/nginx.conf dest=/etc/nginx/sites-available/default


  - name: enable configuration

    file: >

      dest=/etc/nginx/sites-enabled/default

      src=/etc/nginx/sites-available/default

      state=link


  - name: copy index.html

    template: src=templates/index.html.j2 dest=/usr/share/nginx/html/index.html

     mode=0644


  - name: restart nginx

    service: name=nginx state=restarted
… and an nginx configuration file (you could call nginx.conf) …
… and an Ansible template file (you could call index.html.j2) … to result in …
So that’s a simple Ansible playbook example for you, and we hope to develop this further over time. Even so, have to tell you that at the browser going “HTTP://localhost:8080″ for a while I was getting ‘Safari can’t open the page “localhost:8080/index.html” because the server unexpectedly dropped the connection. This sometimes occurs when the server is busy. Wait for a few minutes, and then try again.’ As ansible-playbook web-notls.yml had shown no errors, tried ansible-playbook -vvvv web-notls.yml with no difference. After lot of looking around found it to be an “up to” threefold issue …
- misspelling in nginx.conf leaving out the first 6 (in “ipv6only”)
- do System Preferences… -> Sharing show Remote Login is ticked on as per advice of this link?
- you may have been an eagle eyed one to notice that 2 days ago we had a (SSH friendly) port of 2200 being used for the “testserver” Ansible server of use (this happened due to some previous Ansible work) but this means that 2 days ago a record was written to ~/.ssh/known_hosts for 127.0.0.1:2200 during that vagrant up run. Now, as today’s work has not caused any initialization vagrant commands, nor even vagrant halt nor vagrant up to occur, when we ran vagrant reload after changing Vagrantfile for those forwarding port changes made the default (SSH friendly) port 2222 come back into play and write a new record for 127.0.0.1:2222 at the end of ~/.ssh/known_hosts (and how was this lead gotten to? … the “ssh -i .vagrant/machines/default/virtualbox/private_key vagrant@127.0.0.1 -p 2200″ of 2 days ago was rerun today as “ssh -i .vagrant/machines/default/virtualbox/private_key vagrant@127.0.0.1 -p 2222″ and caused an SSH error …
@@@@@@@@@@@@@@@@@@@@@@@@@@@@@@@@@@@@@@@@@@@@@@@@@@@@@@@@@@@

@    WARNING: REMOTE HOST IDENTIFICATION HAS CHANGED!     @

@@@@@@@@@@@@@@@@@@@@@@@@@@@@@@@@@@@@@@@@@@@@@@@@@@@@@@@@@@@

IT IS POSSIBLE THAT SOMEONE IS DOING SOMETHING NASTY!

Someone could be eavesdropping on you right now (man-in-the-middle attack)!

It is also possible that a host key has just been changed.

The fingerprint for the RSA key sent by the remote host is

87:blah:blah:blah:57.

Please contact your system administrator.

Add correct host key in /Library/pgAgent/.ssh/known_hosts to get rid of this message.

Offending RSA key in /Library/pgAgent/.ssh/known_hosts:8

RSA host key for [127.0.0.1]:2222 has changed and you have requested strict checking.

Host key verification failed.
). Now those two records at the end of ~/.ssh/known_hosts were different. Making them the same except for the port number (doh!) made things work for the nginx server at HTTP://localhost:8080/ … so might an initialization vagrant scenario (plus all the rest), but didn’t try that.
Previous relevant Vagrant Primer Tutorial is shown below.

Vagrant Primer Tutorial
In understanding what is out there on the net, tend to want to form relationships in my mind, between applications.
So here’s a good one … VirtualBox with Vagrant … or perhaps … VirtualMachine with Vagrant.
So here’s another one that’ll knock your socks off (and you’ll want to read after/before/same time/while having corn flakes as today (to get it all in context, if this is new knowledge)) … Ansible with Vagrant, that we talked about yesterday with Ansible Hello World Primer Tutorial as shown below. As you read it, take note of the title of the book we recommend … “Ansible Up and Running” by Lorin Hochstein … the word “up” is bound to be in the list of a deployer’s favourite words, and is critical to all “Vagrant” talk as its favourite command (and its “nirvana” (if successful), and is slow the first time (when “vagrant up” is often preceded by an initialization vagrant command such as “vagrant init ubuntu/trusty32″) with a project on an individual programmer’s system, but fast from then on for that programmer “revisiting”, so that on multiple projects they’re zooming (ie. cd’ing) around to places and going “vagrant up” vagrant up vagrant up vagrant up) is …
vagrant up
… and for today’s book recommendation … “Vagrant Up and Running” by Mitchell Hashimoto … fancy that?!
So what’s Vagrant? And why is it so friendly?
Can try to answer the first now, but the second one relates to early times spent with Caspar the Ghost … but we digress.
To quote the Vagrant landing page …
Create and configure lightweight, reproducible, and portable development environments.
What we understand in layperson’s terms is that if a client plonks a “system” on your doorstep and says any of …
- “Fix this.”
- “Maintain this.”
- “Make it do this, now (awwwwwwwright … after lunch, then).”
… Vagrant may interface to an IDE like PHPStorm (which we’ll talk about soon) or use Git (or GitHub) and/or Composer in a Work Flow helping a group of team leaders and dbas and analysts and programmers achieve this by …
- simulating the whole system
- modelling the whole system
- changing and modifying the resultant model, to check things improve, and still work, hopefully
- deploy this model back onto the reality, for the client to model a broad grin, hopefully
Without this Vagrant and VirtualDisk (or VMWare) relationship, the job can be done, but you often find the (different) environment (between the programmer environments and the client environment) causes problems during the deployment phase, whereas using these products helps mitigate against these issues. Comprehendo?
Previous relevant Ansible Hello World Primer Tutorial is shown below.

Ansible Hello World Primer Tutorial
The role of a programmer is expanding into deployment with software tools such as Ansible, because it has the capability of making the piloting of automation systems “approachable” as an “art”.
Why would you want to “pilot an automation system”? Well, to see the whole picture, when you (are part of a team that) are given a software project of improving a “system”, wouldn’t it be great to …
- model that customer system at a snapshot of time
- be able to work and test on that model away from the customer environment until satisfaction
- after changes are tested to satisfaction, redeploy to the customer’s live system via software changes made to the model, and perhaps to data and configuration settings as well
? We think it sounds very good, especially with Ansible helping out with that modelling, because a lot of the doubt in a programmer’s head when working away from a customer site’s environment (back at their office, perhaps) on a project that is going to be deployed back at the customer is that what they are seeing working, may not work when taken back and deployed onto the customer site’s environment again. The work methods above help to mitigate that, and Ansible really helps with the deployment aspects to the whole job, leaving programmers more time to get back to what they enjoy the most, methinks … programming and unit testing.
Without Ansible, achieving a project with new (never before used) software tools required, involves programmers working out the configuration management aspects to the job via Search Engine Searches (with a lot of “Adding to Favourites”) and/or the recalling of online documents (often from the OpenSource world), and trialling configurations, hopefully combined with personalized accompanying documentation. Employing Ansible into the planning may still involve this initial effort, but should never happen again, because what you are left with will be an Ansible approach capturing knowledge that has a far better chance of staying up to date.
Ansible is pretty obviously most advantageous in complex deployment scenarios, but it can be applied to the one server (and we are talking Linux or Unix with this today, but Windows is also supported) scenario as well, and we’ll be showing a bit of this today, to show you a bit about how Ansible works.
Let’s, before that, do a glossary list of terms (mainly from Wikipedia .. thanks) we might use in relation to Ansible …
- configuration management … that’s Ansible
- provisioning tool … that’s Ansible
- Ansible on GitHub by Michael DeHaan
- SSH
- YAML (and Playbooks)
- JSON
- package manager … eg. Homebrew, apt, YUM, MacPorts, pip, RPM, OpenPKG, nix, Conary, dpkg, Cygwin
- Jinja template manager
- development stack
- deployment
- virtual machine
- automation
- source control
- VirtualBox
- Vagrant … more tomorrow here
- GitHub
- PHPStorm IDE we’ve mentioned before here (integrates some of concepts above)
… and direct you towards a good book, namely “Ansible Up and Running” by Lorin Hochstein, from which a lot of today’s blog posting’s information is derived … so, thanks.
Okay, so what will we do with Ansible?
Install Ansible … on Mac OS X (via Terminal application) … and you’ll need ssh (if “ssh” on command line means nothing) … if you have Homebrew package manager installed you can go …
… or you can install as root via Python’s pip package manager …
$ sudo pip install ansible
… or another way to install as root via the apt package manager …
$ sudo apt-add-repository -y ppa:ansible/ansible

$ sudo apt-get update

$ sudo apt-get install -y ansible
… or you can install into a Python (2.6 or above) virtualenv with wget via …
$ wget https://raw.githubusercontent.com/mitsuhiko/pipsi/master/get-pipsi.py

$ python get-pipsi.py

$ pipsi install ansible
( with an updating of PATH to include ~/.local/bin ) … or you can use GitHub via …
$ git clone https://github.com/ansible/ansible.git --recursive
… so that you can have …
$ ansible
… mean something at a command prompt (if not, a “find / -name ‘ansible’ 2> /dev/null” and adjustment of PATH in ~/.profile may be necessary) … a suffix of ” -vvvv” is useful for debugging purposes.
Show you a 127.0.0.1 local web server with VirtualBox “Hello World” feeling example using Ansible involved the need for installation, as required of Oracle’s VirtualBox and, for tomorrow specifically, we talk about Vagrant via …
… then, working off the install we made of Ansible we found an example hosts file off the install, and copied it to /etc/ansible/hosts.orig as shown by …

$ cd $HOME

$ mkdir mybox

$ cd mybox

$ mkdir playbooks

$ cd playbooks

$ vagrant init ubuntu/trusty32

$ vagrant up


$ ssh -i .vagrant/machines/default/virtualbox/private_key vagrant@127.0.0.1 -p 2200

       vagrant@vagrant-ubuntu-trusty-32:~$ echo "Hello World ... via Ansible"

       Hello World ... via Ansible

       vagrant@vagrant-ubuntu-trusty-32:~$ exit

$ cat hosts

$ head -15 ansible.cfg

$ ansible testserver -m ping

$ ansible testserver -a uptime
")
Ansible is not alone with what it sets out to achieve … think Chef, Puppet or Salt … read more thanks to this useful link for that information.
We hope to be back with more about this powerful product as time goes by. In the meantime, research into Ansible Playbooks would be a great idea.
If this was interesting you may be interested in this too.
If this was interesting you may be interested in this too.
If this was interesting you may be interested in this too.
If this was interesting you may be interested in this too.
If this was interesting you may be interested in this too.


I simply couldn’t leave your site before suggesting that I actually enjoyed the usual information a person supply to your visitors? Is going to be back continuously to check out new posts
Definitely, what a splendid website and illuminating posts, I definitely will bookmark your blog.Best Regards!
There couple of fascinating points with time in this post but I don’t know if these center to heart. There’s some validity but I’m going to take hold opinion until I explore it further. Superb article , thanks and we want much more! Added to FeedBurner likewise
I want to thank you for the outstanding post!! I surely liked every bit of it. I’ve bookmarked your web website so I can take a look at the latest articles you post later on.
I wish to express my respect for your generosity supporting males and females who call for guidance on this one subject. Your unique commitment to obtaining the solution all-around has been specifically critical and have all of the time created those a lot like me to attain their objectives. Your amazing crucial recommendations implies considerably a person like me and a entire lot much more to my workplace workers. Best wishes; from each 1 of us.
You’d superb suggestions there. I did a research about the issue and identified that likely almost anyone will agree along with your web page.
Thank you for the sensible critique. Me & my neighbor were just preparing to do some research on this. We got a grab a book from our area library but I think I learned more from this post. I’m very glad to see such excellent information being shared freely out there.